
Difficulty: Easy | Time: About 15 minutes | Steps: 8 | Good for: Kids and beginners of all ages
No keys, no fuel, no traffic! The little car we’re drawing today runs entirely on pencils, crayons, and a bit of imagination.
I’ll show you how to draw a cute car, starting with its rounded body and adding the roof, windows, wheels, and other details one step at a time. By the end, you’ll have your own colorful cartoon car ready to roll across the page.
Why I Love Drawing Cute Cars
What I love most about drawing cars is that I get to design something of my own. I can give a little car a bubble-shaped roof, tiny windows, or chunky wheels without worrying about how a real engine works.
I also like how a few small details can change its appearance. A curved roof makes it look different from a boxy car, while a simple door and handle bring the drawing together.
What You’ll Need to Draw a Cute Car
You don’t need any special art supplies for this drawing. Here’s what I use:
- Drawing paper or sketchbook: A blank page with enough room for the car.
- Pencil: To sketch the car’s body and other parts.
- Eraser: To fix lines or remove extra pencil marks.
- Black colored pencil: To make the final outline clear.
- Crayons: To fill your car with bright, cheerful colors.
I prefer crayons for this drawing because they leave a lovely hand-colored texture on the paper. You can even mix two shades to make your car look more interesting.
How to Draw a Cute Car Step by Step
We’ll draw our car in eight small steps. Follow each illustration and finish one part before moving to the next.
Step 1: Draw the Rounded Car Body
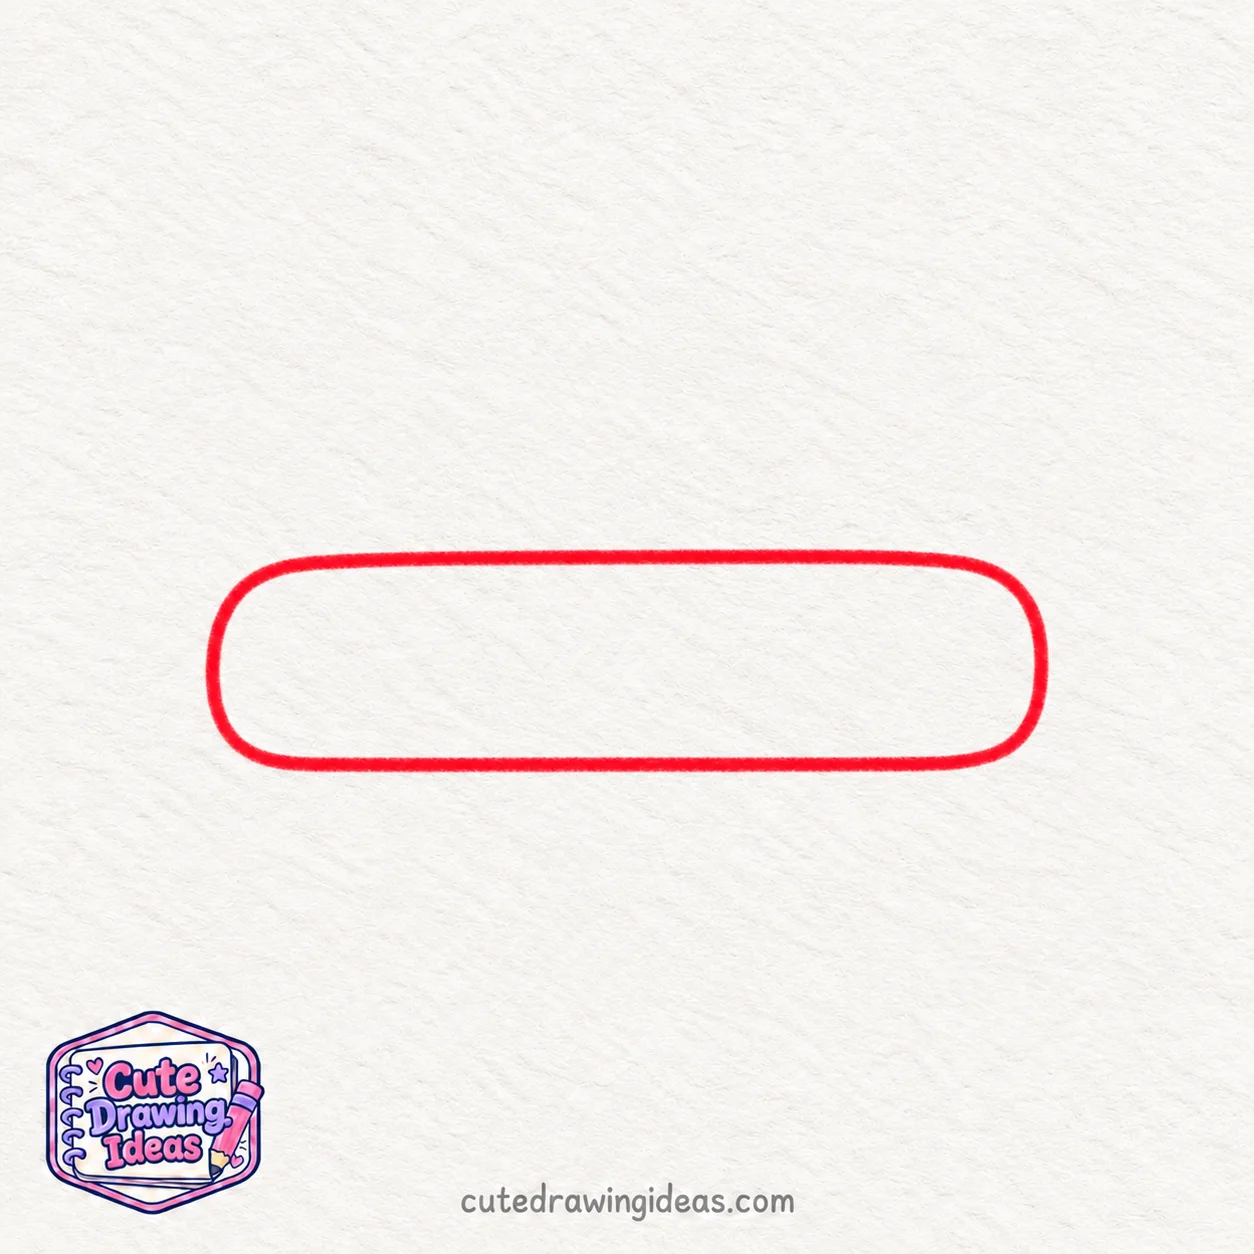
Start near the lower half of your paper and draw a long rectangle with softly rounded corners.
Keep its top and bottom edges almost straight, but curve the front and back ends slightly so they don’t look sharp or square.
Make the body about four times as wide as it is tall. Leave enough space above it for the roof and below it for the wheels.
This is the main body of your car. Use light pencil strokes for now, as we’ll add more details around it in the next steps.
Step 2: Add the Curved Roof
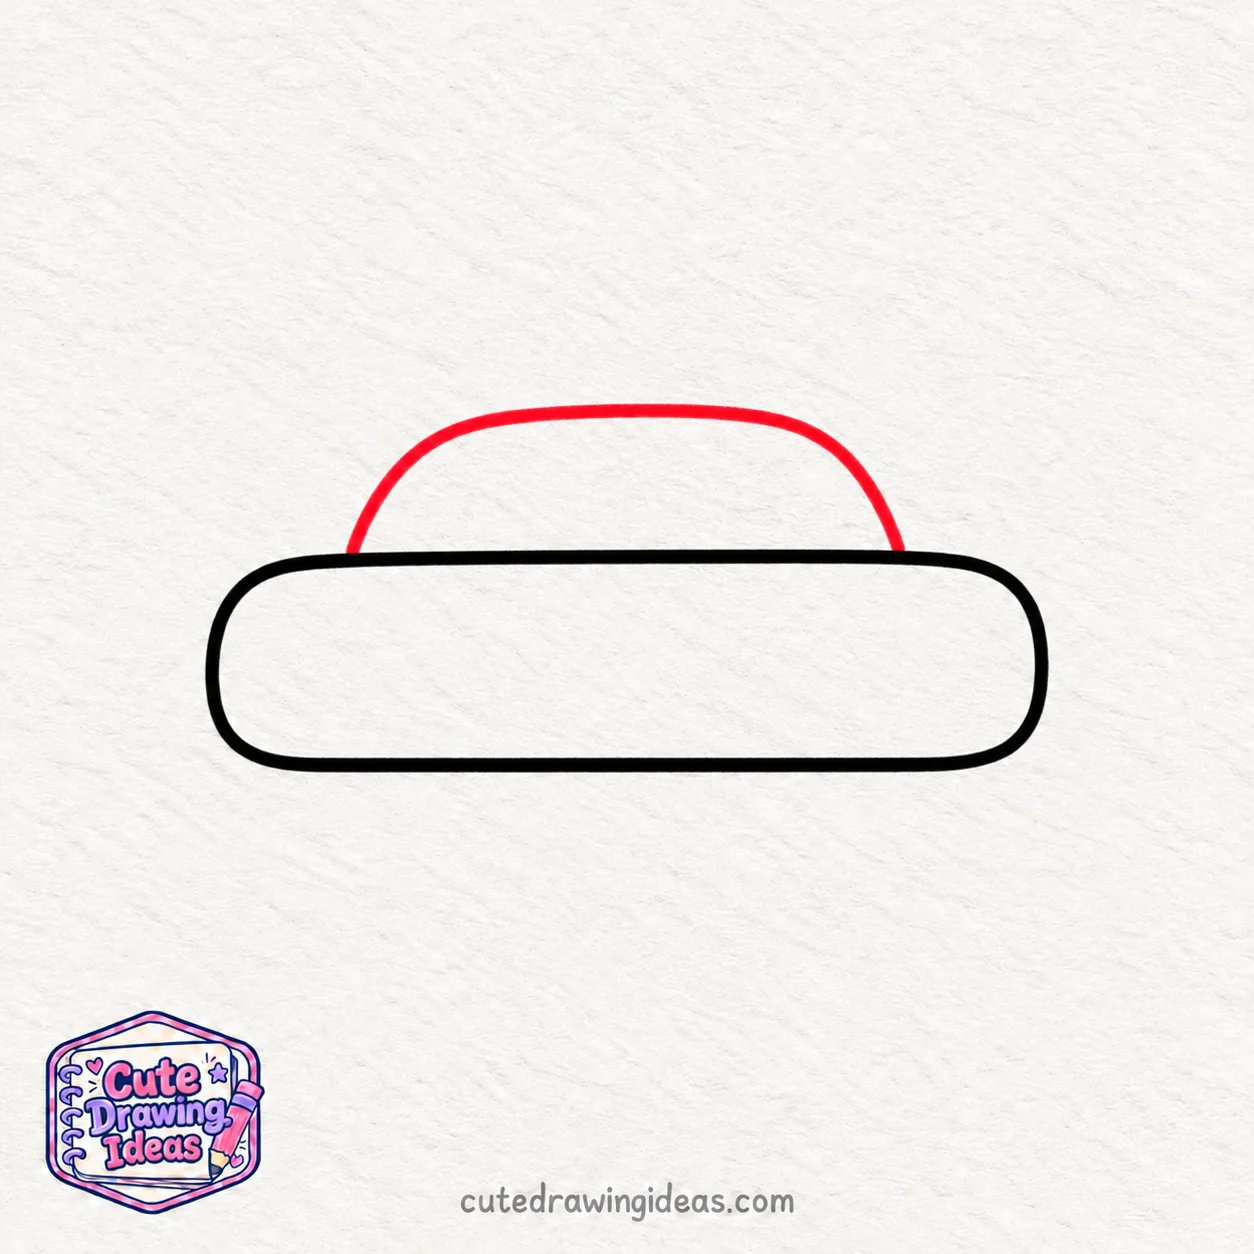
Now, let’s give our little car a roof!
Start on the top edge of the car body, a little in from the left side. Draw a curved line that rises upward, bends gently across the top, and comes back down to meet the body near the right side.
Keep the roof wide and softly rounded, like a low dome. Leave a little space on both ends of the car body for the hood and trunk.
Your car now has its basic shape, ready for the windows!
Step 3: Draw the Car Windows
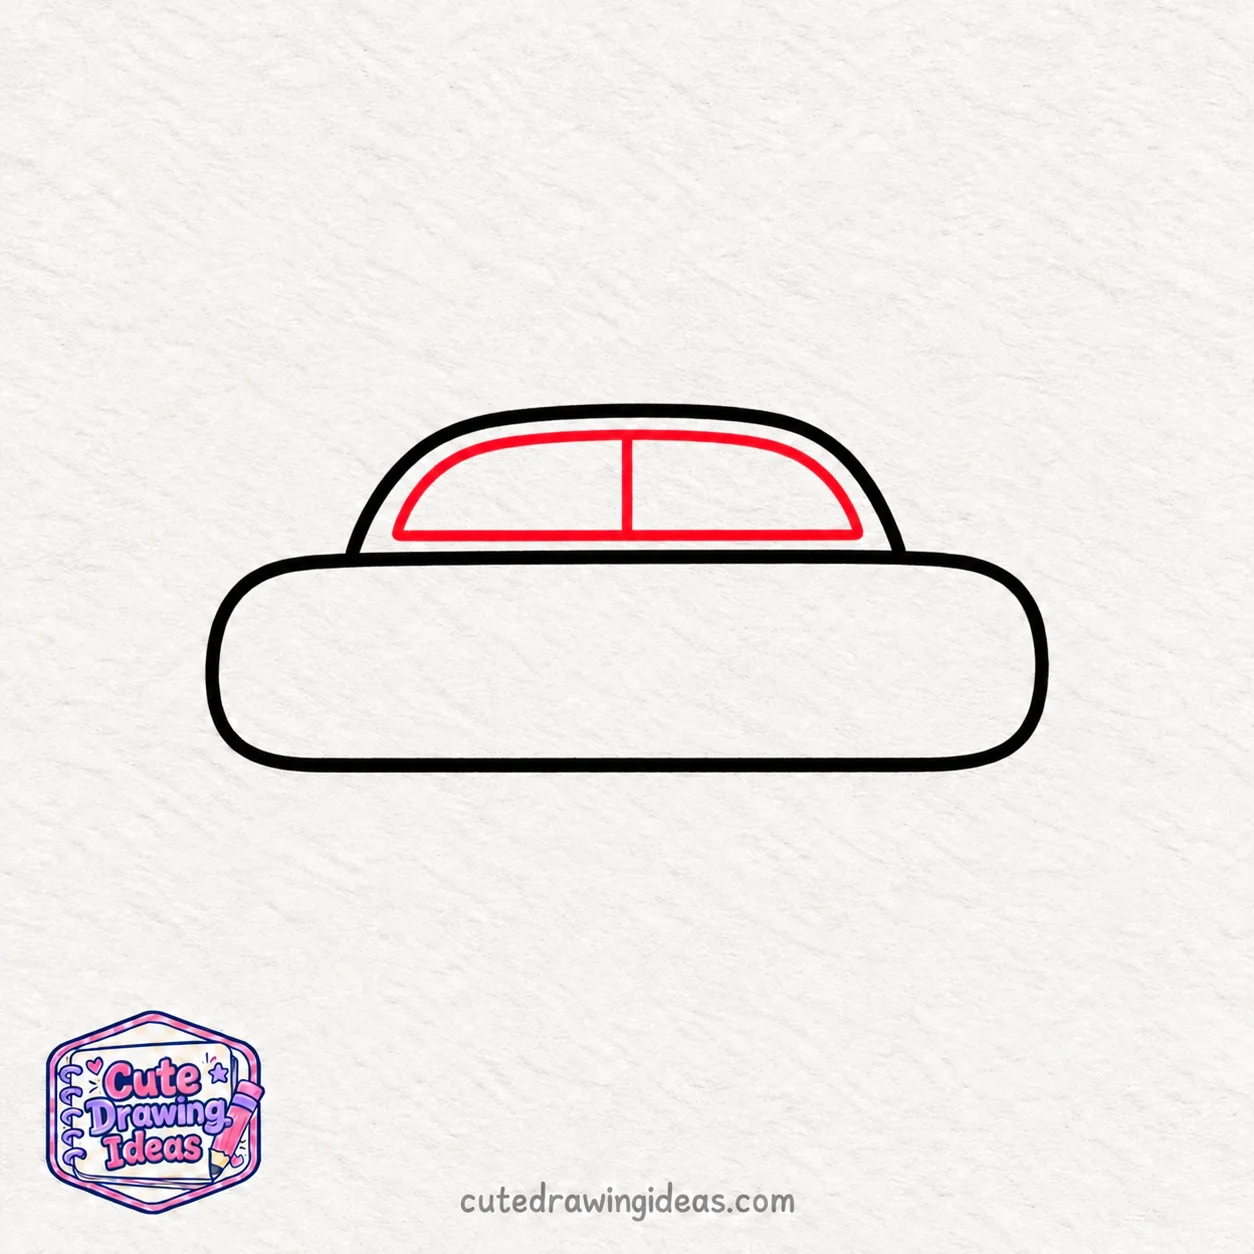
Let’s add two windows inside the curved roof.
Draw a wide window outline just below the roof, following its rounded shape. Leave a small gap between the window and the roof so there’s room for the frame.
Keep the bottom of the window straight and slightly above the car body. Then draw a short line from the top to the bottom of the window, near the middle, to divide it into two.
Now our little car has two side windows, with a narrow frame between them!
Step 4: Add Two Round Wheels
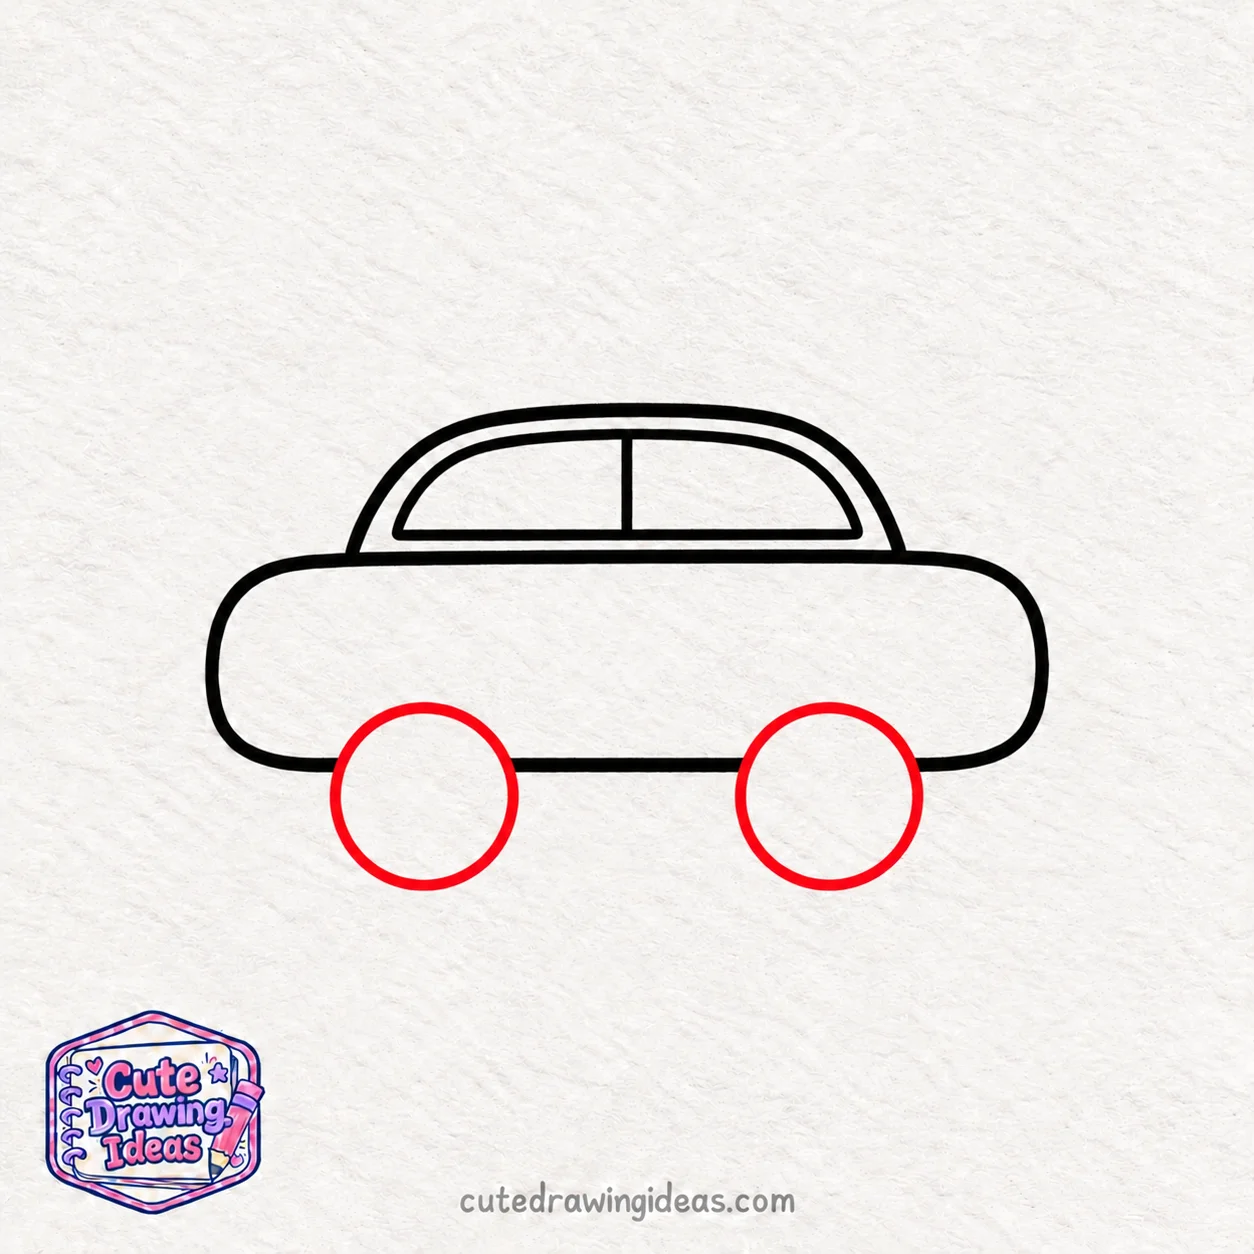
Our little car needs wheels to get moving!
Draw two large circles beneath the car body, one near the left end and the other near the right end.
Let the upper part of each circle overlap the bottom edge of the car body slightly. Keep both wheels about the same size, with their bottoms lined up evenly.
Leave a good amount of space between the wheels. We’ll add their smaller inner circles in the next step.
Step 5: Draw the Wheel Centers
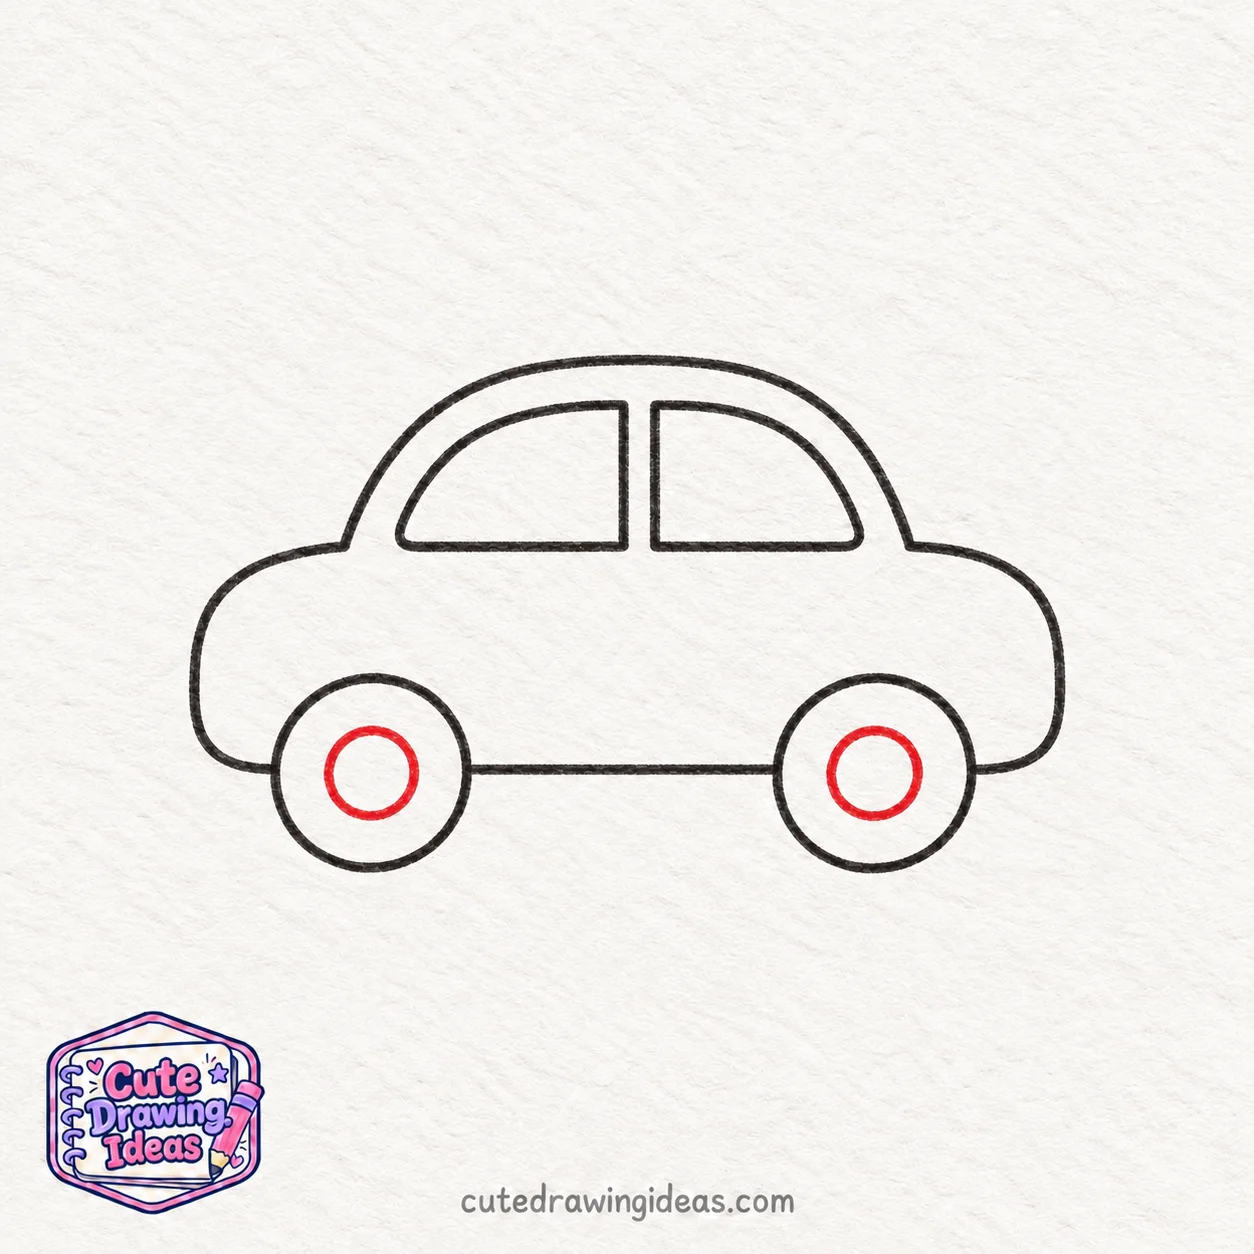
Let’s add the centers to our car’s wheels.
Inside each large wheel, draw a smaller circle. Try to place it in the middle, leaving an even gap between the inner and outer circles.
Keep both smaller circles about the same size. These will be the hubcaps, giving our wheels a neat, finished look.
Now both wheels are ready, and we can move on to the car door!
Step 6: Draw the Car Door and Handle
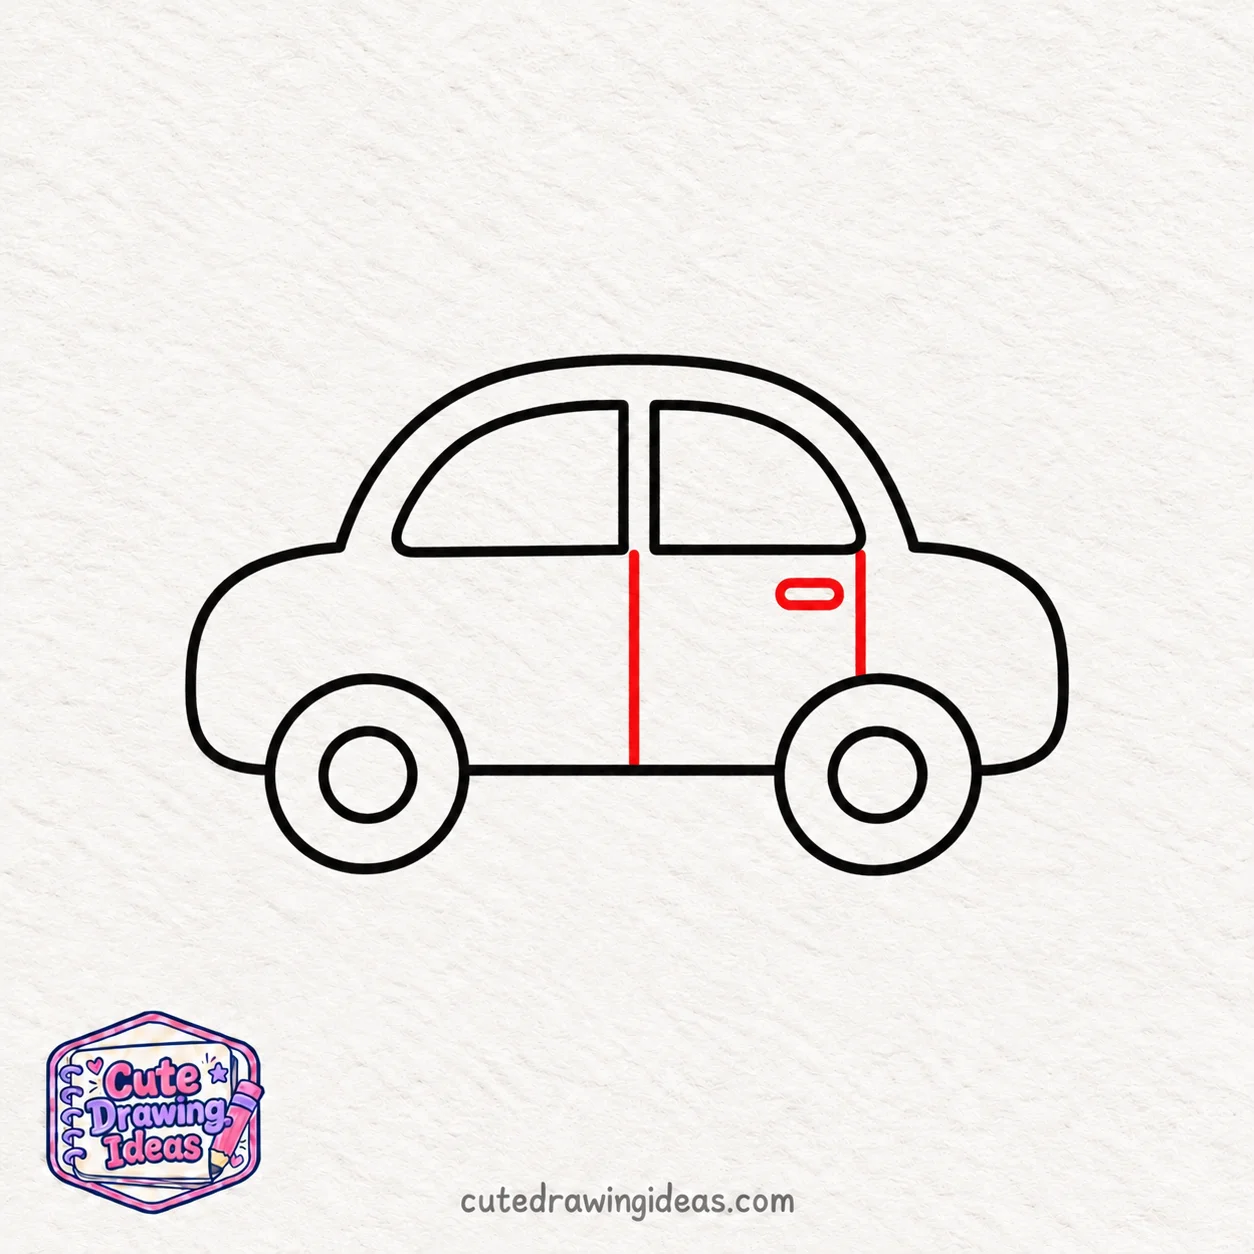
Let’s give our little car a door!
Below the right window, draw a straight line downward from the middle window frame to the bottom of the car body.
Add another line beneath the right end of the same window, stopping when it reaches the top of the right wheel. These lines form the sides of the door.
Now draw a small horizontal oval just below the right window for the door handle.
Our car has a door that looks ready to open!
Step 7: Add the Headlights and Final Details
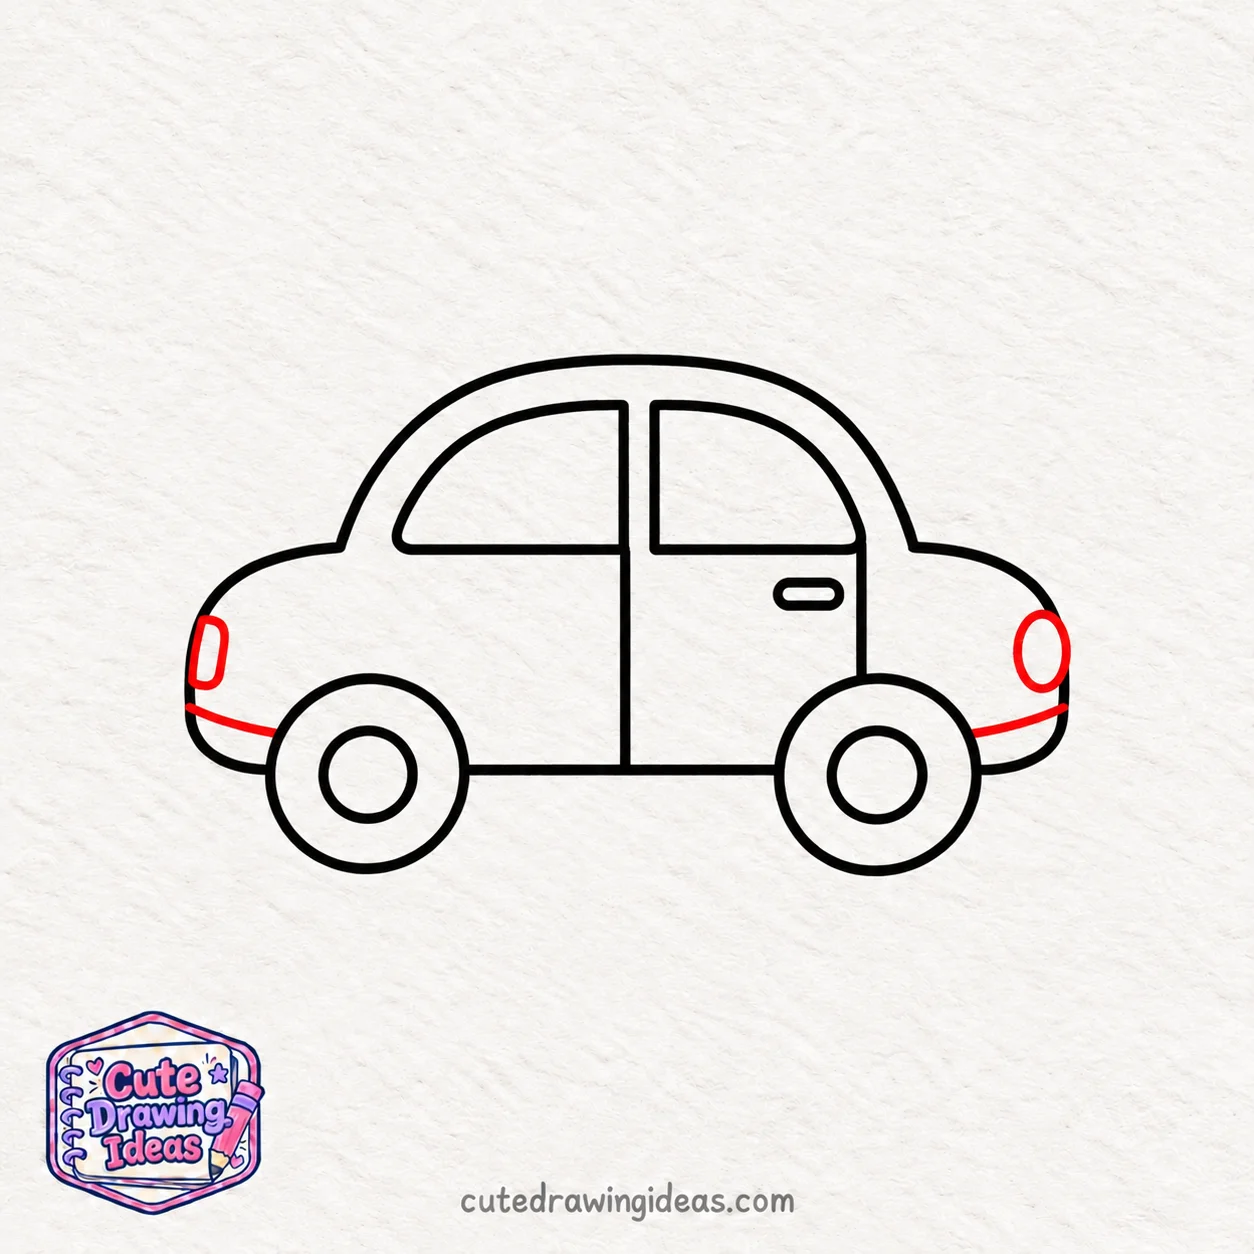
Our little car is almost ready for the road!
Draw a small oval near the right end of the car body for the front headlight. Add another small, upright oval near the left end for the taillight.
Next, draw a short, slightly curved line near the bottom of each end to show the front and rear bumpers.
Keep these details small so they fit neatly around the rounded body.
Now our car has its lights and bumpers, and it’s ready for some colorful crayons!
Step 8: Color Your Cute Car
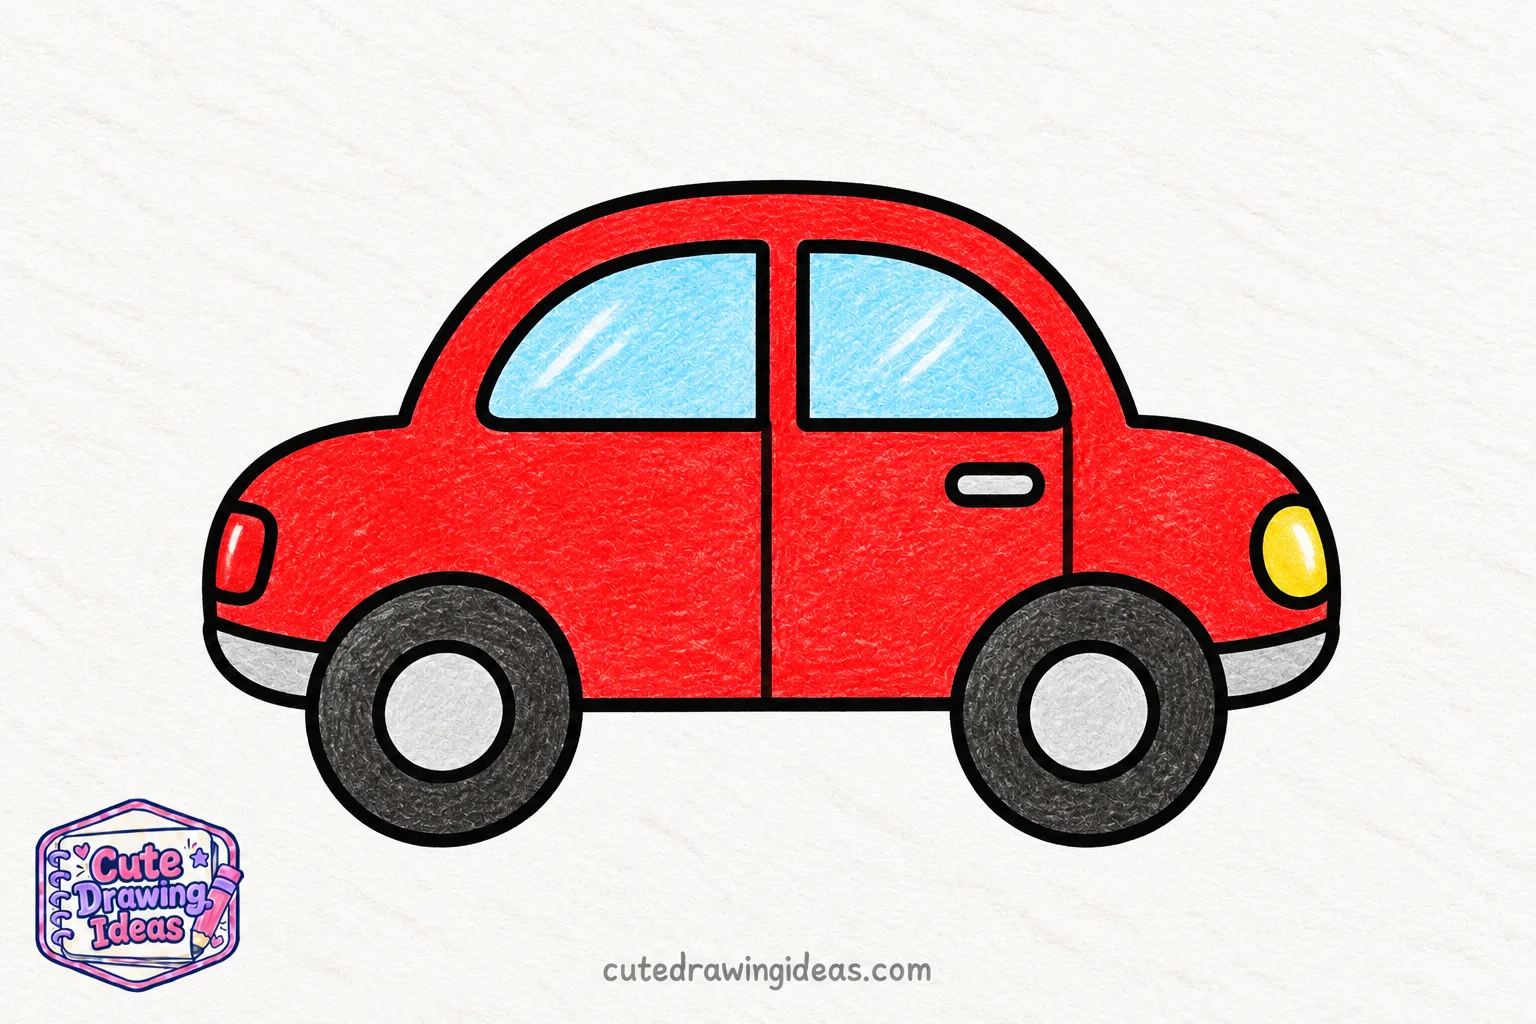
It’s time to bring our little car to life with crayons!
I’m coloring the car body a bright cherry red and filling the windows with light blue. Use dark gray or black for the tires, leaving the small hubcaps silver or light gray.
Color the front headlight pale yellow and the rear taillight red. Shade both bumpers light gray, and leave the door handle white.
You can leave a tiny white streak in each window to make the glass look shiny.
Once you’ve finished coloring, gently trace any faded outlines with your black colored pencil.
And there we have it! Our colorful little car is ready to hit the road!
Easy Tips to Make Your Car Drawing Look Cute
Here are a few things I find helpful when working on a cartoon car drawing.
- Check the spacing before tracing. If one wheel looks too close to the end of the car, adjust its pencil outline before darkening it.
- Give the windows enough room. If the roof looks crowded, make the window openings slightly smaller rather than squeezing the frame against the roof.
- Don’t press too hard with crayons. Start with light strokes and add another layer where you want a stronger color. This makes it easier to keep the coloring inside the outlines.
- Keep the small details readable. If the door handle or lights disappear into the body color, carefully darken their outlines with your black colored pencil.
A few uneven lines are fine. I actually like the little differences that make a drawing look as though it was made by hand.
Common Mistakes When Drawing a Cute Car
The Wheels Are Uneven
If one wheel is much bigger than the other, your little car might look unbalanced.
Fix: Draw both wheels about the same size and keep their bottoms at the same level. You can use a coin to help make matching circles.
The Roof Is Too Wide
A roof that covers the entire car body can make your drawing look more like a van.
Fix: Leave a little space at the front for the hood and at the back for the trunk. Keep the roof gently curved.
The Windows Are Too Close to the Roof
If the windows touch the roof outline, there’s no space left for the window frames.
Fix: Draw the windows slightly inside the roof, leaving a narrow gap around their top and sides.
The Door Lines Cross the Wheels
Drawing the door lines straight through the tires can make the car’s outline confusing.
Fix: Stop the door lines when they reach the wheel or the bottom edge of the car body. Erase any lines that overlap the tires.
Fun Variations to Try
Once you’ve finished your first car, you can change its design to make something different. Here are four cute car drawing ideas I’d like to try.
1. A Cute Pink Car with Heart Decorations
Color the body pink, then add two little hearts to the doors or hood. You could also draw a small heart-shaped decoration hanging from the rearview mirror inside the window.
Try giving the wheels pink centers to match.
2. A Little Blue Bubble Car
Make the car body shorter and raise the roof into a taller, rounder dome. Draw one large side window instead of two smaller ones.
Color it sky blue with dark blue wheels. This tiny bubble car will have a different shape from our original drawing.
3. A Cute Beetle-Inspired Car
Try drawing a car inspired by the rounded shape of a classic Volkswagen Beetle.
Give it a high, curved roof, a short hood, and a gently sloping back. You can use a bright yellow crayon for the body and add small circular headlights to complete its retro appearance.
4. A Colorful Cartoon Race Car
Want a car that looks ready for a race?
Make the roof lower and the body a little longer. Add two racing stripes across the hood and a large number on the door.
You could also draw a small spoiler at the back. Try coloring this one orange, blue, or green.
Fun Facts About Cars
Here are a few things to know about the vehicle we’ve just drawn.
- Most cars have four wheels. We can only see two in our side-view drawing because the other two are on the opposite side.
- Headlights and taillights have different jobs. Headlights help drivers see the road in the dark, while red taillights help other drivers notice the back of a car.
- Car tires have special grooves. These patterns are called tread, and they help the tires grip the road.
- Not every car has the same shape. Some have long hoods, while others have short bodies and tall roofs. That’s why you can create so many different car designs with a pencil.
Frequently Asked Questions
1. What is a cute car drawing?
A cute car drawing is a playful illustration of a car with rounded features and simplified details. Unlike a realistic automobile sketch, it doesn’t need complicated parts or exact measurements.
2. What shapes do you need to draw a cute car?
You mainly need a rounded rectangle for the body, a curved dome for the roof, and circles for the wheels. Smaller ovals and straight lines help you add the lights, windows, and door handle.
3. How do you make a car drawing look cute?
Try giving your car a short, rounded body and a slightly oversized roof. You can also make the wheels a little larger than they would be on a realistic car. These playful proportions are common in kawaii and chibi-style drawings.
4. What is the easiest car to draw for beginners?
A bubble-shaped cartoon car is a good starting point because its body and roof are made mostly from curves. A simplified Beetle-style car is another option if you want to practice a taller, rounded roof.
5. Can I draw a simple car without a ruler?
Yes! You can draw the body and windows freehand. I prefer doing this for my cartoon drawings because slight differences in the lines give them a natural, hand-drawn appearance.
6. How can I make both wheels the same size?
Draw one wheel first, then use it as a guide for the second. You can lightly mark the top and bottom of each wheel before completing the circles. If you’re having trouble, tracing around the same coin twice can help.
7. How can I tell the front and back of my car apart?
In our drawing, the front is on the right, where we added the yellow headlight. The red taillight is on the left at the back. These small details help make the direction clear.
8. What colors work best for a cute car drawing?
Cherry red, sunny yellow, bubblegum pink, and mint green are all lovely choices. I like pairing a colorful body with light blue windows and dark gray tires so each part stands out.
9. Can I turn my car sketch into a coloring page?
Of course! Before you add any crayons, trace the finished outline onto another sheet of paper. You can make several copies of the uncolored design and try different colors, patterns, and decorations.
10. What are some cute car names for my drawing?
You could call your car Cherry, Bubbles, Zoomie, Sunny, or Little Wheels. I think Cherry suits our red cartoon car perfectly!
Keep Drawing
Your little car is ready for its first adventure! Why not draw a winding road, a few trees, or a cozy house for it to park beside?
You could even create your own mini car collection, with a tiny taxi, a speedy race car, and a colorful family car lined up together.
I’d love to see where your imagination takes you! Share your cute car drawing with us on Pinterest, and keep exploring more cute drawing ideas.