Difficulty: Easy | Time: 15–20 Minutes | Steps: 7 | Good for: Kids and Beginners
There’s something about a little frog sitting with its legs tucked beside its body that always makes me want to sketch one. I especially love adding those tiny spread-out toes and a happy expression that gives each frog its own personality.
In this tutorial, I’ll show you how to draw a frog in seven easy steps. We’ll begin with the head, work our way down to the legs and feet, and finish with a lovely shade of green. I’ve kept the drawing beginner-friendly, so you can enjoy making your own little frog without getting caught up in complicated details.
What You Will Need
- A pencil
- An eraser
- A sheet of drawing paper
- A black pen or marker for outlining
- Green, light green, and pink crayons, colored pencils, or markers
Before You Start
Keep your pencil lines light. This makes it easier to fix a shape or erase any extra lines before outlining your frog.
Leave room for the legs. Our frog will be sitting with its back legs bent outward, so don’t draw the head too close to the bottom or edges of your paper.
Step by Step: How to Draw a Frog
Step 1: Draw the Frog’s Head
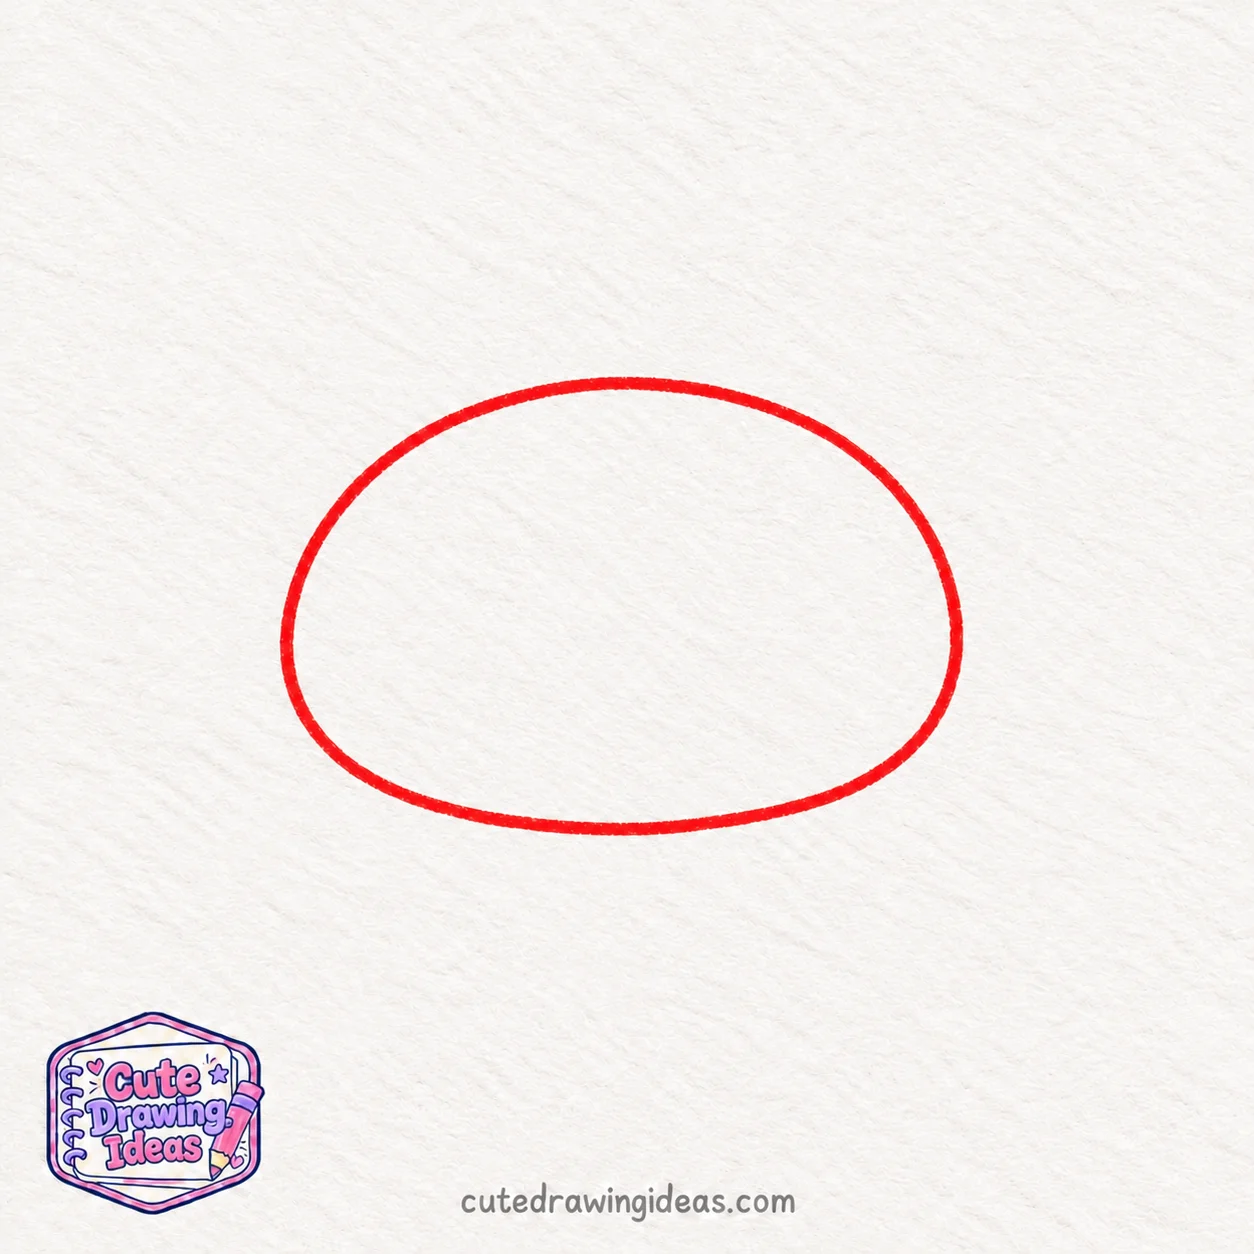
Start near the upper middle of your paper and draw a large, sideways oval for the frog’s head. Make it wider than it is tall, with gently rounded sides and a smooth bottom.
Close the shape at the top, leaving enough space above it for the frog’s raised eyes.
Don’t worry if your oval isn’t perfectly even. A slightly uneven shape can give your little frog more character.
Step 2: Draw the Frog’s Raised Eye Bumps
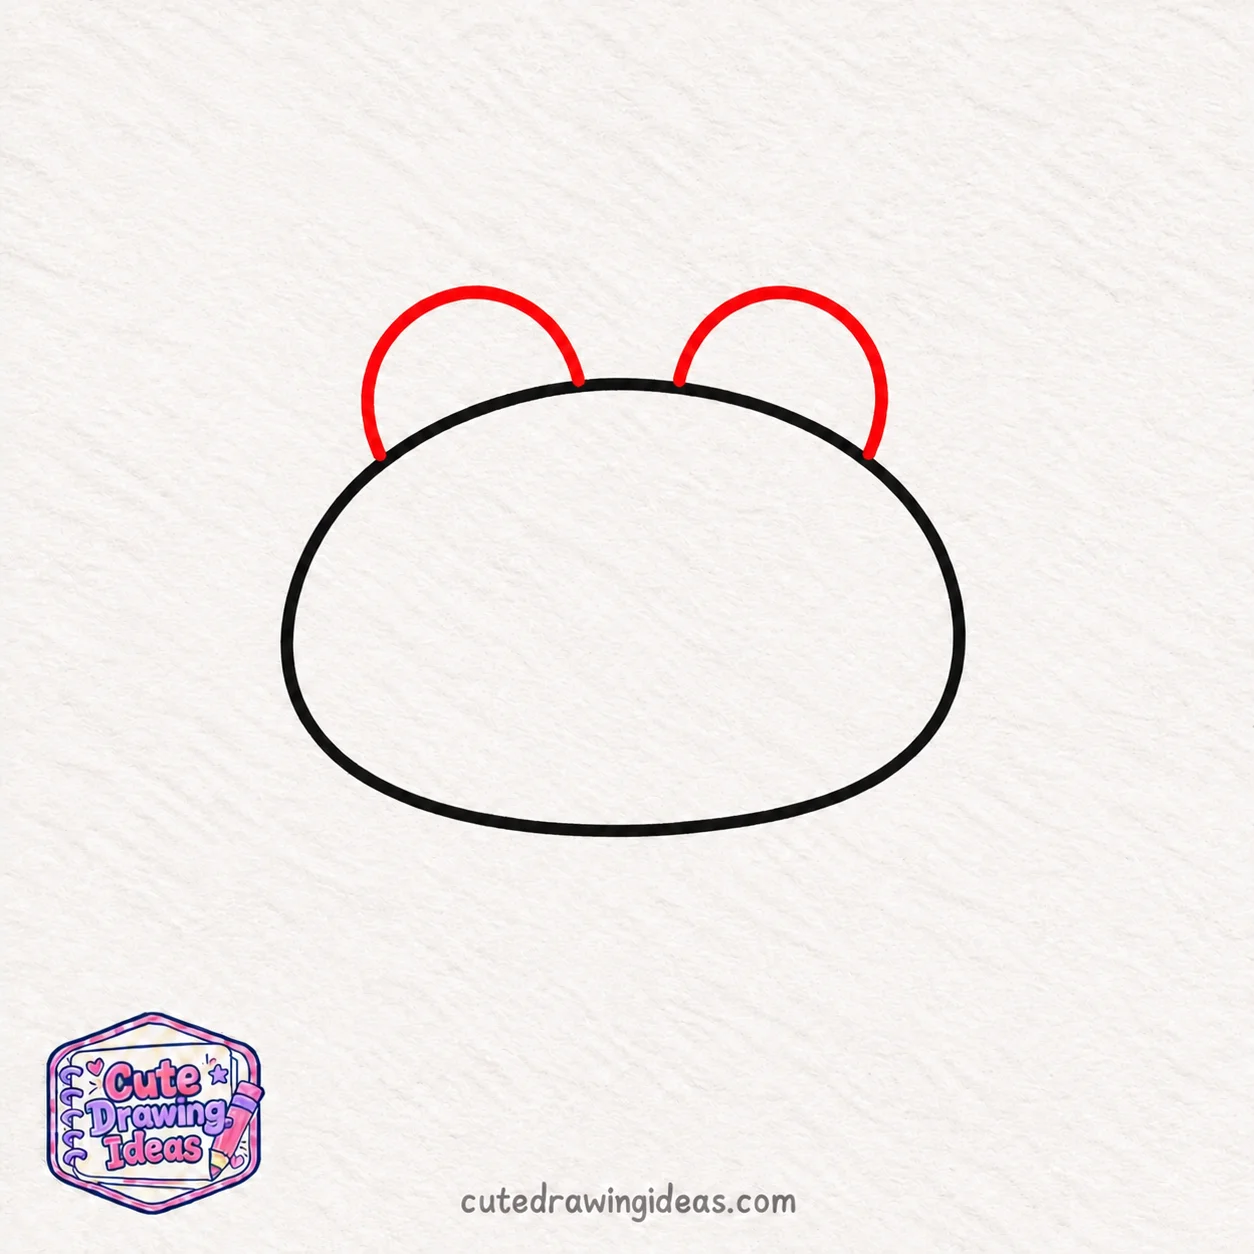
At the top of the frog’s head, draw two rounded, semicircular bumps, one near the left side and the other near the right. Curve each bump upward and bring it back down to meet the head outline.
Keep both bumps about the same size, with a small gap between them. These will form the raised outer shapes of your frog’s eyes.
For now, draw only the outer eye bumps. We’ll add the pupils and facial details in the next step.
Step 3: Draw the Frog’s Eyes and Face
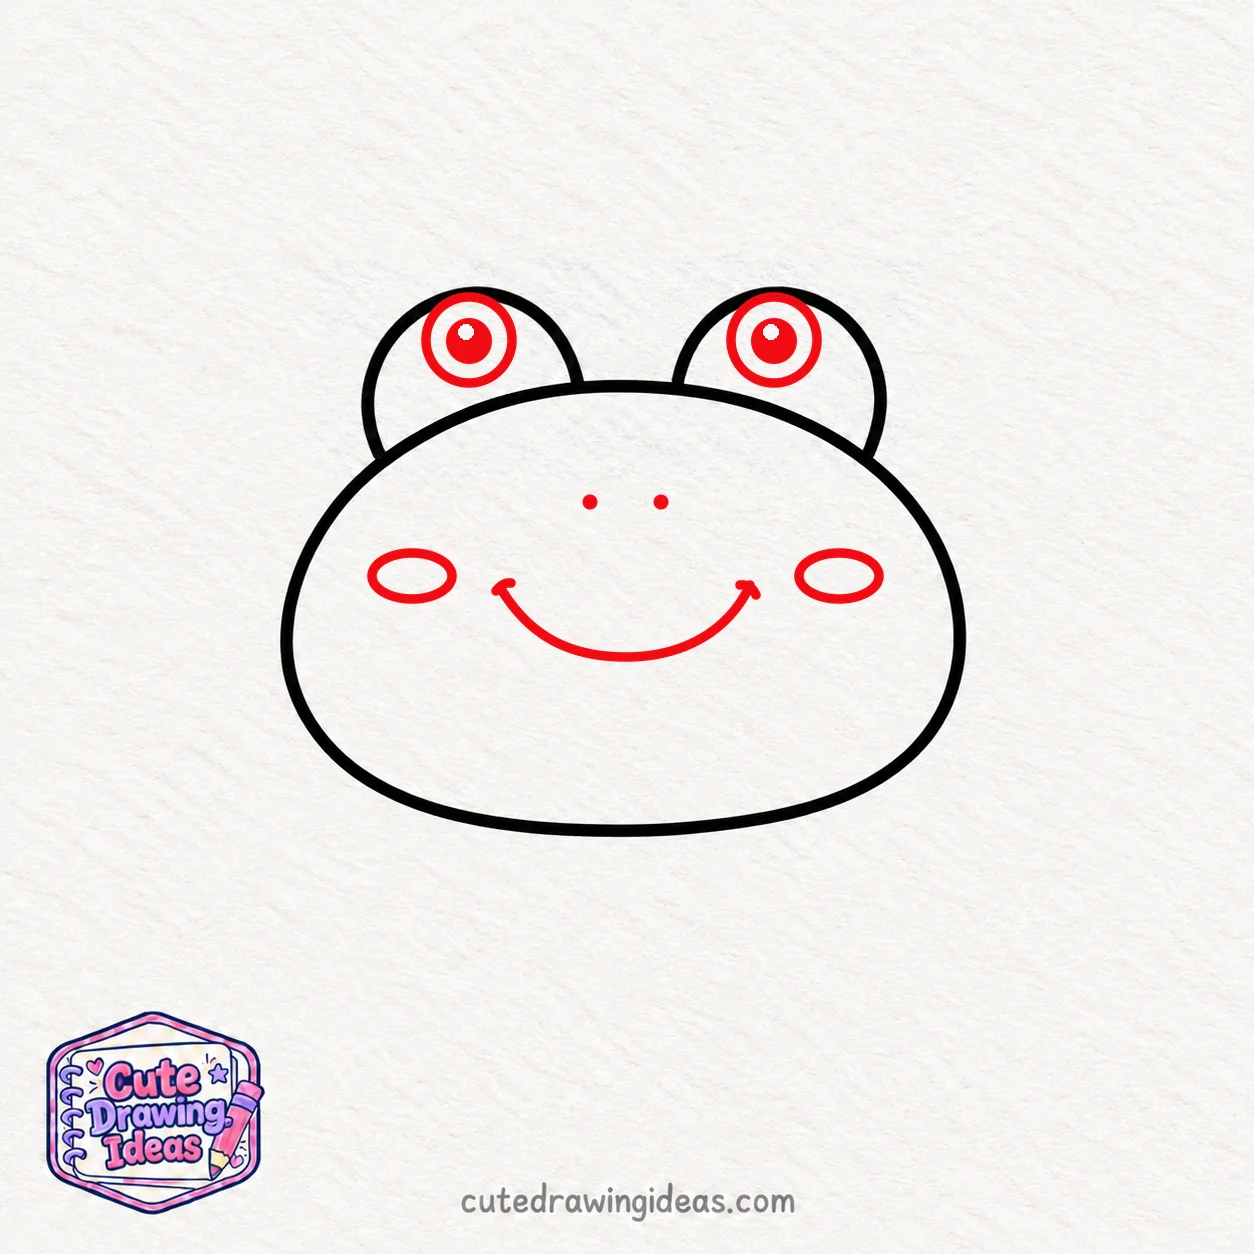
Inside each raised eye bump, draw a smaller circle and add a dark pupil in the center. Leave a tiny white spot in each pupil to give the eyes a shiny look.
Next, draw two tiny dots near the upper middle of the head for the nostrils. Below them, add a wide, curved smile with both ends pointing upward. Finish with two small oval cheeks, one on each side of the smile.
Keep the pupils about the same size and the smile gently curved to give your frog a cheerful expression.
Step 4: Draw the Frog’s Body and Belly

Starting just below the left side of the frog’s head, draw a curved line that extends outward and downward. Repeat on the right side, then connect both lines with a wide, gently rounded curve at the bottom to form a plump body.
Inside the body, draw a large upside-down U-shaped curve, with both ends touching the bottom outline. This creates the frog’s rounded belly.
Keep the body wide and full rather than long and narrow to give your frog a chubby, sitting appearance.
Step 5: Draw the Front Legs and Toes
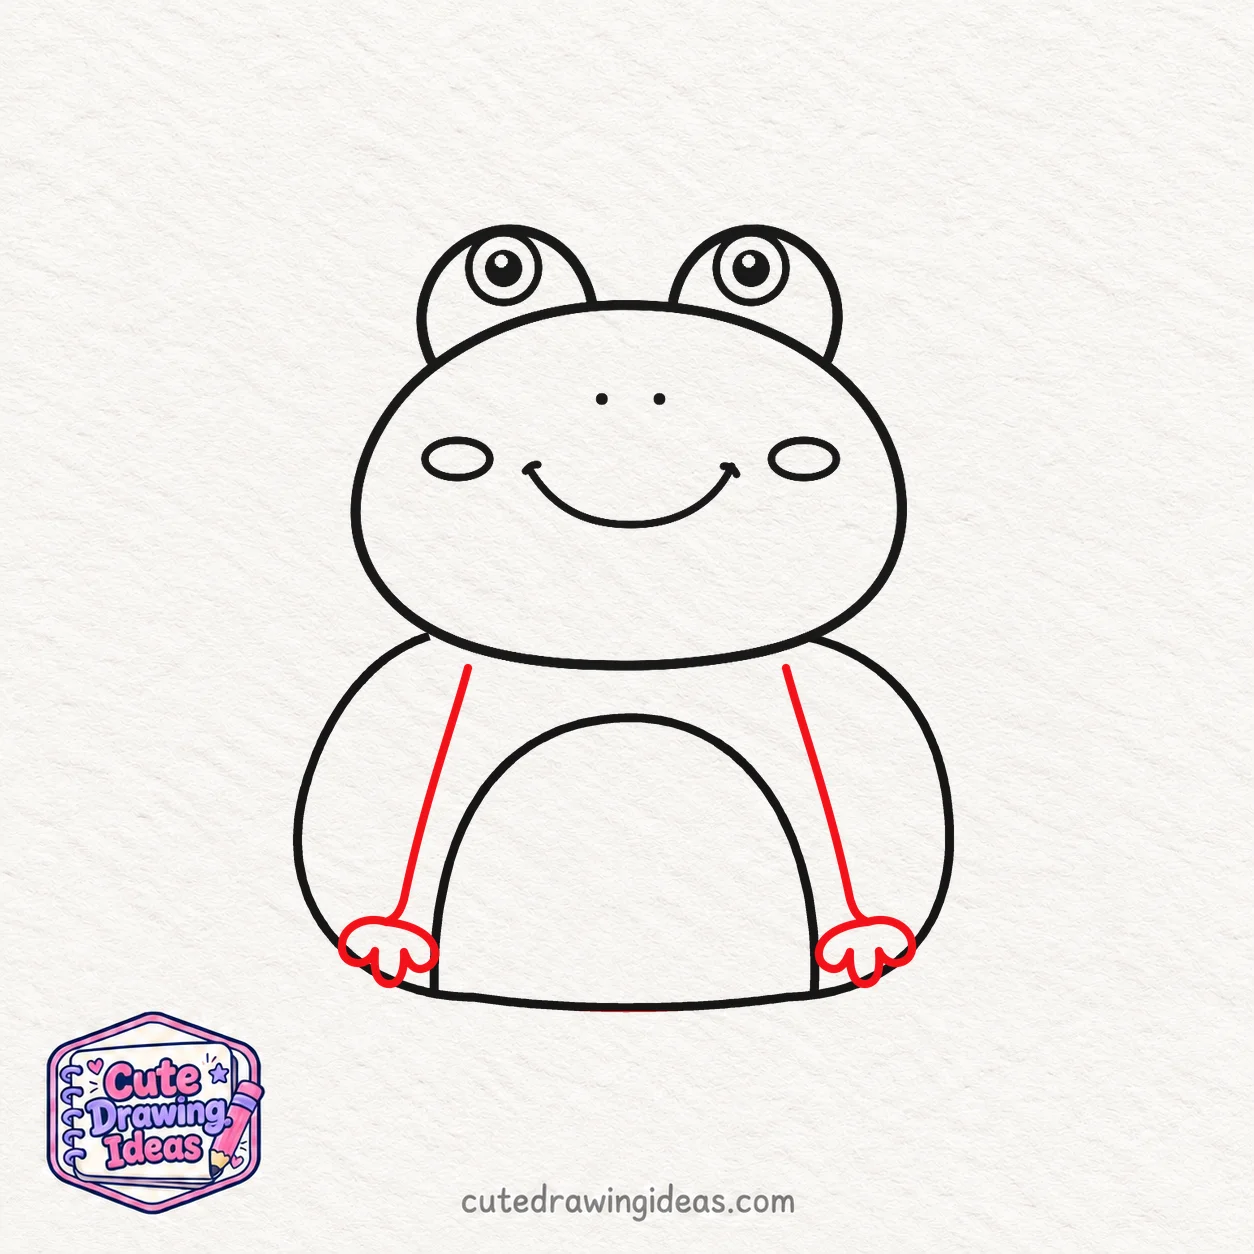
Just below the frog’s head, draw a slightly slanted line down each side of the belly. Keep both lines inside the body, leaving a little space between them and the outer edges.
At the bottom of each line, draw a small foot with three rounded toes. Let the toes spread slightly outward and rest along the bottom of the body, one foot on either side of the belly.
Keep the legs evenly spaced and the toes short and rounded to match your frog’s chubby appearance.
Step 6: Draw the Back Legs and Webbed Feet
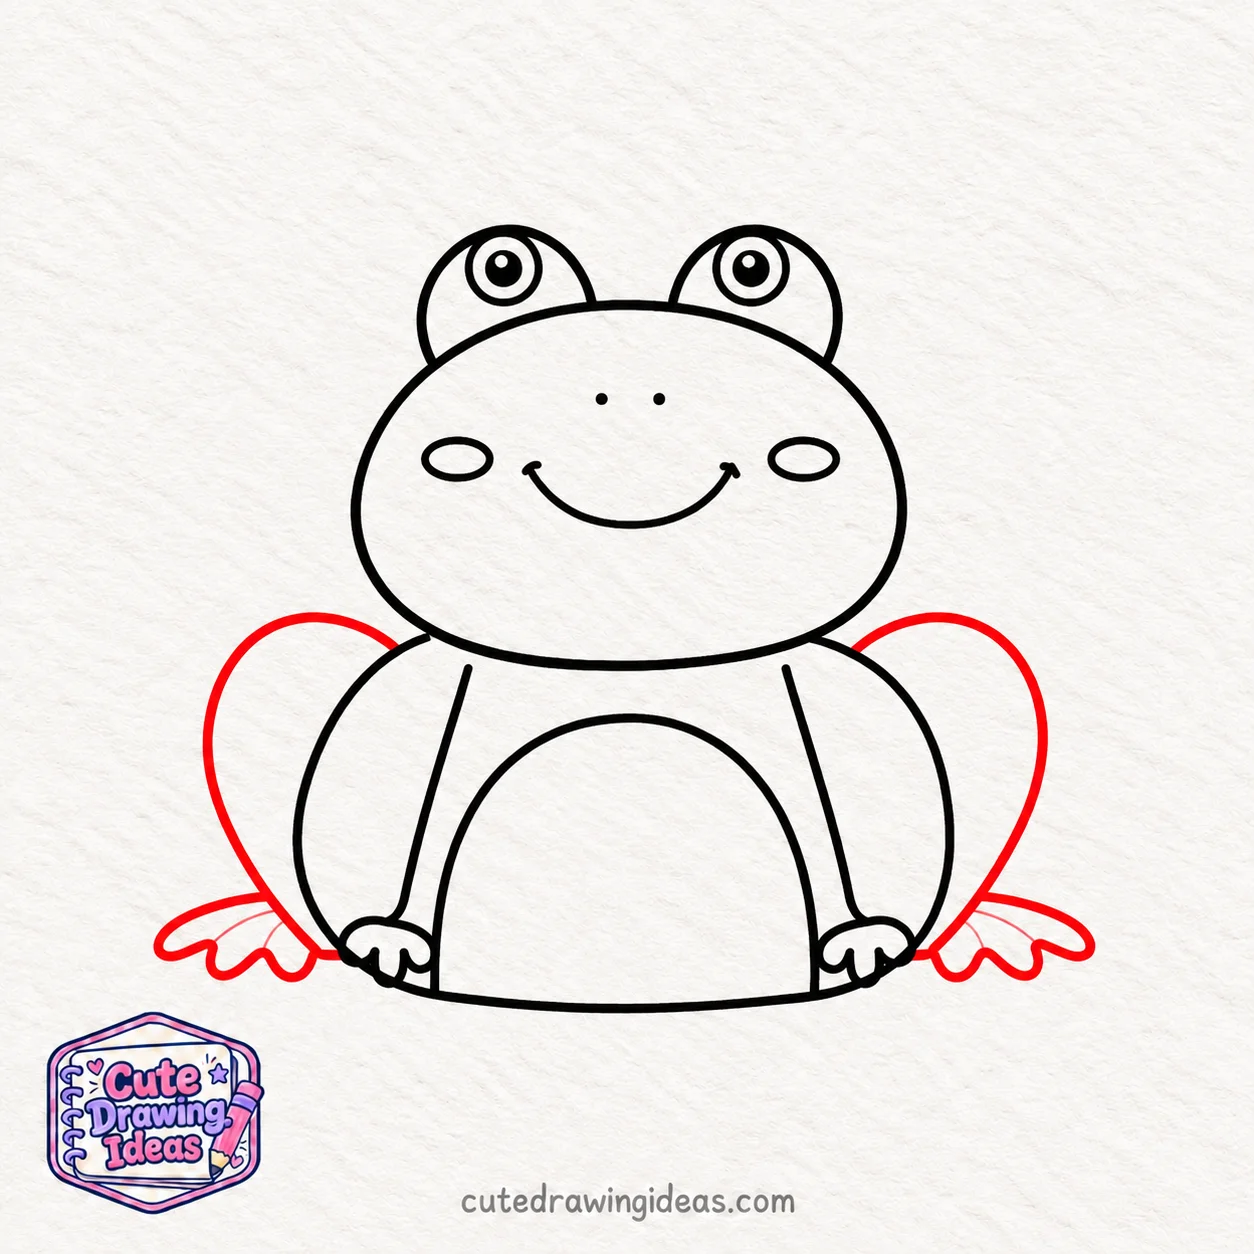
On each side of the frog’s body, draw a large, rounded curve starting just below the head. Let each curve bend outward and then downward to form the folded-back legs.
At the bottom of each leg, add a wide, flattened foot with three rounded toes pointing slightly outward. Draw small curved lines between the toes to show the webbing.
Keep the back legs wider than the front legs and position the feet on either side of the body to give your frog a balanced sitting pose.
Step 7: Outline and Color Your Cute Frog
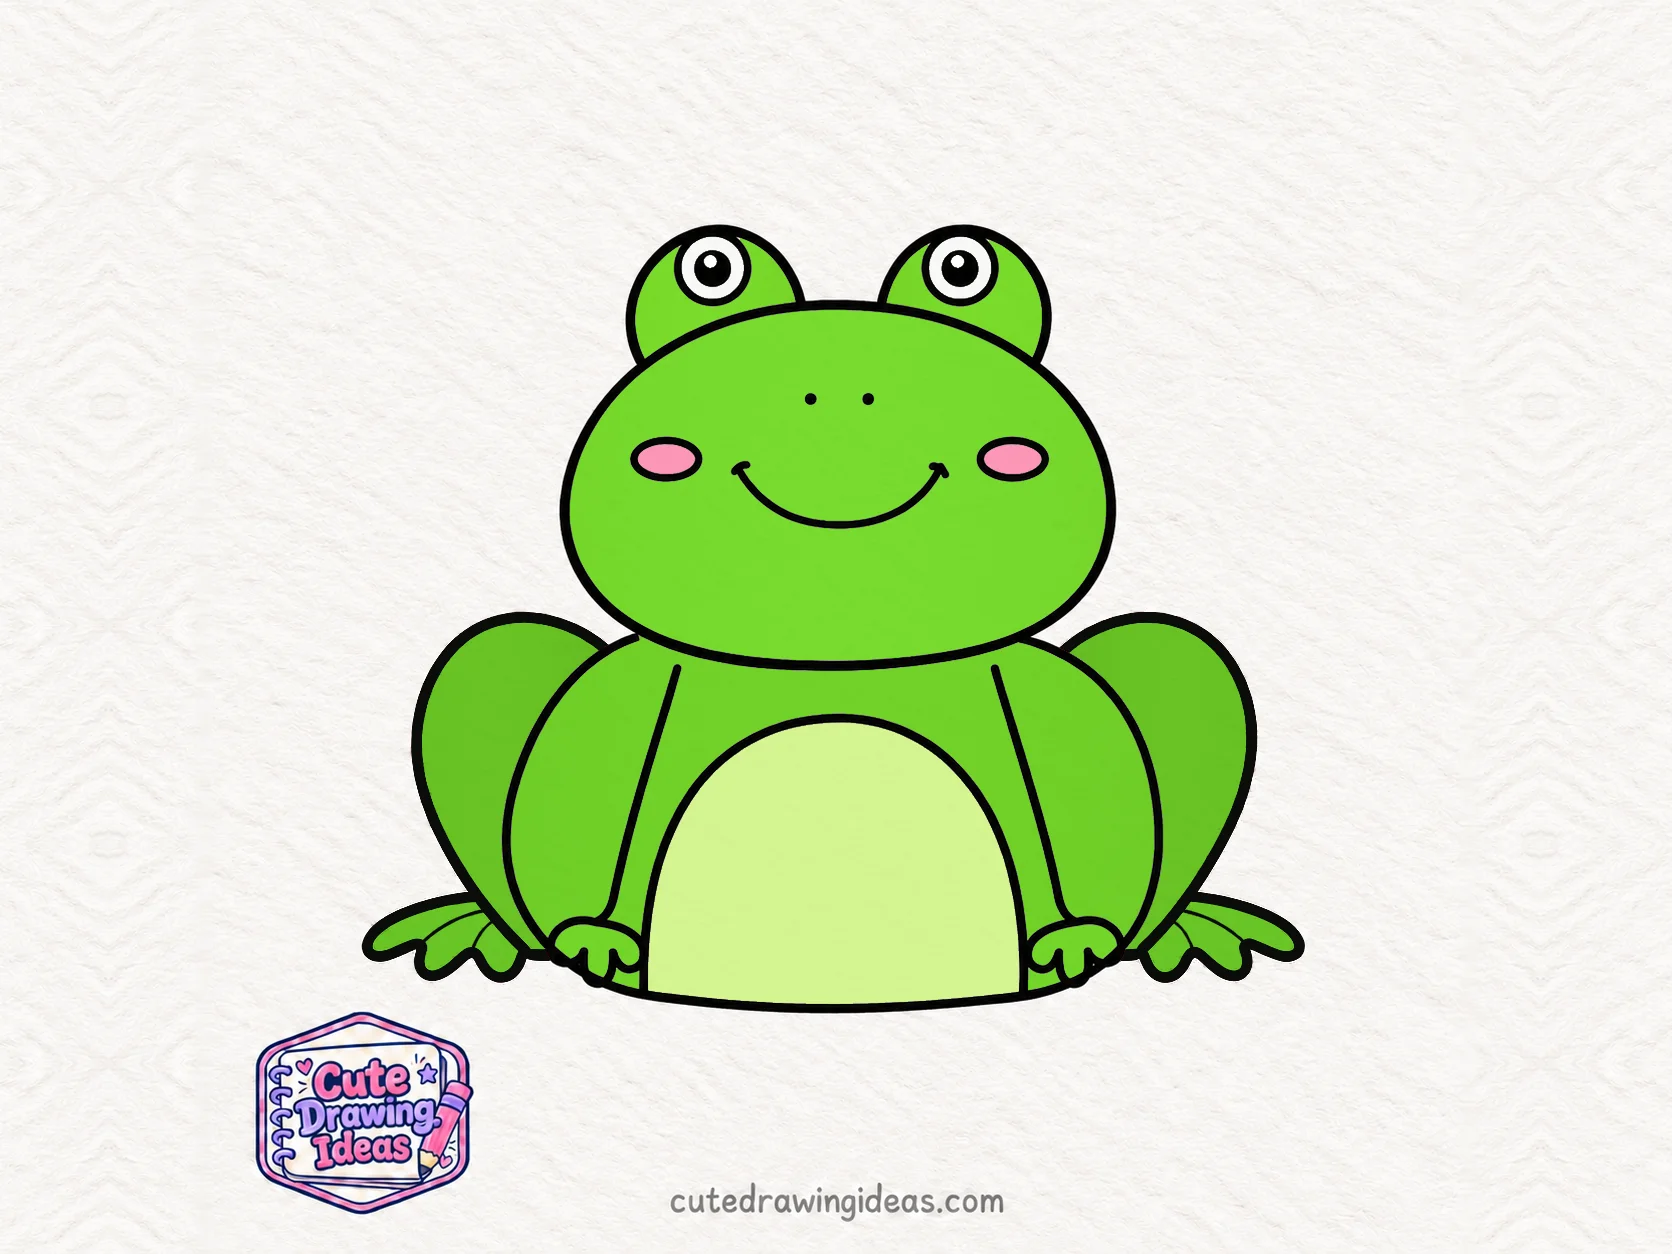
Trace the frog’s final outlines with a black pen or marker, including the back legs and webbed feet. Once the ink dries, gently erase any remaining pencil marks.
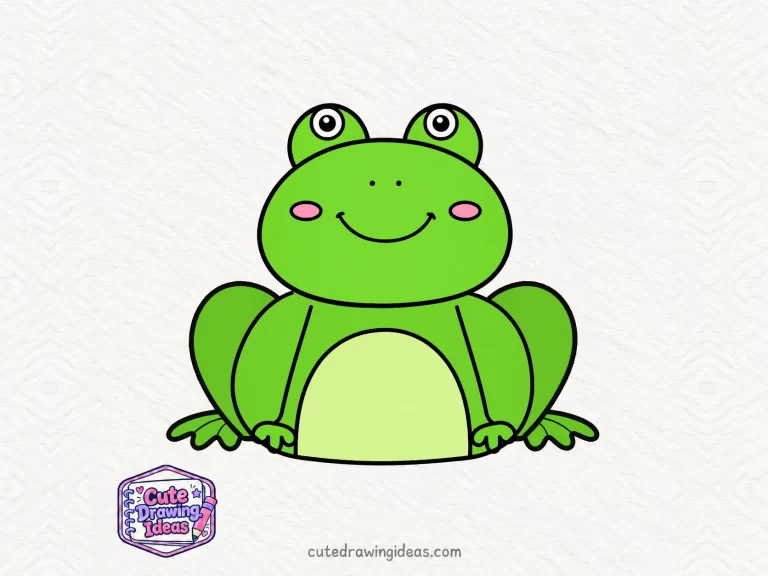
Color the head, body, and legs bright green. Use a lighter shade of green for the rounded belly and soft pink for the cheeks. Fill the pupils with black, leaving the tiny white highlights untouched.
Add a little darker green around the sides of the body and folded legs for depth. Keep the colors soft and even to give your frog a neat, hand-drawn finish.
Your Finished Frog Drawing
And there it is! Your little frog is sitting with its feet spread out, looking as though it’s ready to hop straight off the paper.
I particularly like how the folded-back legs give this drawing its sitting pose. If yours looks a little different from mine, that’s perfectly fine. Small differences in the curves and facial expressions make every frog drawing unique.
Why I Love Drawing Frogs
One thing I enjoy about drawing frogs is how easily you can change their poses. A sitting frog has those lovely folded legs, but a jumping frog needs a completely different arrangement of limbs. Even changing the direction of its eyes can make it look curious, surprised, or sleepy.
I also like how their unusual feet give me something different to practice. Drawing the little toes and the spaces between them helps me pay attention to details that I might otherwise overlook.
Tips to Make Your Frog Even Cuter
Keep the Eye Highlights Consistent
When leaving the tiny white highlights in the pupils, place them on the same side of both eyes. This makes the eyes look as though they’re catching light from one direction.
Add a Little Personality to the Cheeks
Try positioning the cheek ovals slightly closer to the smile for a bashful expression, or farther apart for a broader, happier look. You can experiment with these small changes on another sketch.
Use Different Outline Thicknesses
If you’re comfortable using a marker, make the outer outline slightly thicker than the smaller lines inside the drawing. This helps the frog’s silhouette stand out without hiding its facial details.
Color in Gentle Layers
When using colored pencils, start with a light layer of green and gradually add more color where you want a deeper shade. This gives you better control than pressing hard from the beginning.
Common Mistakes When Drawing a Frog
The Back Legs Look Like Extra Arms
If the back legs are too narrow or close to the front legs, they can be difficult to tell apart.
Fix: Make the folded-back legs broader and curve them outward from the sides of the body. The front legs should remain closer to the belly.
The Feet Look Like One Solid Shape
Drawing the toes too close together can make the feet look like flat blobs.
Fix: Leave a visible dip between each toe. Use short curved lines to suggest the webbing without filling in the gaps completely.
The Frog Looks Uneven
If one side of the body extends much farther than the other, the frog may appear to be leaning.
Fix: Check where the left and right body curves begin beneath the head. Compare the width of both sides before tracing your pencil lines.
The Facial Features Look Crowded
Placing the nostrils and smile too close to the eyes can make the face feel cramped.
Fix: Leave some open space between the eyes, nostrils, and mouth. Adjust the features lightly in pencil before outlining them.
Fun Variations to Try
Once you’ve finished your easy frog drawing, you can use the same basic idea to create a few different characters.
Kawaii Frog Drawing
Give your frog an even sweeter expression by drawing a tiny heart-shaped mouth or adding little heart marks beside its cheeks. You could also add a small bow or a flower on its head to make the character look different from the original.
Frog Sitting on a Lily Pad
Draw a wide, flat oval beneath your frog and cut a small triangular notch into one side to create a lily pad. Add a few curved lines around it to suggest water.
You can even draw a tiny dragonfly hovering nearby to turn your frog into a little pond scene.
Glass Frog Drawing
For a glass frog-inspired drawing, try a slimmer body, delicate limbs, and longer toes. Use pale green coloring and leave the belly much lighter to suggest the translucent skin that makes glass frogs so unusual.
This variation is a slightly bigger challenge because the body proportions differ from our rounded cartoon frog.
Baby Frog Drawing
Draw a smaller version with a slightly larger head compared with its body. Give it shorter legs and tiny feet to make it look younger.
You can place a small tadpole beside it to show another stage in a frog’s life.
Fun Facts About Frogs
Frogs have some interesting features that make them quite different from other animals. Here are a few facts I thought would be fun to share.
- Frogs don’t have ears that stick out like ours. Instead, they have round hearing membranes called tympanums, located just behind their eyes. These help them hear sounds around them.
- Frogs are amphibians. Many species spend time both in water and on land.
- Many frogs begin life as tadpoles. As they grow, they develop legs and gradually change into young frogs.
- Their back legs are powerful. Frogs use them for jumping, and many species also use their legs to swim.
- Frogs can absorb water through their skin. They don’t need to drink water the same way humans do.
Frequently Asked Questions
Can You Draw a Frog Without a Marker?
Yes. You can complete the entire drawing with a pencil. If you want darker outlines, go over your finished lines with a softer pencil before adding color.
How Long Does It Take to Draw a Frog?
This seven-step tutorial should take around 15 to 20 minutes for a beginner. You might need a little more time if you’re carefully coloring the small toes and eye details.
Can Young Children Follow This Frog Drawing Tutorial?
Yes. The drawing uses straightforward shapes and short instructions. Younger children may need a little help with the smaller facial details and webbed feet.
Can You Color a Frog Something Other Than Green?
Yes. Although green suits our cartoon frog, real frogs come in many colors, including brown, yellow, red, and blue. You can choose a different color combination for your own character.
How Can You Fix an Uneven Frog Drawing?
You don’t need perfect symmetry. If one side looks noticeably different, lightly erase the part you’re unhappy with and redraw it using the opposite side as a guide. Small differences usually won’t affect the overall drawing.
Keep Drawing
Your frog is finished, but your sketchbook doesn’t have to stop here. Try drawing another one in a different pose or give it a little pond of its own.
Keep your finished frog in your sketchbook so you can look back at it and see how your drawing skills improve with practice.