Difficulty: Easy | Time: 30 minutes | Steps: 10 | Good for: Kids and Beginners
Have you noticed how a sitting cat can look completely serious until it tilts its head or curls its tail? That’s what makes cats so interesting to draw. Even the smallest details can change their whole expression.
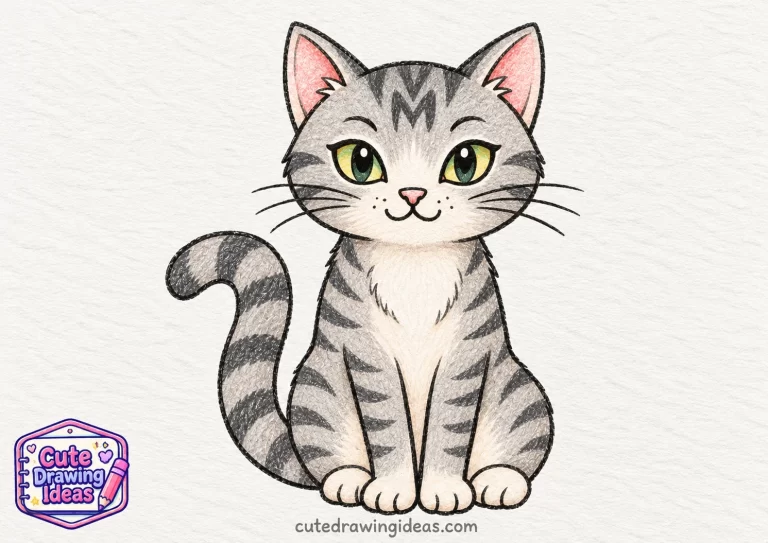
In this how to draw a cute cat tutorial, I’ll show you how to turn a few pencil shapes into a sitting tabby cat with pointed ears, curious eyes, little paws, and a curled tail. We’ll build the drawing one part at a time, so even if you’re new to sketching, you can follow along without getting lost in the details.
Materials You’ll Need
You don’t need an expensive drawing kit to follow this tutorial. A few basic supplies will do.
- HB pencil: For lightly sketching the cat’s head, body, and other shapes.
- Eraser: To clean up guidelines and correct small mistakes.
- Drawing paper or sketchbook: Any plain sheet with enough space for a full-body cat drawing.
- Black marker or fine liner: For tracing the finished outline.
- Colored pencils or crayons: Grey, dark grey, pink, and green for our tabby cat.
I’ll use light pencil strokes at first because they’re easier to erase. If you prefer a black-and-white cat drawing, you can skip the coloring supplies.
How to Draw a Cute Tabby Cat Step by Step
For this easy cat drawing, we’ll create a tabby sitting upright on two front paws, with a rounded hind leg and a tail curling alongside its body.
The drawing starts with the larger shapes. We’ll add the face and striped fur pattern after the body is in place.
Step 1: Draw the Cat’s Body Shape
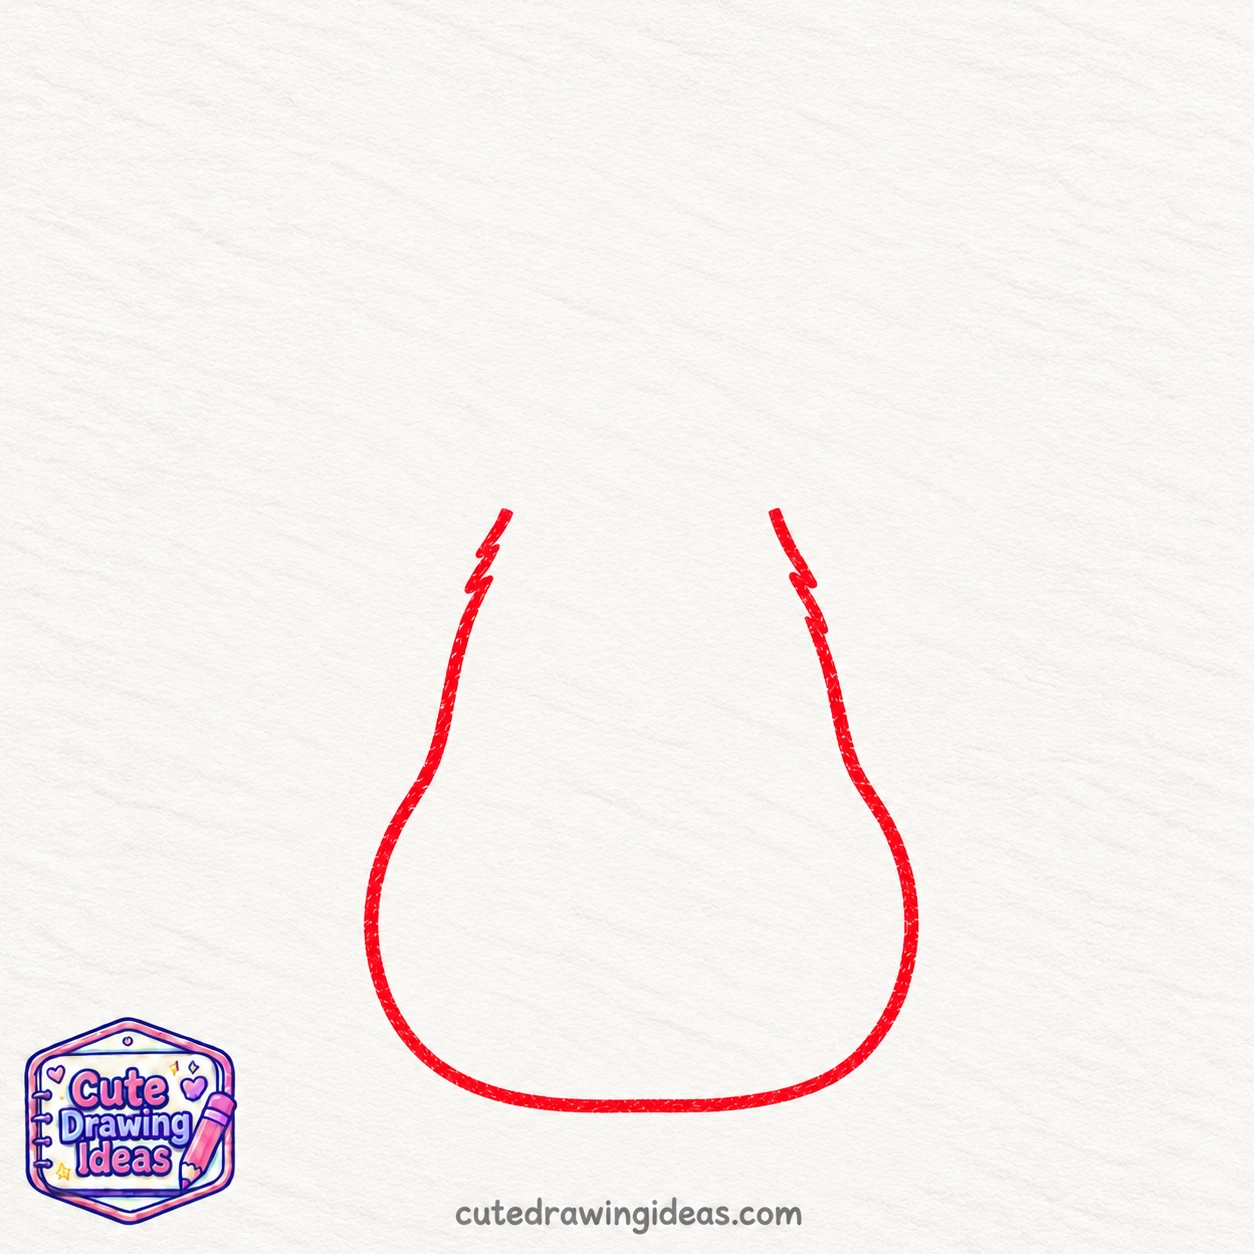
Start near the center of your paper and sketch a tall oval, leaving enough space above it for the head.
Keep the upper part slightly narrow and make the lower half wider. The wider bottom will form the cat’s rounded belly while it’s sitting.
Don’t press too hard with your pencil. We’ll erase some of this oval when we add the legs.
Step 2: Draw a Simple Cat Head
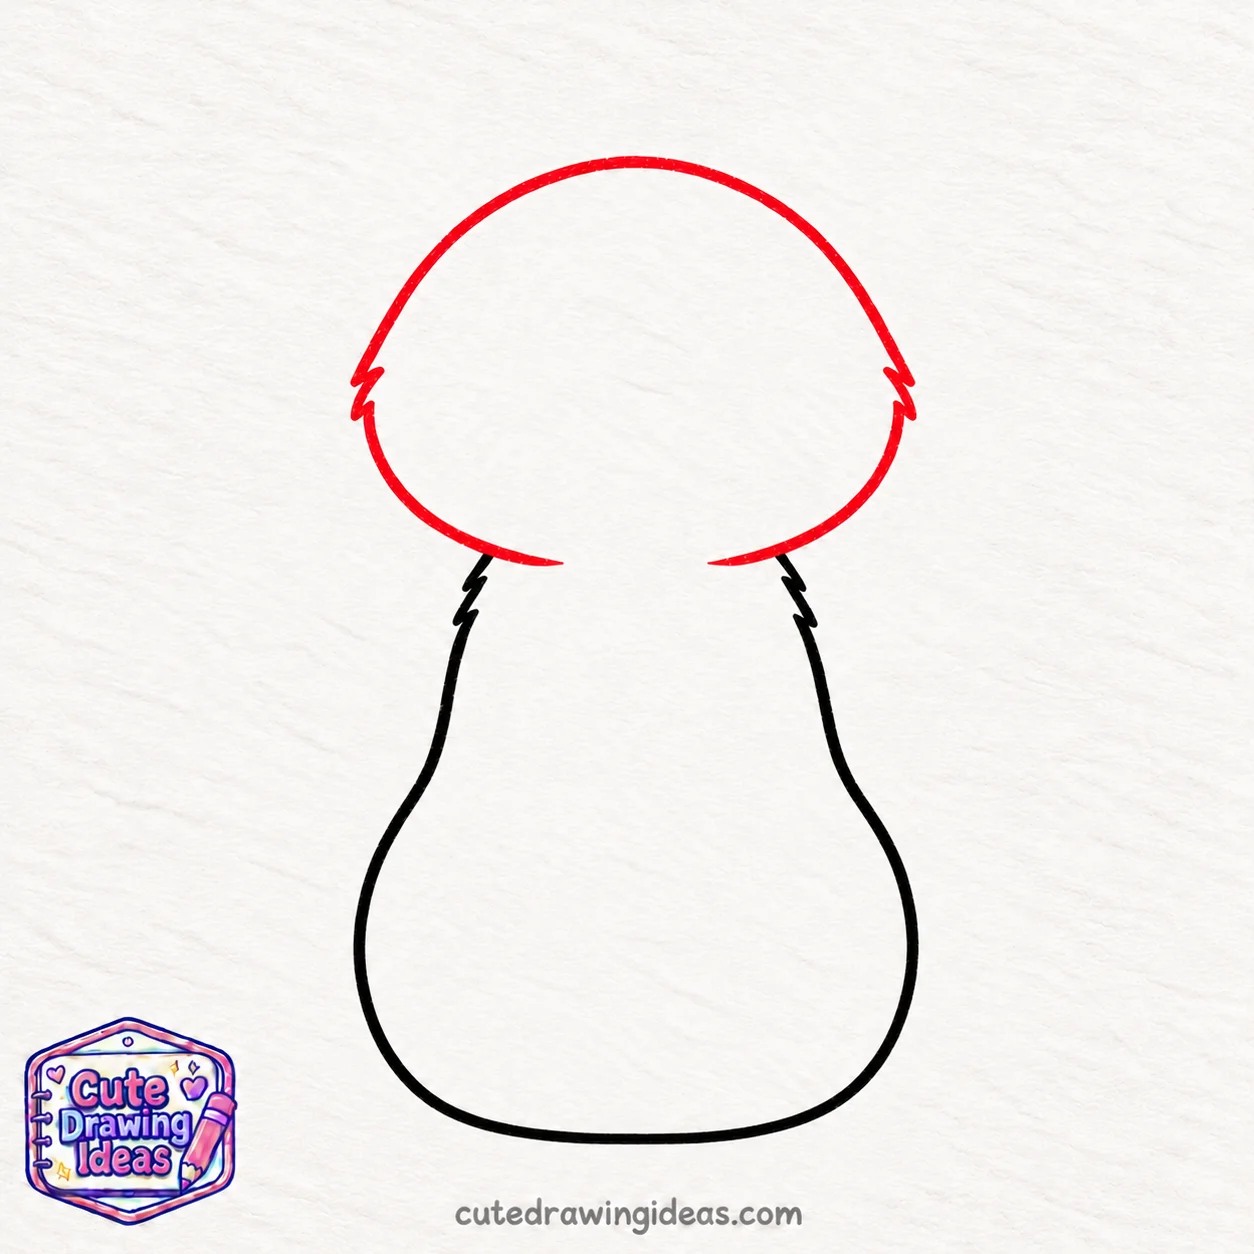
Above the oval, draw a head slightly wider than the body’s top.
Begin with a gently curved forehead. Bring both sides downward at a slight angle, round the cheeks, and join them with a soft chin.
Let the chin overlap the top of the body a little so the head connects naturally to the shoulders.
Unlike a completely round kitten face, this cat’s head will have slightly angled sides and a more defined chin.
Step 3: Add the Pointed Cat Ears
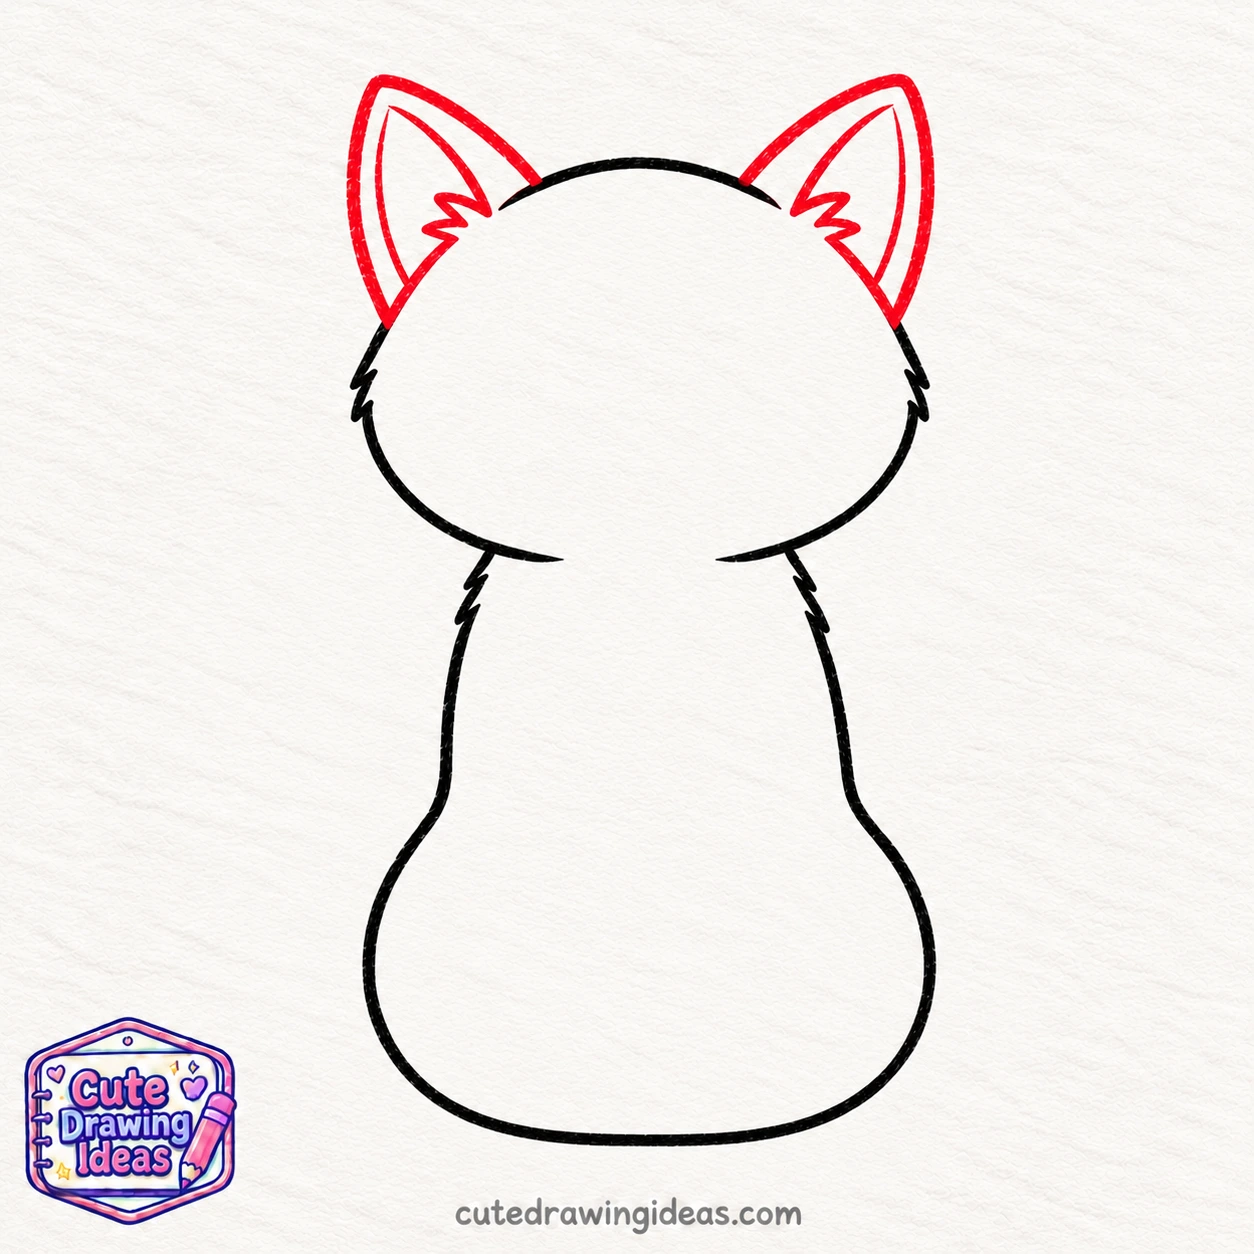
At the top of the head, draw two tall, triangular ears.
Start the first ear near the upper left corner of the head. Draw a line upward to a point, then bring it back down toward the forehead.
Repeat on the opposite side, keeping the ears approximately the same height.
Add a smaller triangle inside each ear to show the inner ear.
I like tilting the ears slightly outward because it gives the cat an attentive expression.
Step 4: Draw the Chest Fur and Front Legs
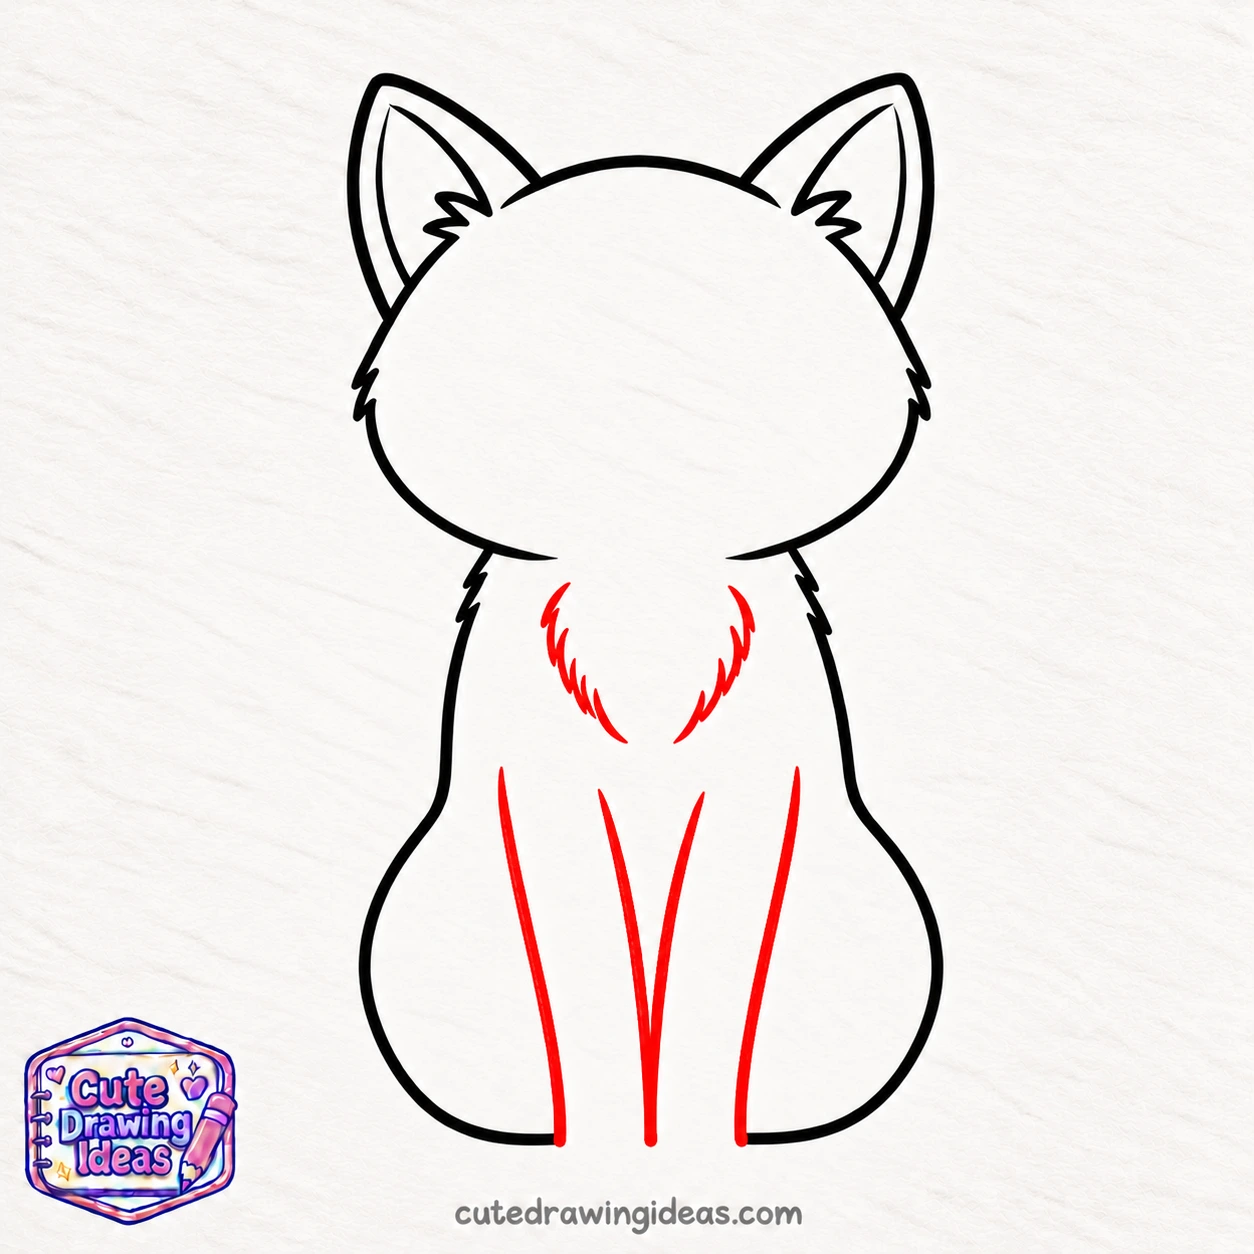
Let’s start with the fluffy chest fur just below the cat’s head.
Leave a small gap beneath the chin, then draw a short, curved line with tiny, pointed strokes along its edge. Let it curve inward and downward toward the middle of the chest.
Repeat on the opposite side to create a matching fur section. Keep both sections separate at the bottom instead of joining them into a single point.
Now, move down to the lower half of the body and draw four long, slightly curved lines to shape the front legs. Place two lines on either side, keeping the middle pair closer together.
Extend these lines toward the bottom of the body, but leave the ends open. We’ll add the paws in the next step.
Step 5: Draw the Paws and Rounded Back Leg
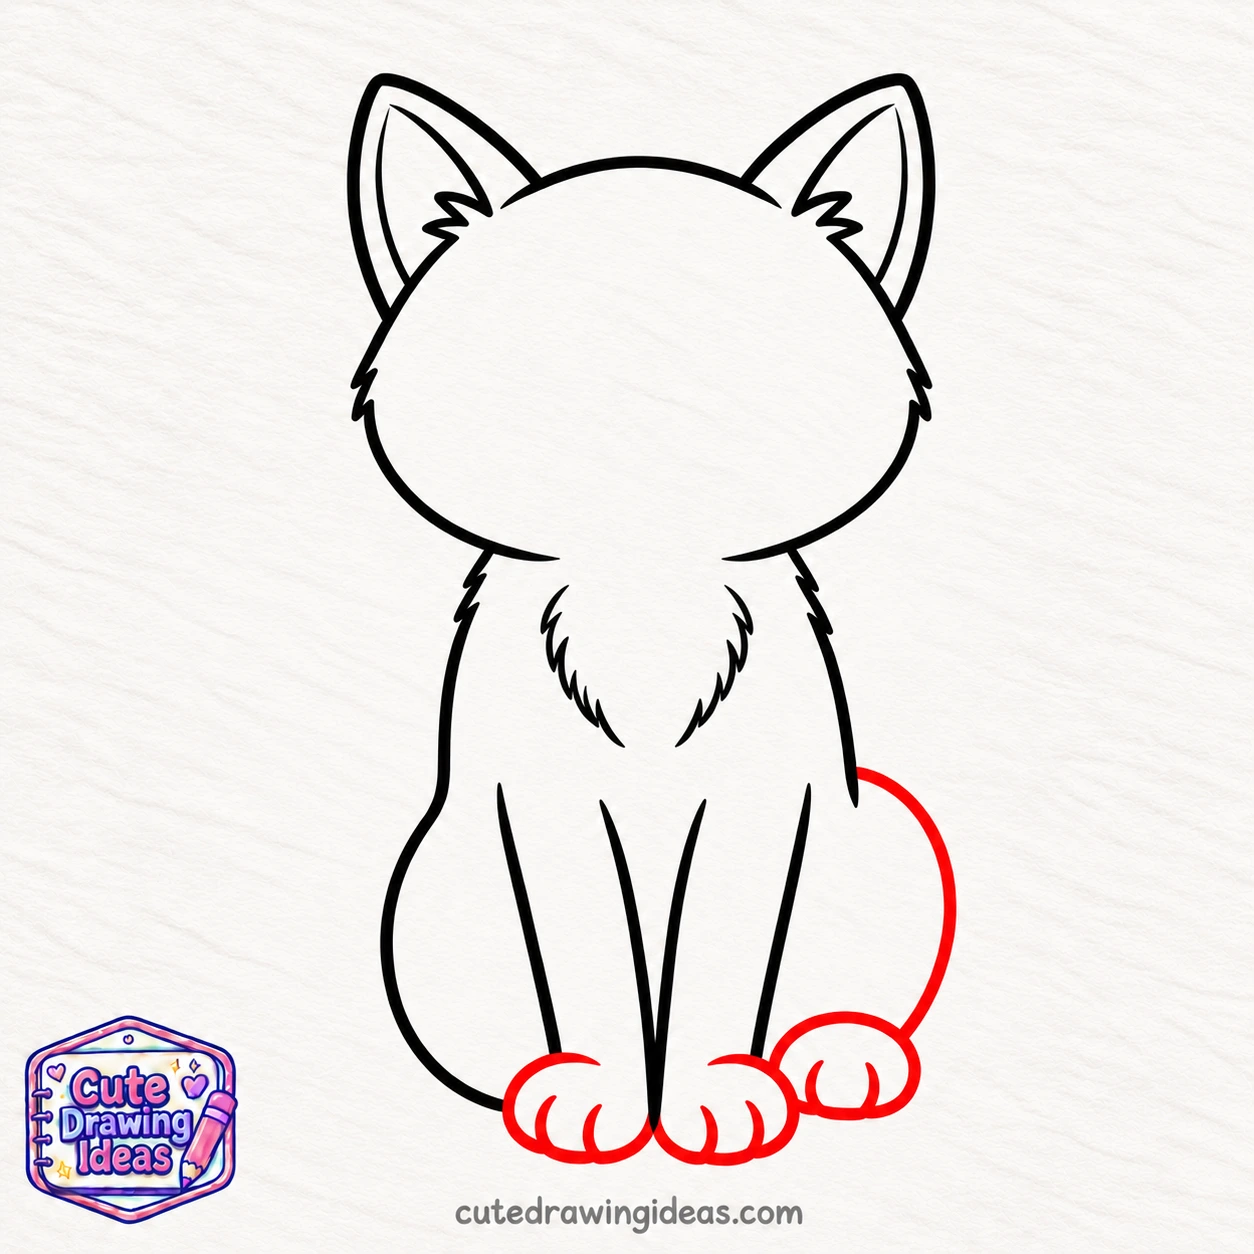
At the bottom of each front leg, draw a small, rounded paw.
Add two short curved lines inside each paw to suggest the toes.
Next, start along the lower right side of the body and draw a wide outward curve. Bring it down toward the ground beside the front paws.
This creates the folded hind leg and helps the cat look comfortably seated.
Erase any parts of the original oval that run through the finished legs.
Step 6: Draw the Cat’s Long Curved Tail
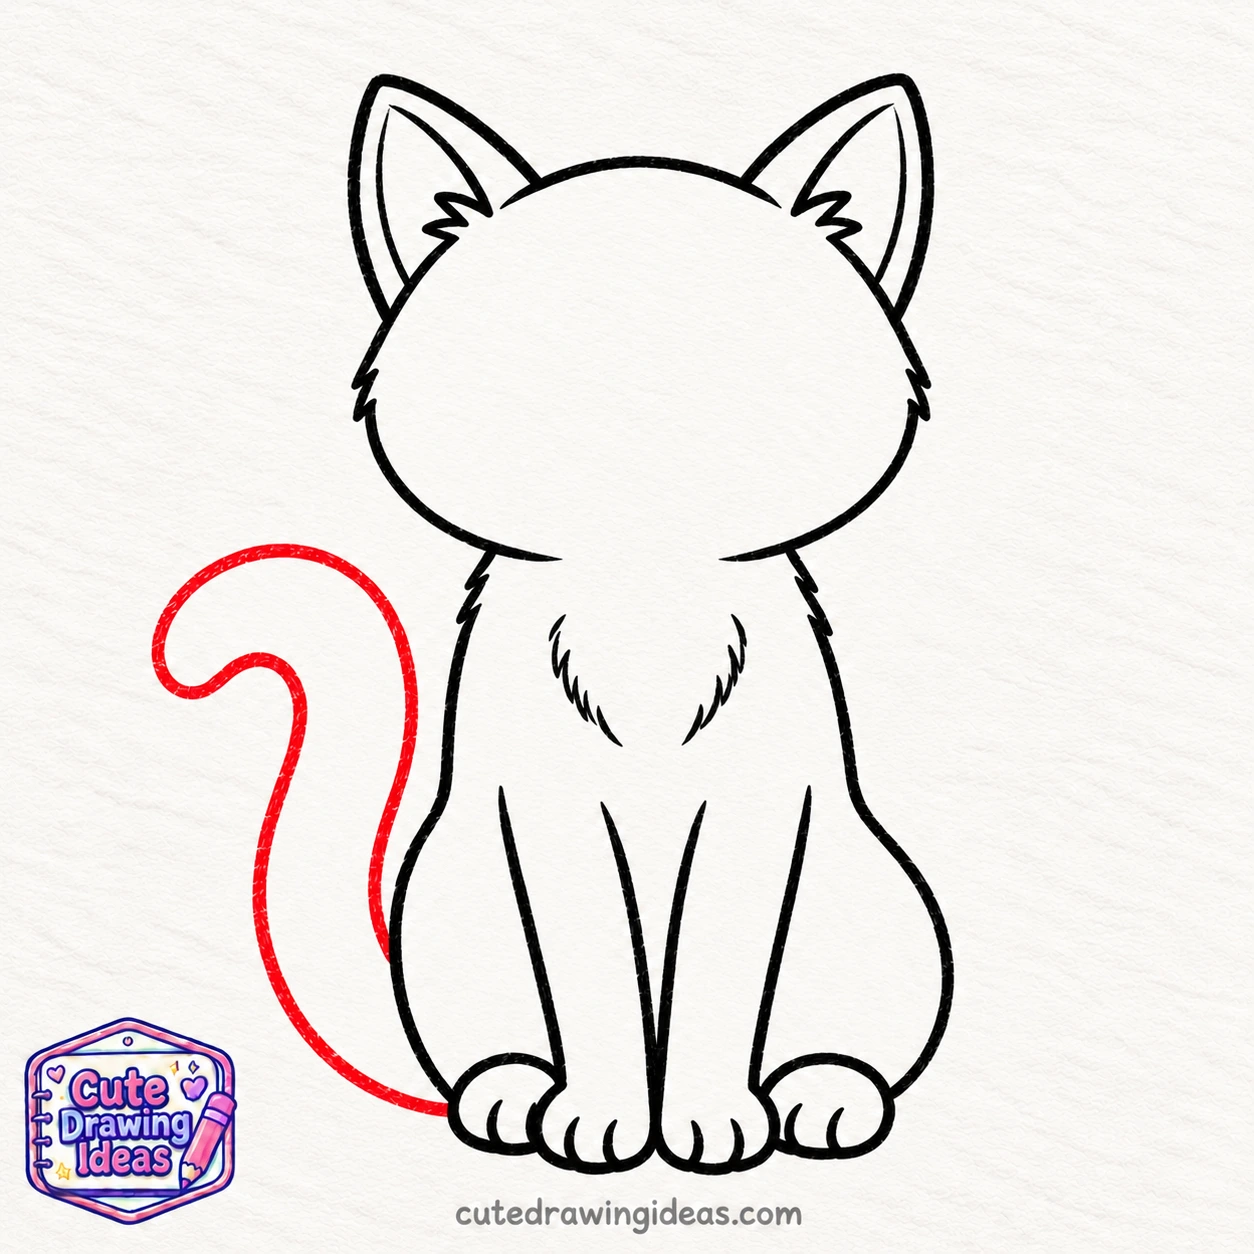
Start the tail near the lower left side of the body, just behind the cat’s back.
Draw a line extending outward, curving upward, and bending gently inward to form a loose hook.
Add another line alongside it, keeping a similar distance between the two lines until they meet at the rounded tip.
Make the tail slightly thicker near the body and narrower toward the end.
This long tail gives our sitting cat a different silhouette from a small, compact kitten drawing.
Step 7: Draw the Cat’s Almond-Shaped Eyes
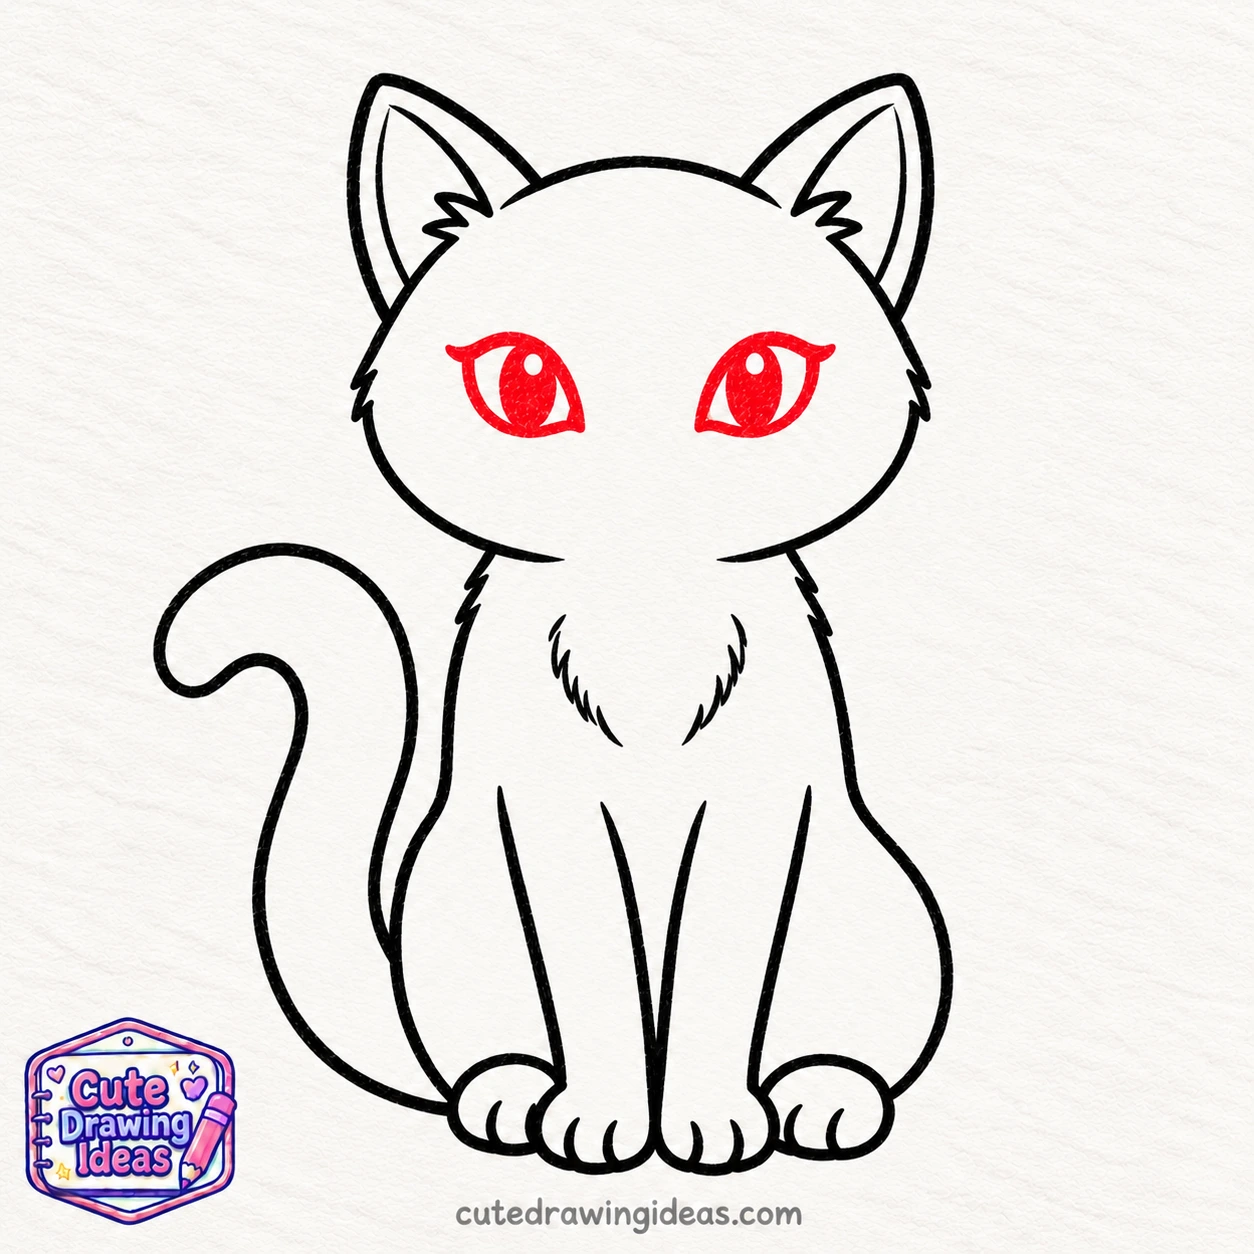
Now let’s work on the cat’s face.
In the upper half of the head, draw two almond-shaped eyes. Give each eye a curved upper edge and a softer lower edge that meet at the corners.
Inside each eye, draw a narrow vertical pupil.
Leave a tiny white highlight near the upper part of each pupil to make the eyes look bright.
Before darkening the lines, check that both eyes are at approximately the same height.
These slightly pointed eyes will give our cat a different expression from a big-eyed cartoon kitten.
Step 8: Add the Nose, Mouth, and Whiskers
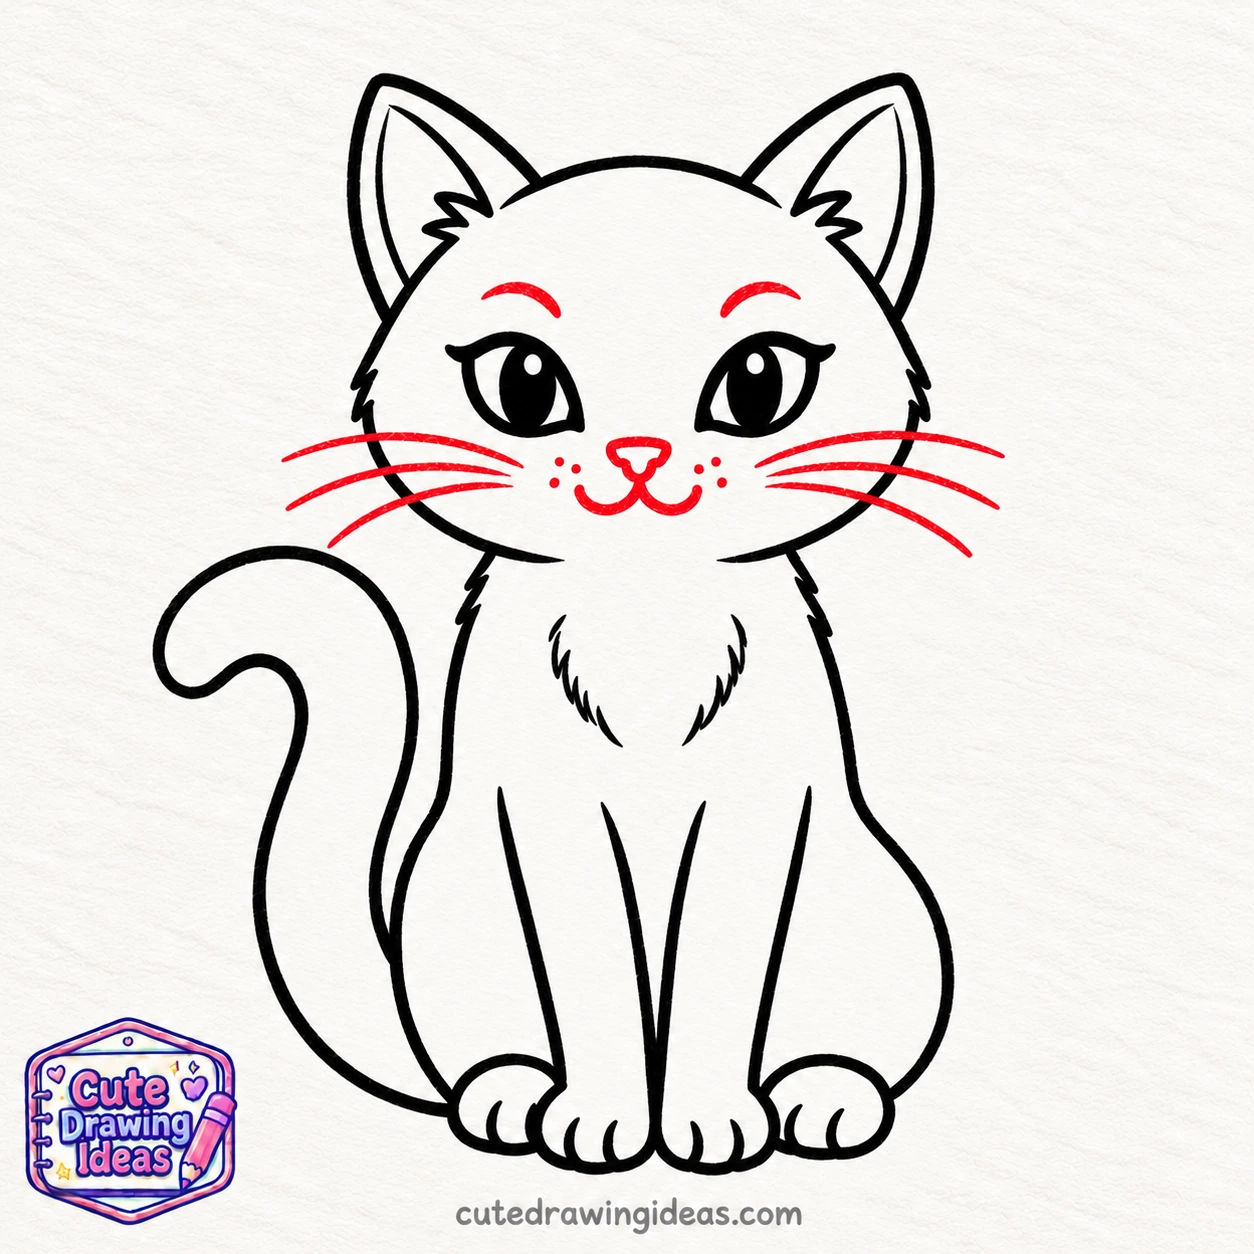
Between the eyes, a little lower down, draw a small upside-down triangle for the nose.
From its bottom point, add a short vertical line. Then draw a small curve on each side to create a gentle smile.
Place three tiny dots on either cheek.
From these areas, draw three long whiskers extending outward on each side of the face.
Let the upper whiskers angle slightly upward, the middle ones stretch outward, and the lower ones curve gently downward.
Our cat face drawing now has its main features in place.
Step 9: Add the Tabby Cat’s Stripes

This is the step that gives our drawing its tabby appearance.
Begin with a simple M-shaped marking across the forehead. Keep the strokes slightly curved so the marking follows the shape of the head.
Next, add a few more markings:
- Draw two short stripes on each cheek, pointing outward.
- Add narrow, curved stripes along the shoulders and sides of the body.
- Draw two or three small stripes across the front legs.
- Add several curved bands across the tail, following its shape.
Keep the muzzle and chest mostly clear to create some contrast between the striped and lighter areas.
A little drawing tip: Tabby stripes don’t need to match perfectly. You can make some shorter or wider, but avoid putting so many close together that the pattern becomes difficult to see.
Step 10: Finish and Color Your Cute Tabby Cat
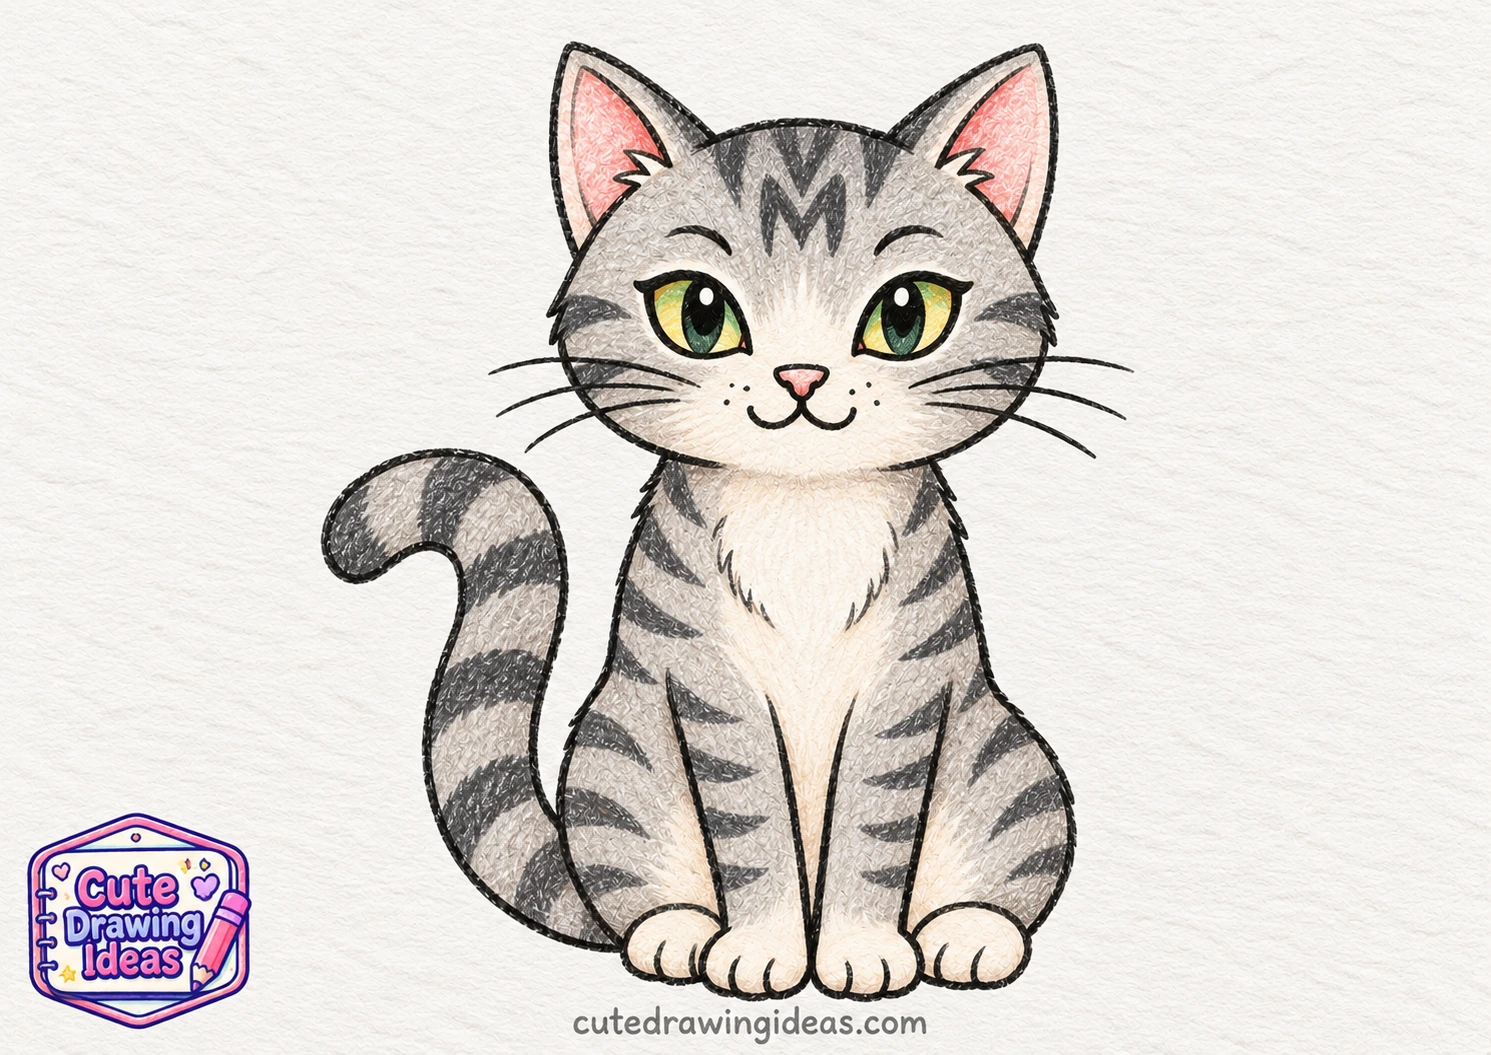
Before picking up your marker, check how the different parts of your sketch connect.
Look at the ears, the front paws, and the point where the curved tail joins the body. Make any small corrections with your pencil.
Once you’re satisfied, carefully trace the outer contour, eyes, nose, mouth, whiskers, and tabby markings with a black marker.
Let the ink dry before erasing the remaining pencil guidelines.
Now it’s time to color your cat. For my tabby, I’ve chosen a soft grey coat with darker charcoal stripes.
Start by lightly coloring the head, body, legs, and tail grey. Leave the chest, chin, and muzzle a lighter shade.
Next, fill in the M-shaped forehead marking, cheek stripes, leg markings, and tail bands with dark grey.
Use pale pink for the nose and inner ears.
For the eyes, try green or golden yellow, keeping the pupils black and the highlights white.
If you’d like a little shading, apply a slightly darker grey beneath the chin and around the folded back leg. This helps separate the overlapping parts of the body.
And there we have our finished sitting tabby cat
Why I Love Drawing Cute Cats
What I like most about drawing cats is how much personality you can give them without adding complicated details. A pair of alert ears can make a cat look curious, while a relaxed tail can make the same drawing feel calm.
For this tutorial, I’ve chosen a sitting tabby cat rather than a tiny, round kitten. Its taller body, almond-shaped eyes, and striped fur give me more interesting features to work with, while still keeping the drawing manageable for beginners.
Easy Tips for Drawing a Cute Cat
Here are a few things I recommend checking while working on your cat sketch.
Keep the sitting pose balanced. The front paws and hind leg should appear to rest on the same imaginary ground line. If one paw looks too high, extend the leg slightly before outlining.
Check the eye spacing. If the eyes seem crowded, lightly erase one and move it outward. Leaving enough room for the nose makes the face easier to read.
Follow the body’s shape with your stripes. Markings along the back should curve around the body, while the tail bands should cross the tail. This helps the fur pattern fit the drawing.
Don’t overcrowd the face. Keep the forehead markings above the eyes and the cheek stripes away from the whiskers so each detail remains visible.
Use light pressure when shading. Build darker areas gradually with your colored pencil rather than pressing hard from the beginning.
Fun Variations of Your Cute Cat Drawing
Once you’ve finished your sitting tabby, try changing its body shape, expression, or pose. Here are five cute cat drawing ideas you can experiment with.
1. Cute Chubby Cat Drawing
For a cute chubby cat drawing, replace the tall body with a shorter, wider oval.
Make the belly noticeably rounder, shorten the front legs, and draw smaller paws. You can keep the striped tabby pattern or give your cat a plain coat.
The wider body and tiny feet will make this version look plump and relaxed.
2. Cute Kawaii Cat Drawing
If you like kawaii cat art, try changing the proportions of your drawing.
Make the head larger, shorten the body, and replace the almond-shaped eyes with small round ones.
Add tiny paws, pink cheeks, and a little W-shaped mouth.
You can make a cute mini cat drawing using this style because the simplified features remain recognizable even at a smaller size.
3. Cute Black and White Cat Drawing
Turn your tabby into a tuxedo cat by replacing the stripes with large patches of black and white fur.
Color the back, tail, and upper head black while leaving the muzzle, chest, belly, and paws white.
Try giving one side of the face a small black patch for a different look.
This variation is also a good way to practice keeping light and dark areas separate without using many colors.
4. Cute Anime Cat Drawing
For an anime-inspired cat, enlarge the eyes and give them thicker upper outlines.
Add a second highlight inside each eye and draw a few pointed tufts of fur along the cheeks.
You can make the ears a little taller and tilt the eyebrows to create a surprised, curious, or slightly grumpy expression.
5. Cute Sleeping Cat Drawing
Instead of keeping your cat upright, try drawing it curled up for a nap.
Start with a wide oval body, tuck the paws under the chin, and curve the tail along the lower edge of the body.
Use two short downward curves for the closed eyes and a tiny relaxed mouth.
Add a few stripes along the back to turn it into a sleeping tabby cat.
Fun Facts About Tabby Cats
Before you put your pencils away, here are a few interesting things about the striped cats we’ve been drawing.
- Tabby isn’t a cat breed. It’s a coat pattern that can appear in many different breeds and mixed-breed cats.
- Tabby patterns come in different designs. Some cats have narrow stripes, while others have swirling markings or spots.
- Many tabby cats have an M-shaped marking on their foreheads. That’s the familiar pattern we added above our cat’s eyes.
- Tabby cats aren’t always grey. Their coats can include brown, orange, cream, and other colors.
Next time you see a tabby cat, look closely at its forehead, legs, and tail. You might find a new stripe pattern worth trying in your sketchbook.
Frequently Asked Questions
Can I make a cute cat drawing without guidelines?
Yes. If you’re comfortable sketching, you can begin with the cat’s outer outline. However, I recommend light pencil guidelines for beginners because they help position the head, body, and legs before adding smaller details.
How can I make the cat’s eyes look even?
Lightly mark the position of both eyes before drawing their full shapes. Check that they’re at the same height and leave enough space between them for the nose. Once you’re happy with the placement, finish the outlines and pupils.
How do I draw cat fur without drawing every hair?
Use a few short pencil strokes along the cheeks, chest, or edges of the body. Let the strokes follow the direction of the fur. You only need a handful to suggest texture, especially in a simple cartoon cat drawing.
Can I use brown or orange instead of grey for my tabby cat?
Absolutely. The stripes are what give this drawing its recognizable tabby pattern. You can use brown with dark brown markings, orange with deeper ginger stripes, or another combination you like.
Keep Drawing
Every little drawing helps you get better. Now that you know how to draw a fish, try making another one with a different tail, a bigger eye, or a new color.
You could even draw a whole page of little fish swimming together.