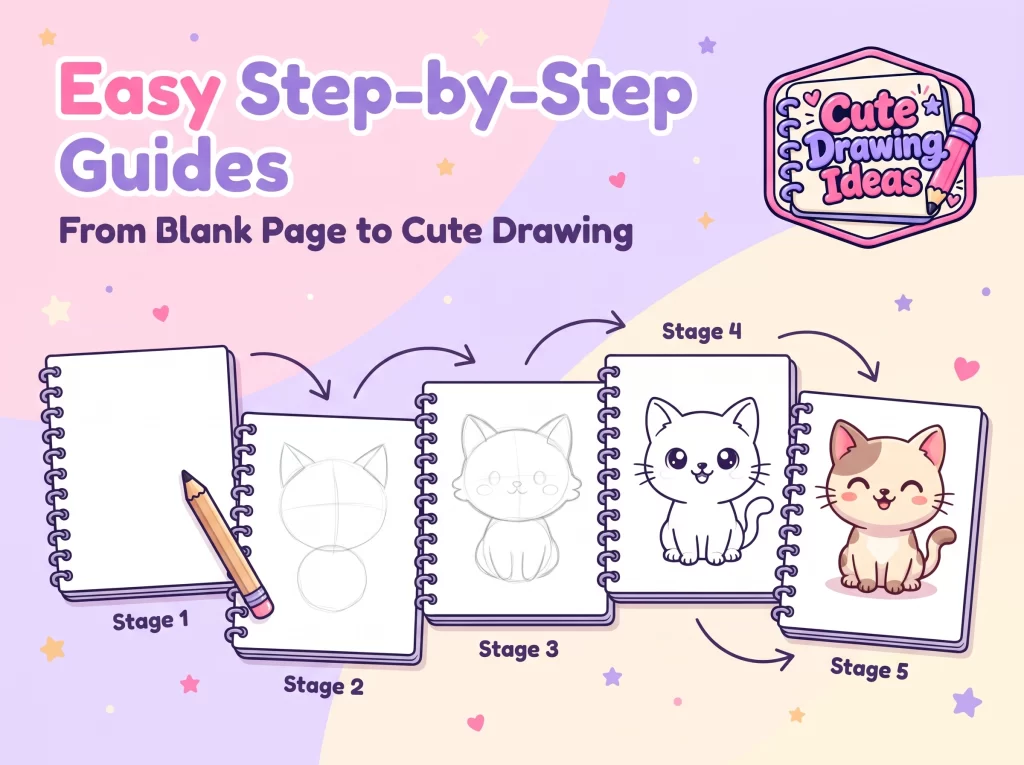
Easy step-by-step drawing guides take the hardest part of drawing, knowing where to begin, and do it for you.
Every cute drawing is broken into small stages. You start with a circle or an oval, then add one thing at a time until a finished picture appears on your page.
A blank page can feel like a big ask. Most people don’t get stuck because they lack talent.
They get stuck because they try to draw the whole picture at once. A cat becomes a round head, two triangle ears, and a soft body. A cupcake becomes a rounded top, a small cup shape, and a few sprinkles.
Whether you’re a child picking up a pencil, a parent drawing alongside your kid, or an adult who hasn’t drawn since school, this page explains how the method works and how to get the most from it.
Make Drawing Easy for Everyone
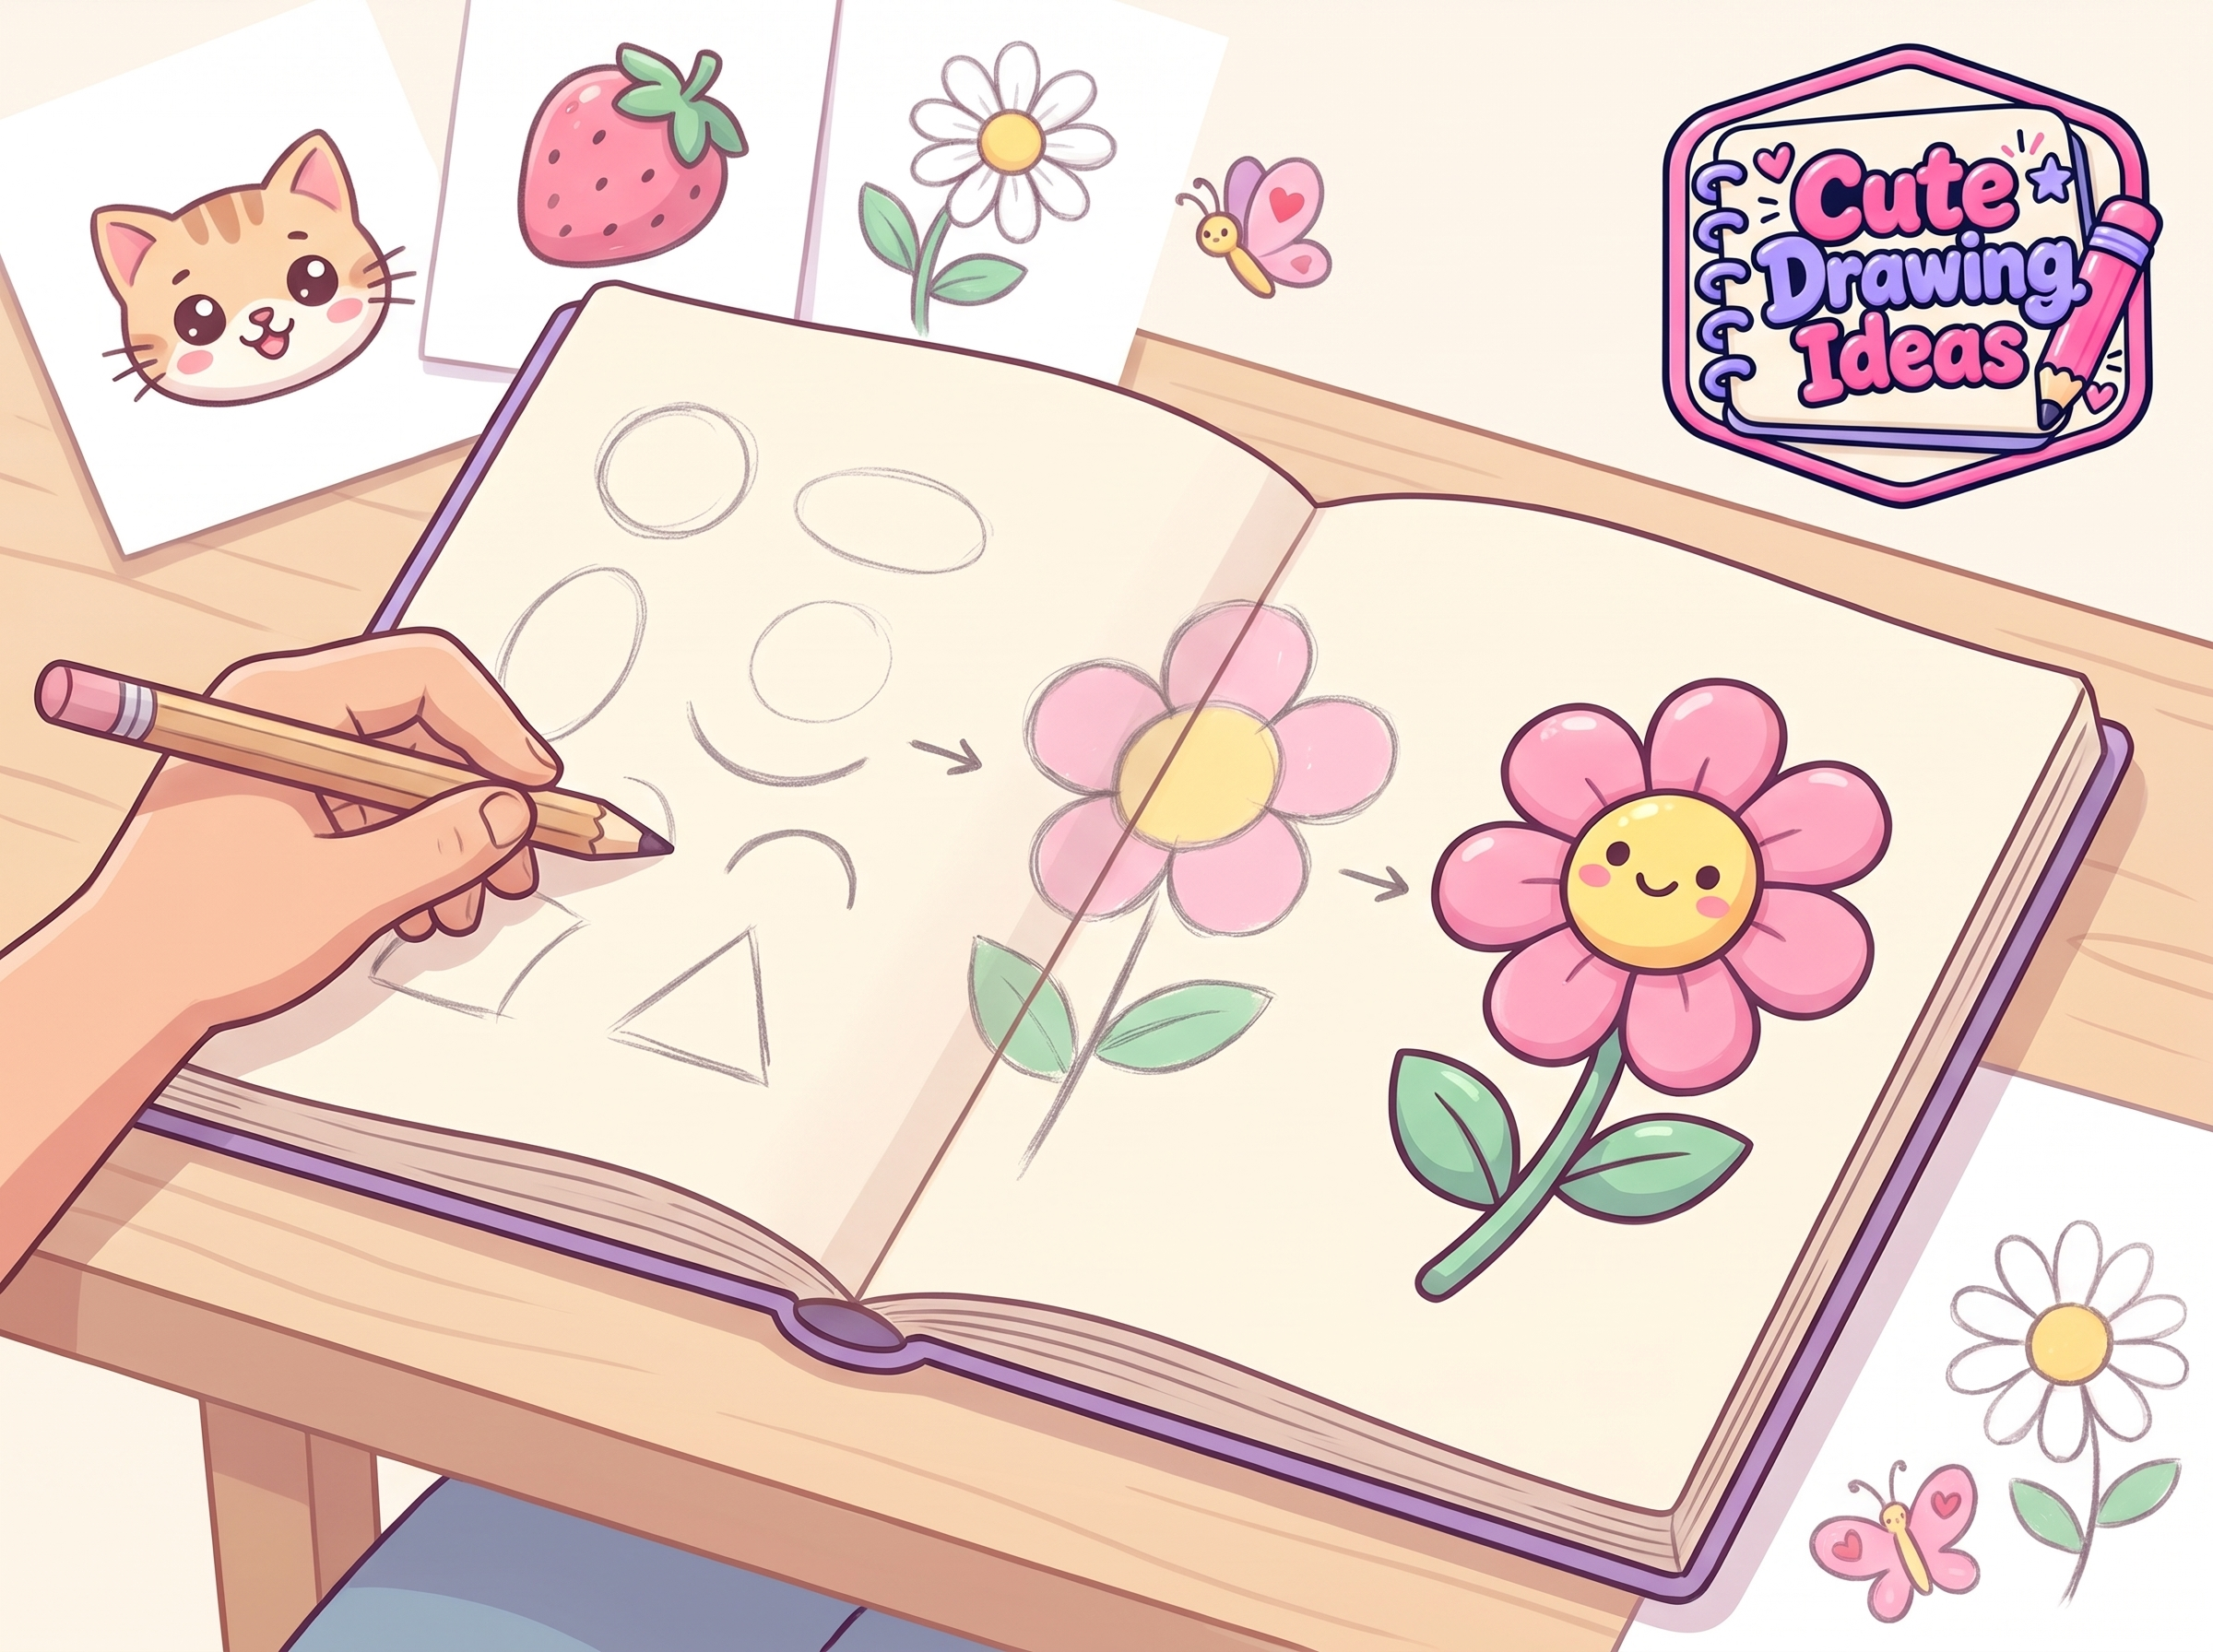
Drawing is a skill, but it is also a habit and a way to relax.
The easiest way to build both is to make the first step small enough that you can’t fail at it.
Why a blank page feels hard
When you look at a pizza, a puppy, or a flower, your brain sees one finished object. It doesn’t automatically see the circles, triangles, and curves underneath.
So you freeze because you don’t know which line to draw first. The guides solve that by showing the order, one small stage at a time.
Who these guides are for
- Kids who want a fun, screen-free activity and clear steps they can follow on their own.
- Parents and caregivers who want something simple to draw together without needing any art skills.
- Teachers who need a short, low-prep art activity for the classroom.
- Adults and hobbyists who want a relaxed way to start drawing or to restart after years away.
What Are Easy Step-by-Step Drawing Guides?
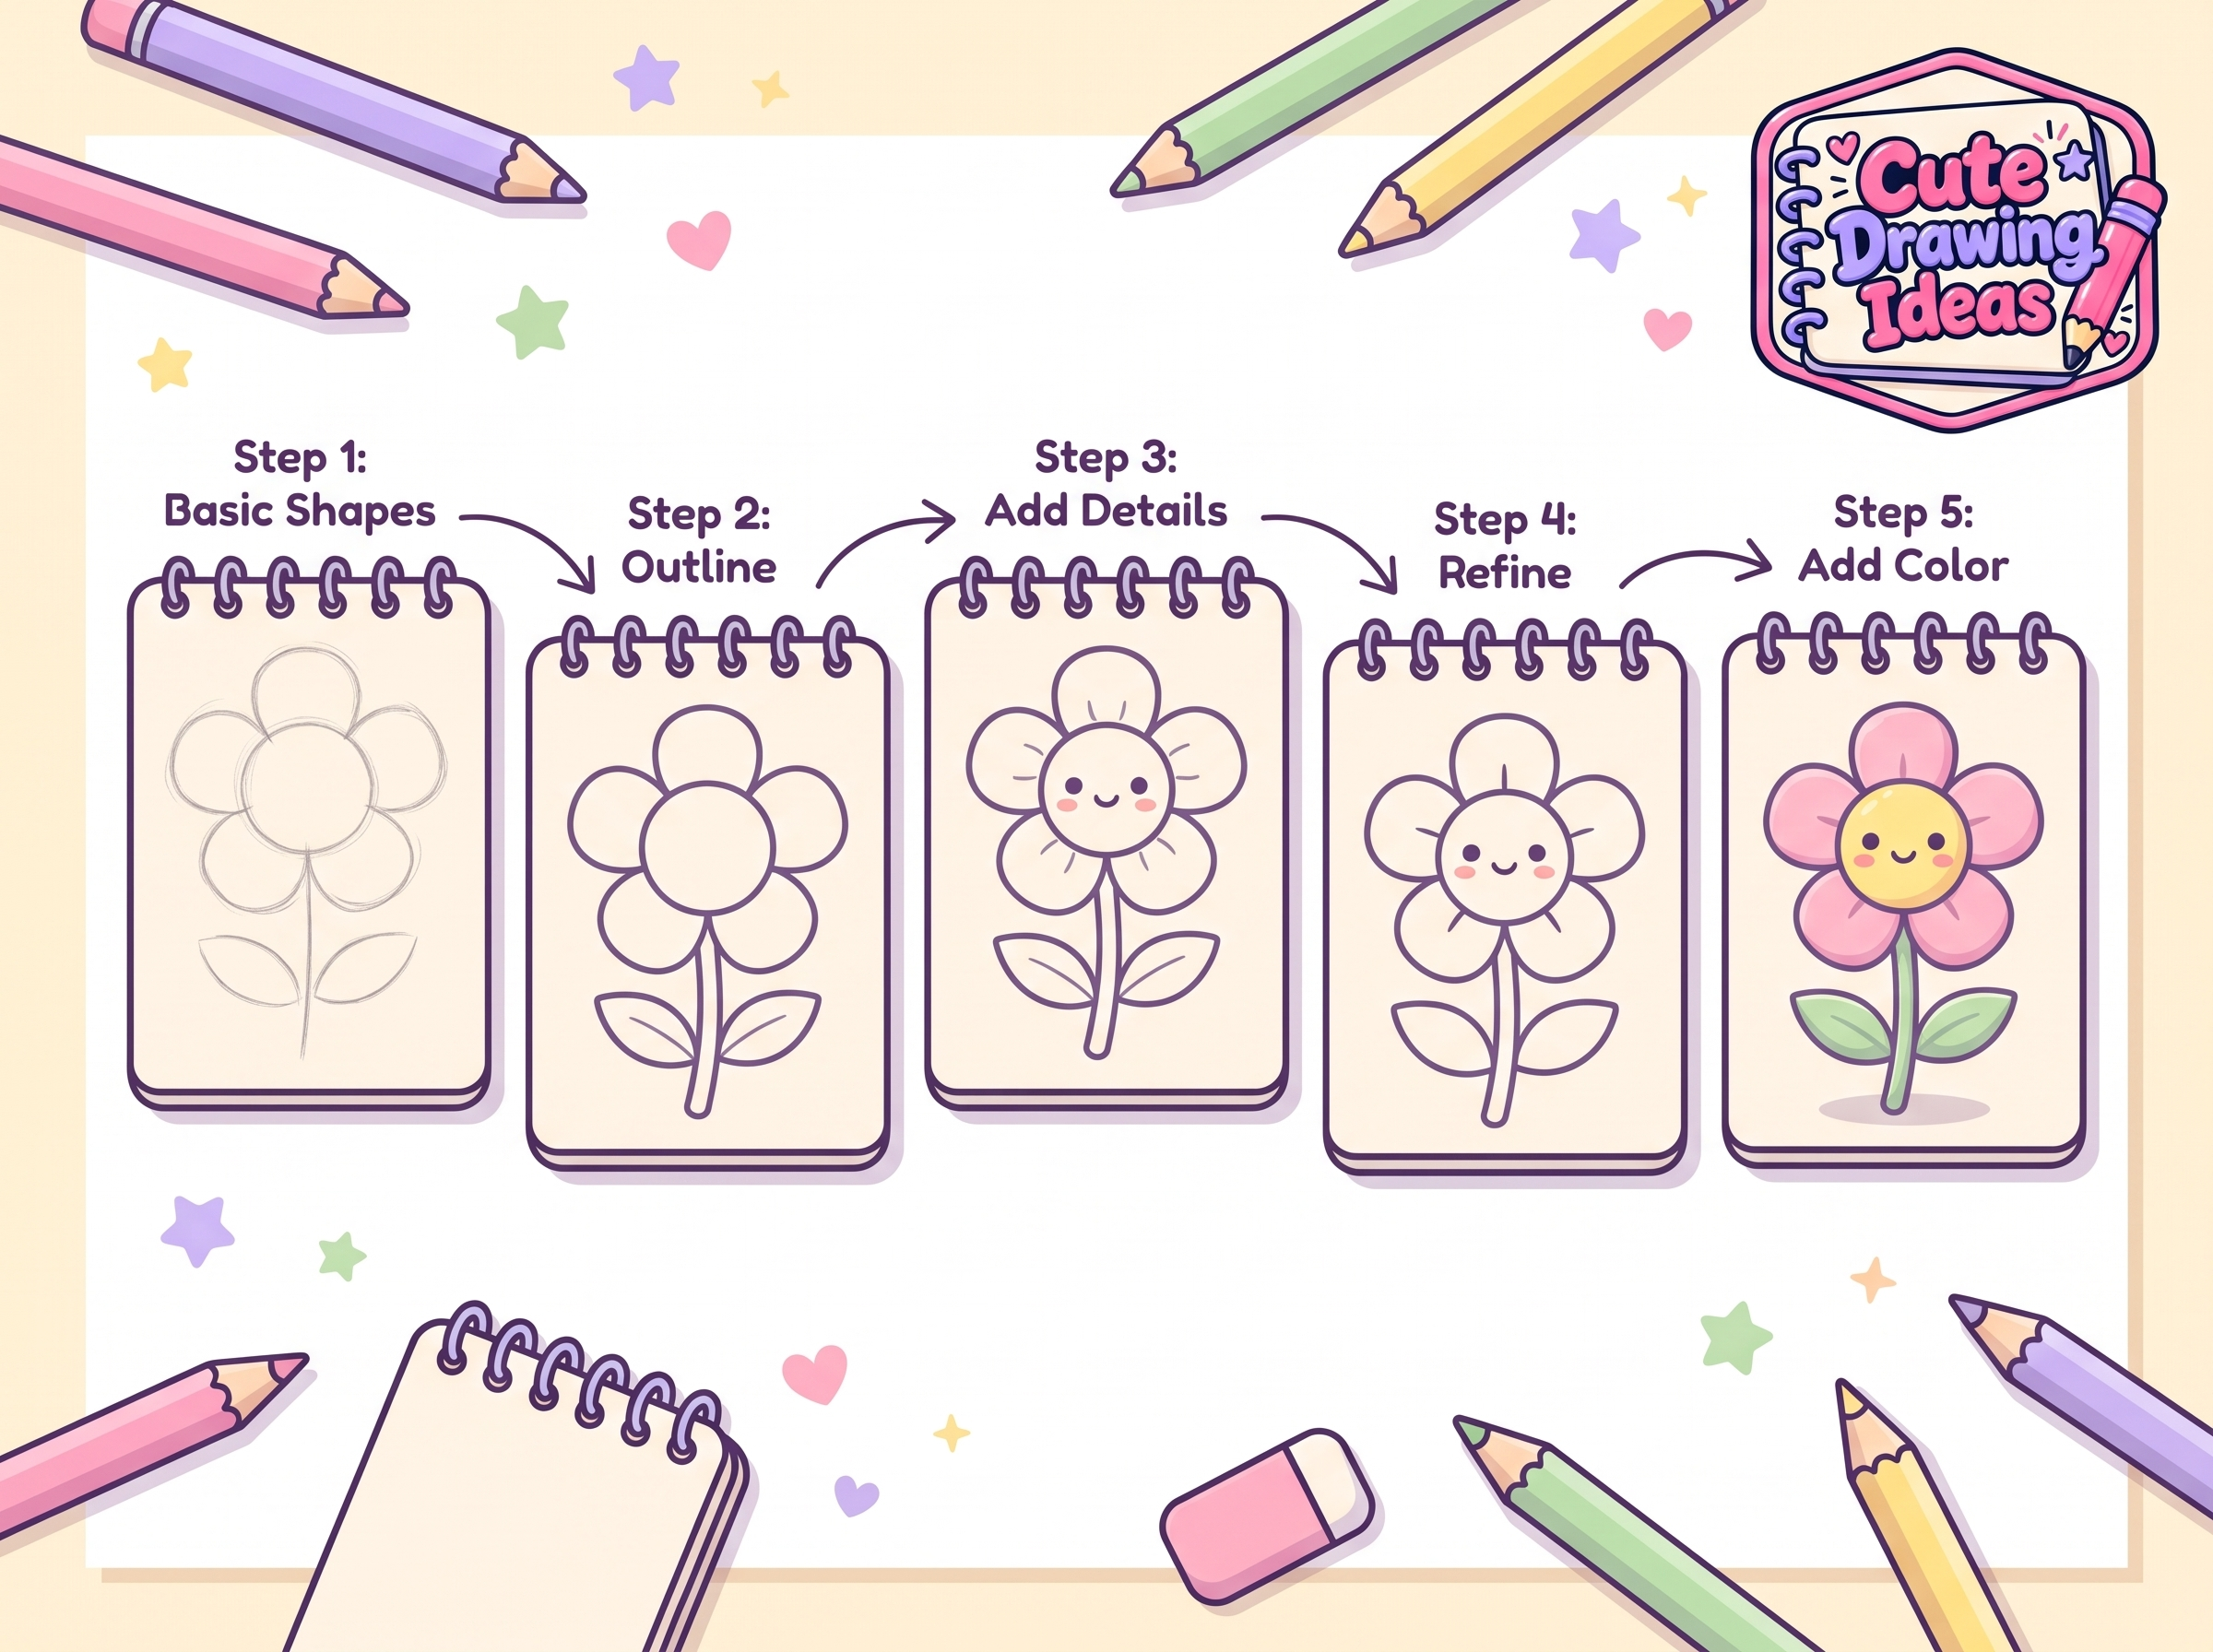
A drawing split into small stages
A step-by-step drawing guide shows a drawing being built in order. You begin with simple shapes, then follow each stage until the picture is complete.
You never have to figure out where to begin, because the guide has already worked that out. Each stage adds only one or two lines, so you always know exactly what to do next.
Why they work when you’re not an experienced artist
Experienced artists look at a pizza and see its shapes without thinking. Beginners often just see “a pizza,” which is hard to copy.
A guide does that breakdown for you. It turns something complicated into circles, triangles, curves, and lines, which anyone can draw.
That’s why easy step-by-step drawing tutorials suit beginners, kids, and anyone who wants a relaxed way to draw. You’re copying one small step at a time, not the whole picture.
Step-by-step guides vs. tracing vs. freehand
Tracing copies the outline but doesn’t teach you how the drawing is built. Freehand drawing from imagination is great, but it’s hard to start with. Step-by-step guides sit in the middle. You draw every line yourself, so you build real skill, and the steps keep you from getting lost. After a few guides, many people find they can draw simple subjects freehand without any help.
How Our Step-by-Step Drawing Process Works
The same seven stages apply to almost every drawing. Learn them once, and you can use them on any subject.
We’ll walk through them with a cute ice cream cone and show how the same stages work for a simple pet.
Step 1: Choose a drawing idea you like.
Pick something that makes you smile. You’ll enjoy finishing a drawing you’re excited about much more than one you chose because it seemed easy.
If you’re new to drawing, a simple subject such as a single scoop of ice cream, a fruit, or a round-faced cat is a good place to start.
Not sure what to pick? Look at what’s around you right now: a snack, a pet, a mug, a plant. Drawing something you can see or love makes the process feel personal from the first line.
Step 2: Gather your basic drawing materials.
You don’t need special supplies. A pencil, an eraser, and plain paper are enough. Add colored pencils, crayons, or markers when you’re ready to color.
A pencil matters because it lets you draw lightly first and fix things later. If you plan to ink your drawing, a fine-tip pen or marker works well once the pencil outline is final.
Step 3: Start with simple shapes and guide lines.
For an ice cream cone, draw a circle for the scoop and a triangle pointing down for the cone. For a pet cat, draw a circle for the head and an oval for the body. Press lightly. These are guide shapes, and most of them will be erased later, so don’t worry about making them perfect.
A light vertical line down the middle of a face or body helps you place eyes, ears, and arms evenly. Treat it as a helper, not part of the final drawing.
Step 4: Build the main outline
Now trace around the shapes with a smoother, more confident line. Give the ice cream scoop a wavy, dripping edge where it meets the cone. Turn the cat’s circle into a head with two pointed ears and a rounded chin. This is the stage where the drawing starts to look like the real thing.
If a line feels wobbly, redraw it in short, light strokes until it feels right. Nobody gets a perfect outline on the first try.
Step 5: Add recognizable details and cute expressions
Details are what make a subject recognizable. Add a waffle pattern to the cone or whiskers and a small nose to the cat. For a cute style, keep details small and simple. Two small oval eyes and a tiny curved smile on the ice cream scoop turn it into a character.
Keep faces small and place the features low and close together. A few clear details look cuter than many busy ones.
Step 6: Erase the guidelines
Once the outline looks right, gently erase the guide shapes you no longer need. This step makes a big difference. Your drawing looks cleaner and more finished, and many people enjoy it as the first moment their drawing really looks like something.
Erase in one direction with light pressure so you don’t smudge the lines you want to keep.
Step 7: Add colors and personal touches
Color it in. An ice cream scoop might be pink, mint, or a color that doesn’t exist in real life. Then make it yours: add sprinkles, a cherry on top, a heart in the background, or a name tag on your cat’s collar.
There’s no rule that your drawing has to match the example. Your own changes are what make it yours.
Explore Different Types of Drawing Ideas

Simple drawing ideas are everywhere once you start looking. Here are some ways to find your next one.
How to draw cute food
Food is a favorite starting point because the shapes are simple and friendly. Pizza slices are triangles, burgers are stacked ovals, and cupcakes are a circle on a small cup. Fruits and vegetables are easy, too: an apple is a rounded shape with a stem, and a carrot is a long triangle with leafy lines.
If you want to learn how to draw cute food, give it a smiling face and a little blush on its cheeks. Sweets such as donuts, ice cream, and boba make especially good first subjects.
Animals and pets
Cats, dogs, rabbits, and birds have round heads, soft bodies, and simple ears or beaks. Because pets have strong personalities, you can show a lot with small changes: a sleepy puppy with droopy ears or a curious rabbit with a tilted head.
Everyday objects
Look around you. A book is a rectangle with a curved spine. A pencil is a long rectangle with a point. A cup is an oval with a handle. A backpack is a rounded rectangle with a pocket. Objects you use every day are a good way to practice because you can look at the real thing while you draw.
Daily-life activities
Drawing from everyday life gives you endless ideas: a child reading under a blanket, a watering can next to a plant, a bowl on a kitchen table, and a backpack by a school desk. These scenes combine the simple objects and characters you’ve already practiced.
Nature and flowers
Leaves, flowers, trees, and butterflies repeat the same few shapes. A simple flower is a circle with rounded petals around it. A tree is a trunk with a cloud-shaped top. A butterfly is two mirrored pairs of wings. These are easy to practice, and they look lovely colored in.
Cute characters and fun doodles
Almost anything can become a character if you give it a face. A smiling cloud, a cheerful cup, or a sleepy moon starts with a basic shape and two eyes. This is the most playful category, and it’s a good way to build your own style.
The Basic Shapes Behind Every Cute Drawing
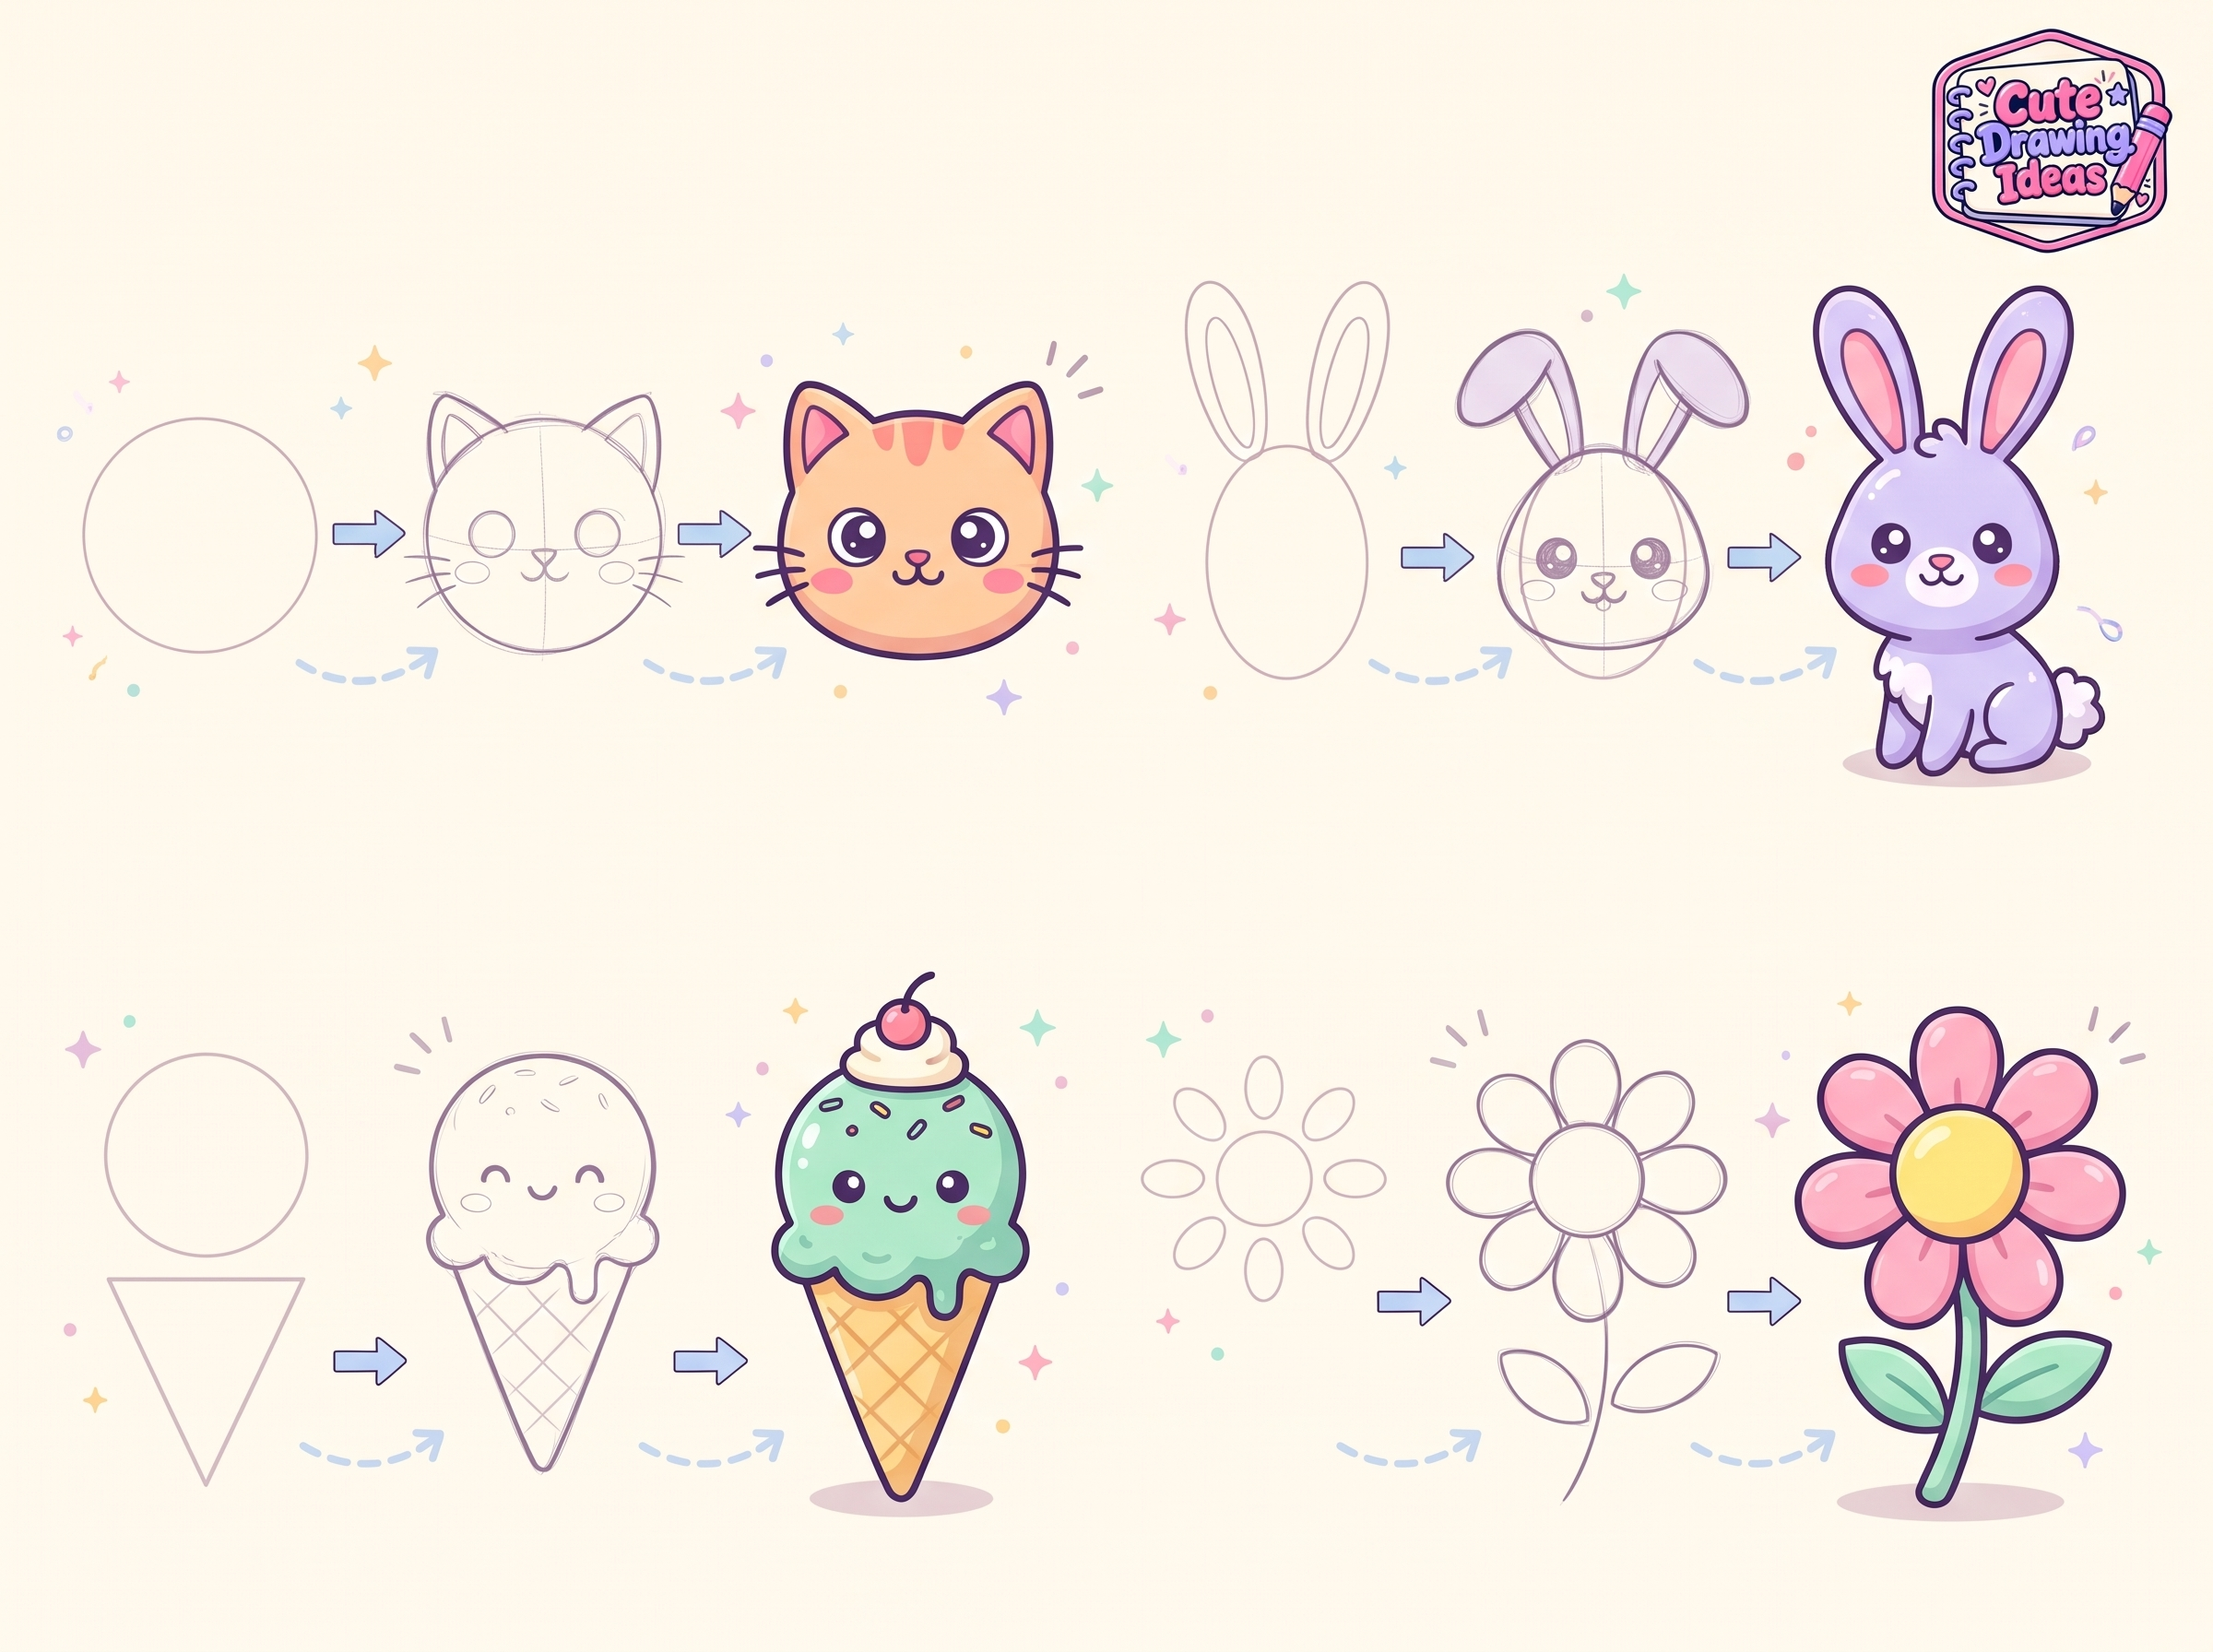
Almost every drawing in our guides is built from a handful of shapes. If you can draw these comfortably, you can draw nearly anything.
Circles and ovals
Circles and ovals make heads, bodies, scoops, fruits, clouds, and eyes. Practice drawing them in one smooth motion. Slightly squashed or stretched ovals give you cheeks, bellies, and cups.
Triangles and rectangles
Triangles become ears, cones, pizza slices, and roofs. Rectangles with rounded corners become books, backpacks, and boxes. Rounding the corners is one of the easiest ways to make any shape look friendlier.
Curves and lines
Gentle curves make smiles, tails, leaves, and steam. Short straight lines make whiskers, rays of sunshine, and stitches. Practicing a few curves before you start is a quick warm-up for your hand.
How Our Guides Help Children Learn Drawing
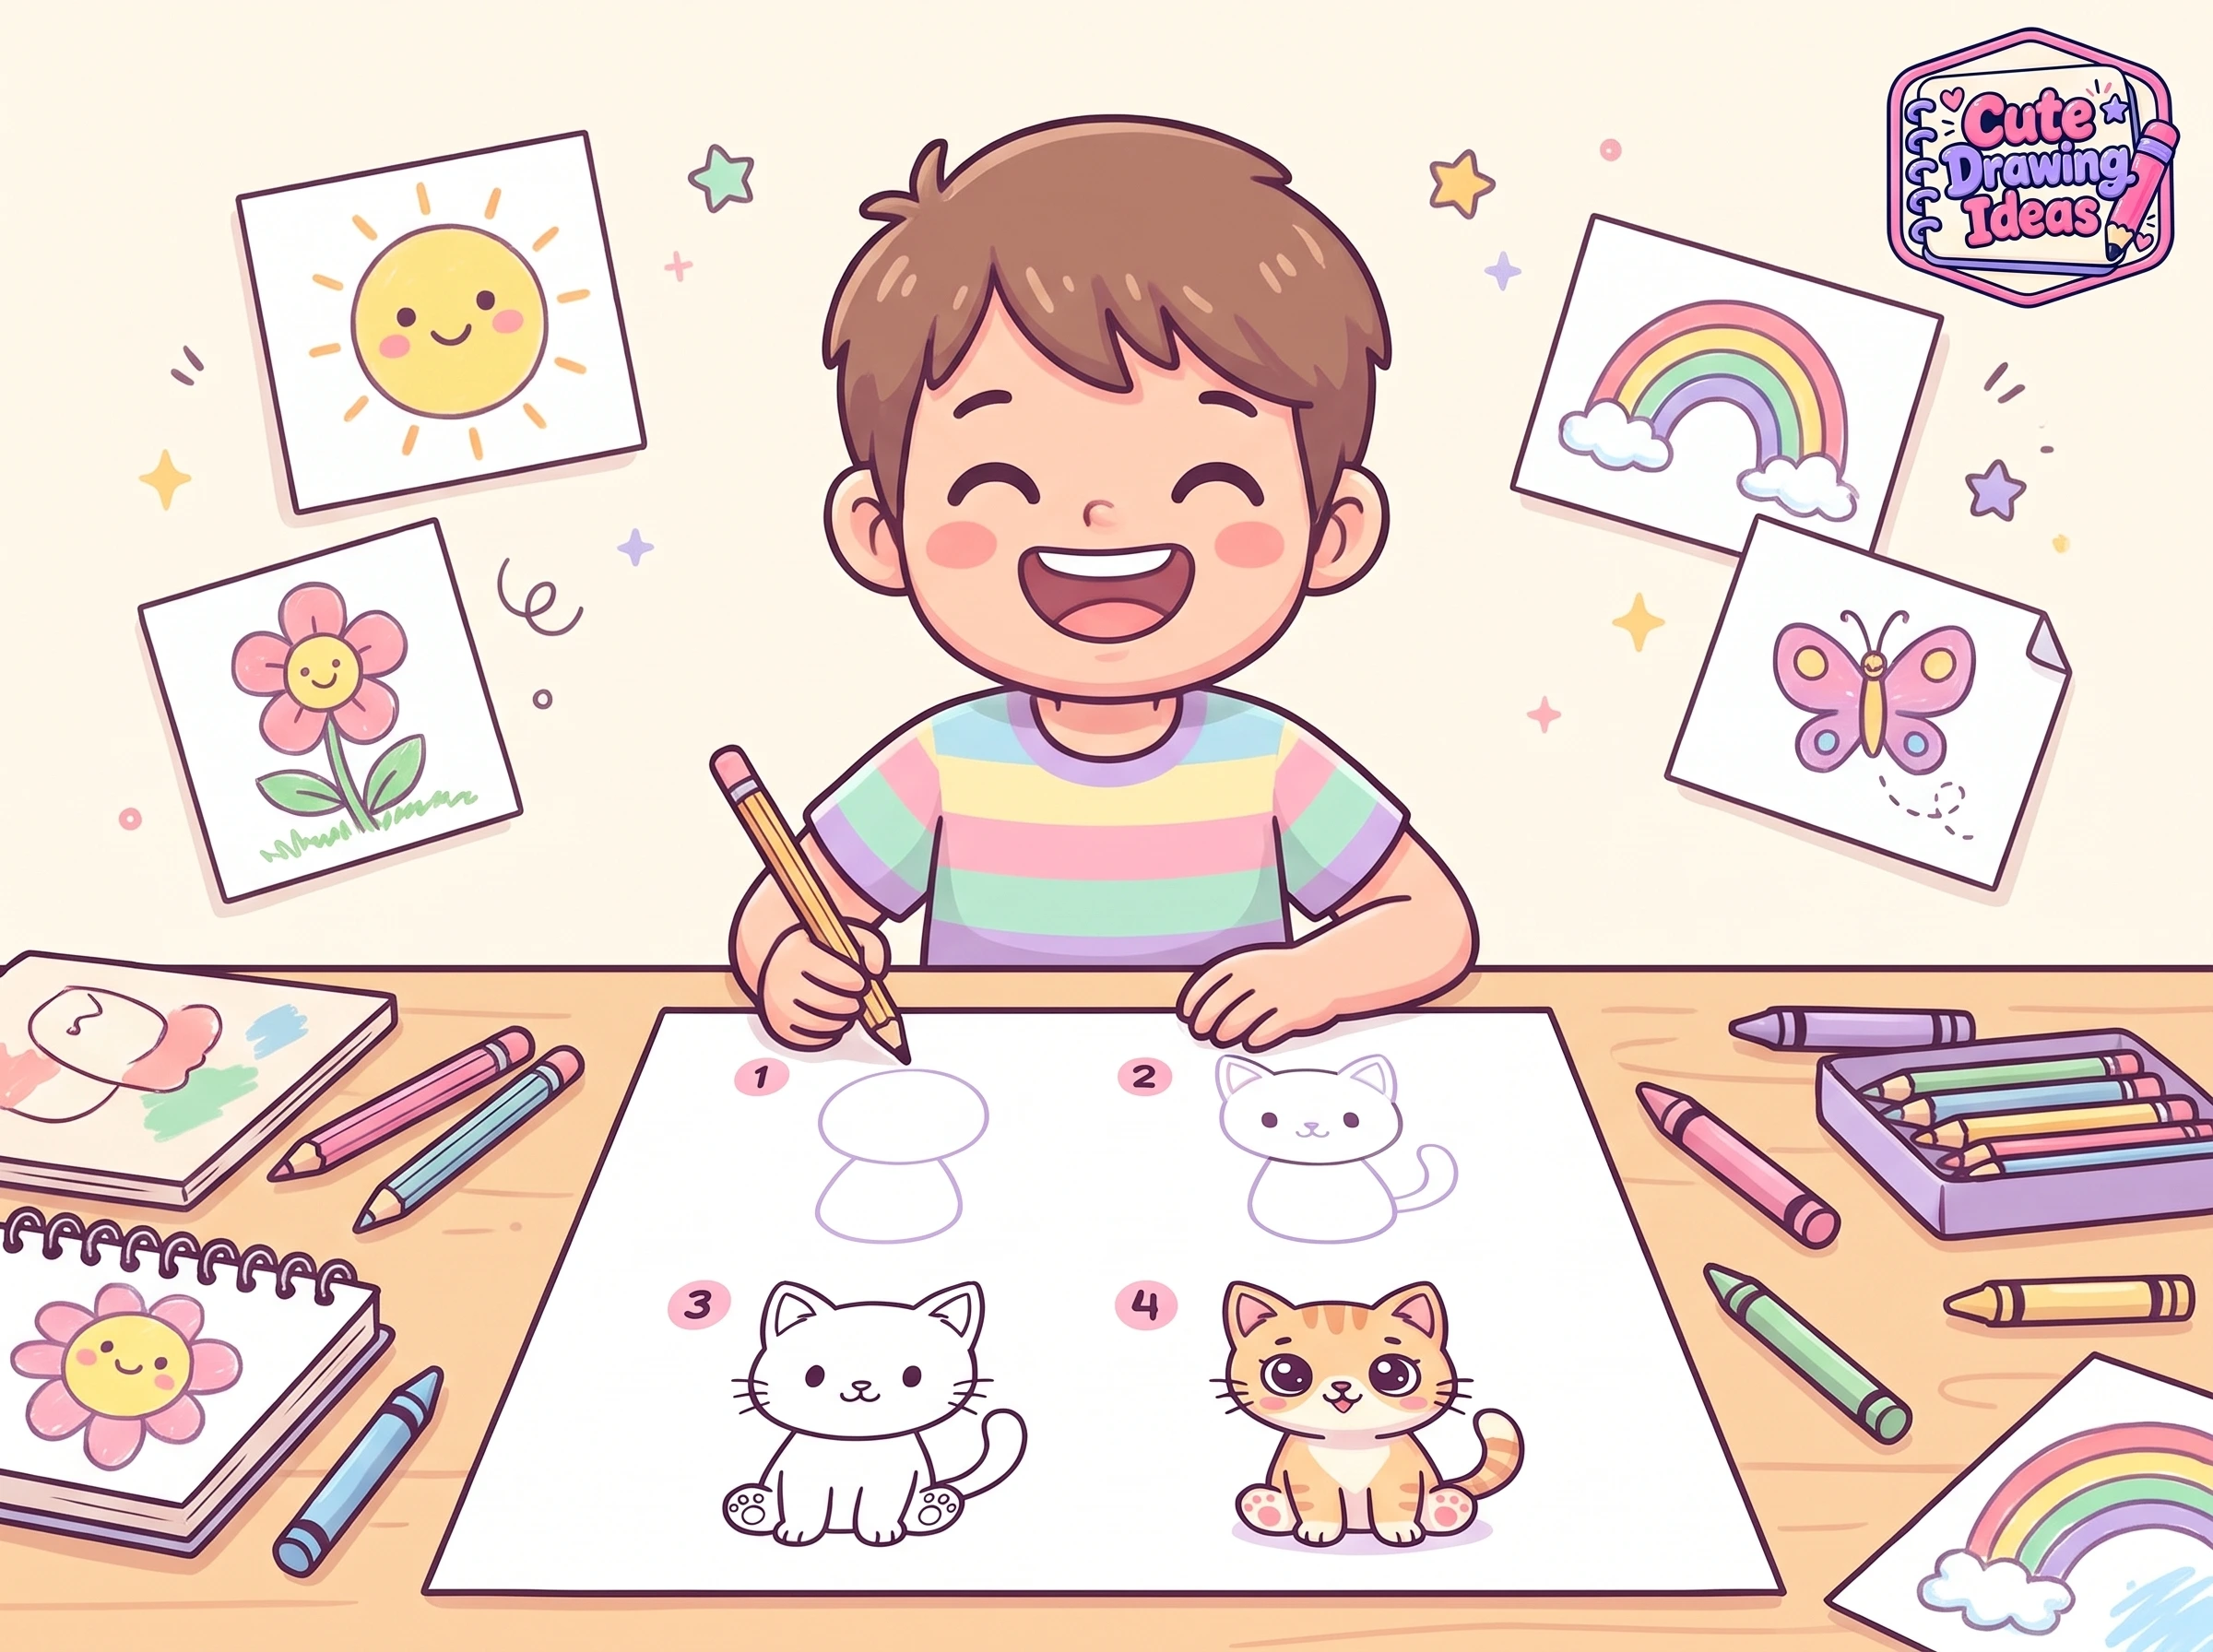
Drawing is a calm, hands-on activity, and following a guide can support some useful habits.
Every child is different, but here is what many children get from age-appropriate drawing activities.
Creativity and imagination
Children can choose colors, add details, and invent their own versions. Even when everyone follows the same steps, no two drawings come out alike.
Observation skills
Looking at shapes and how they fit together encourages children to notice details in the world around them, such as the triangle ears on a cat or the round top of a cupcake.
Hand-eye coordination
Tracing curves and straight lines in a drawing gives children a chance to practice controlling a pencil, which supports handwriting later on.
Patience and focus
Completing a drawing in stages teaches children to take their time and finish what they start.
Confidence
Finishing a drawing, even a simple one, gives children something they made themselves. Showing it to a parent, teacher, or friend adds to that pride.
These are possible benefits of regular drawing practice, not guarantees. Progress comes at different speeds, and enjoying the process matters more than the result.
Drawing Guides for Complete Beginners
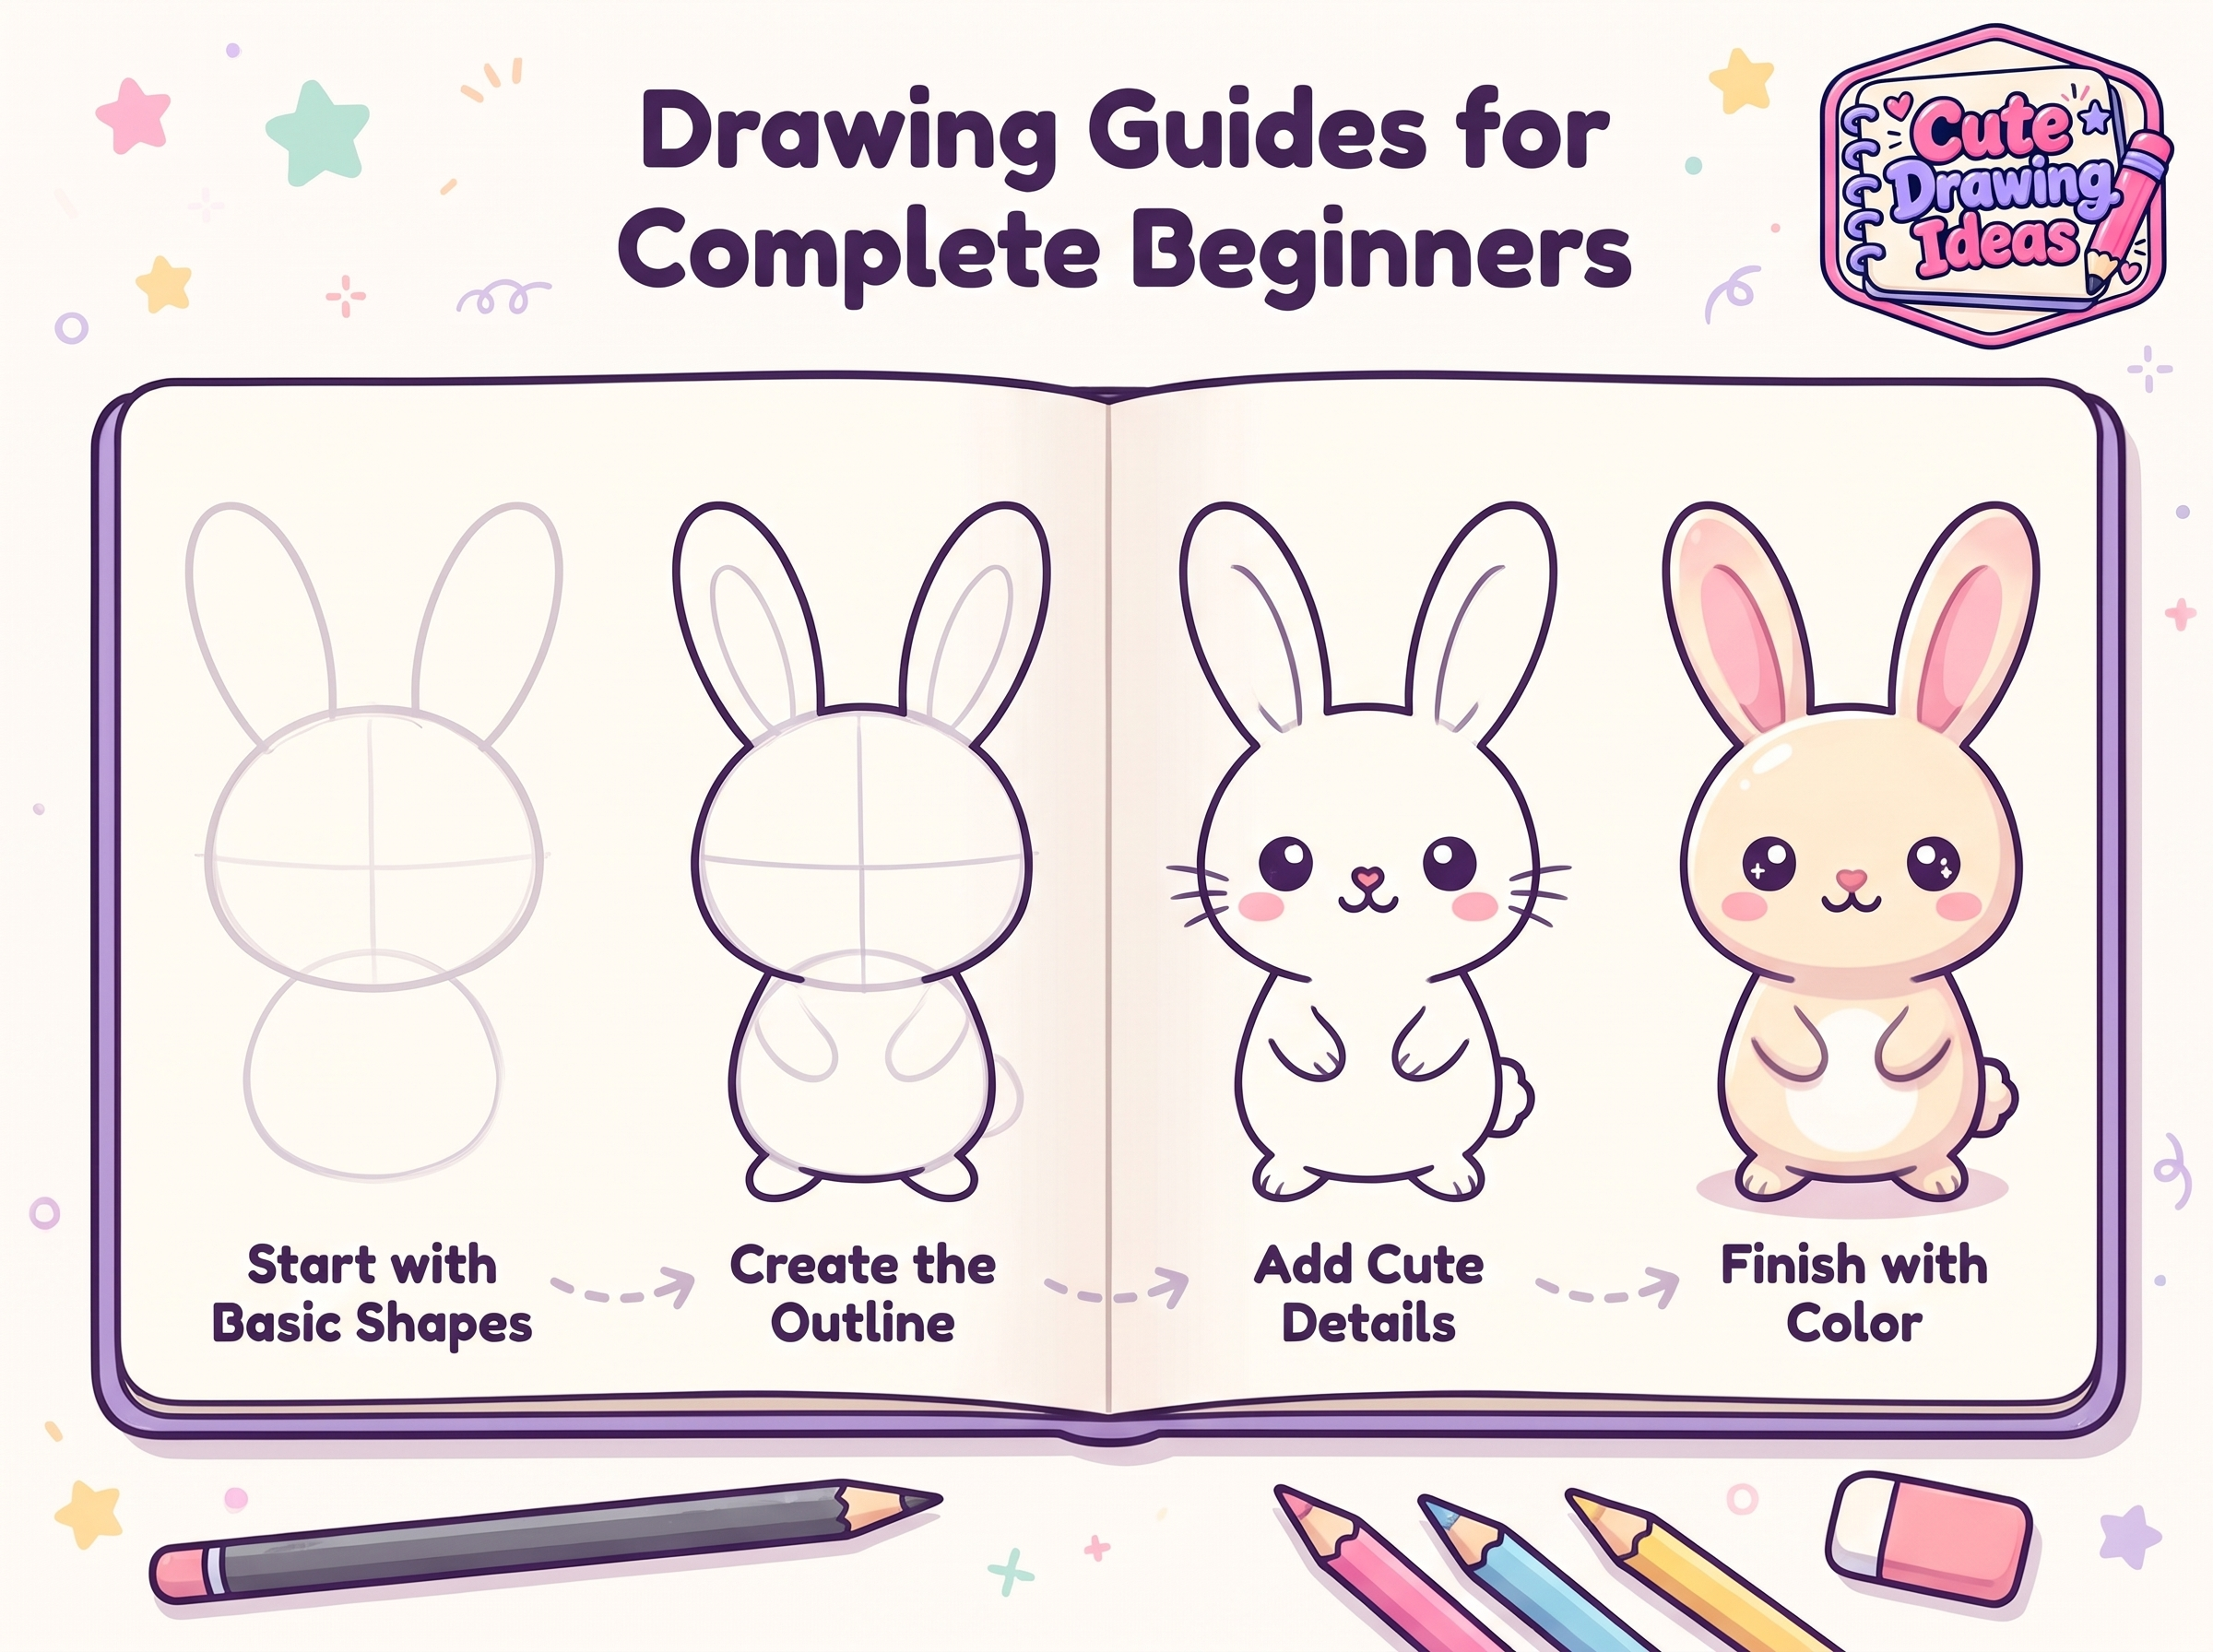
If you have never followed a drawing guide, start small. You don’t need to feel confident to begin.
Practice shapes and lines first.
Spend a few minutes drawing circles, ovals, triangles, squares, and curved lines. This warms up your hand and shows you that the shapes are easy. Everything in our guides is built from them.
Start with simple subjects.
Choose drawings with a small number of shapes, such as a fruit, a single scoop of ice cream, or a round pet face. Draw them a few times before moving on. The second attempt is usually better than the first.
Move up gradually: Beginner, Intermediate, and Advanced
When simple drawings feel comfortable, try ones with more parts, such as a full-body pet, a stack of pancakes, or a flower with leaves. Moving up slowly means you build skill without feeling lost. Our Beginner, Intermediate, and Advanced categories are set up with this progression in mind.
A simple four-week practice plan
- Week 1: Warm up with shapes, then draw one fruit and one scoop of ice cream.
- Week 2: Draw a round-faced cat or puppy, adding one new detail each time.
- Week 3: Try a drawing with two parts, such as a cupcake on a plate or a flower with leaves.
- Week 4: Redraw your favorite from Week 1 and compare. Most people are surprised by how much they’ve improved.
Tips for Creating Better Cute Drawings
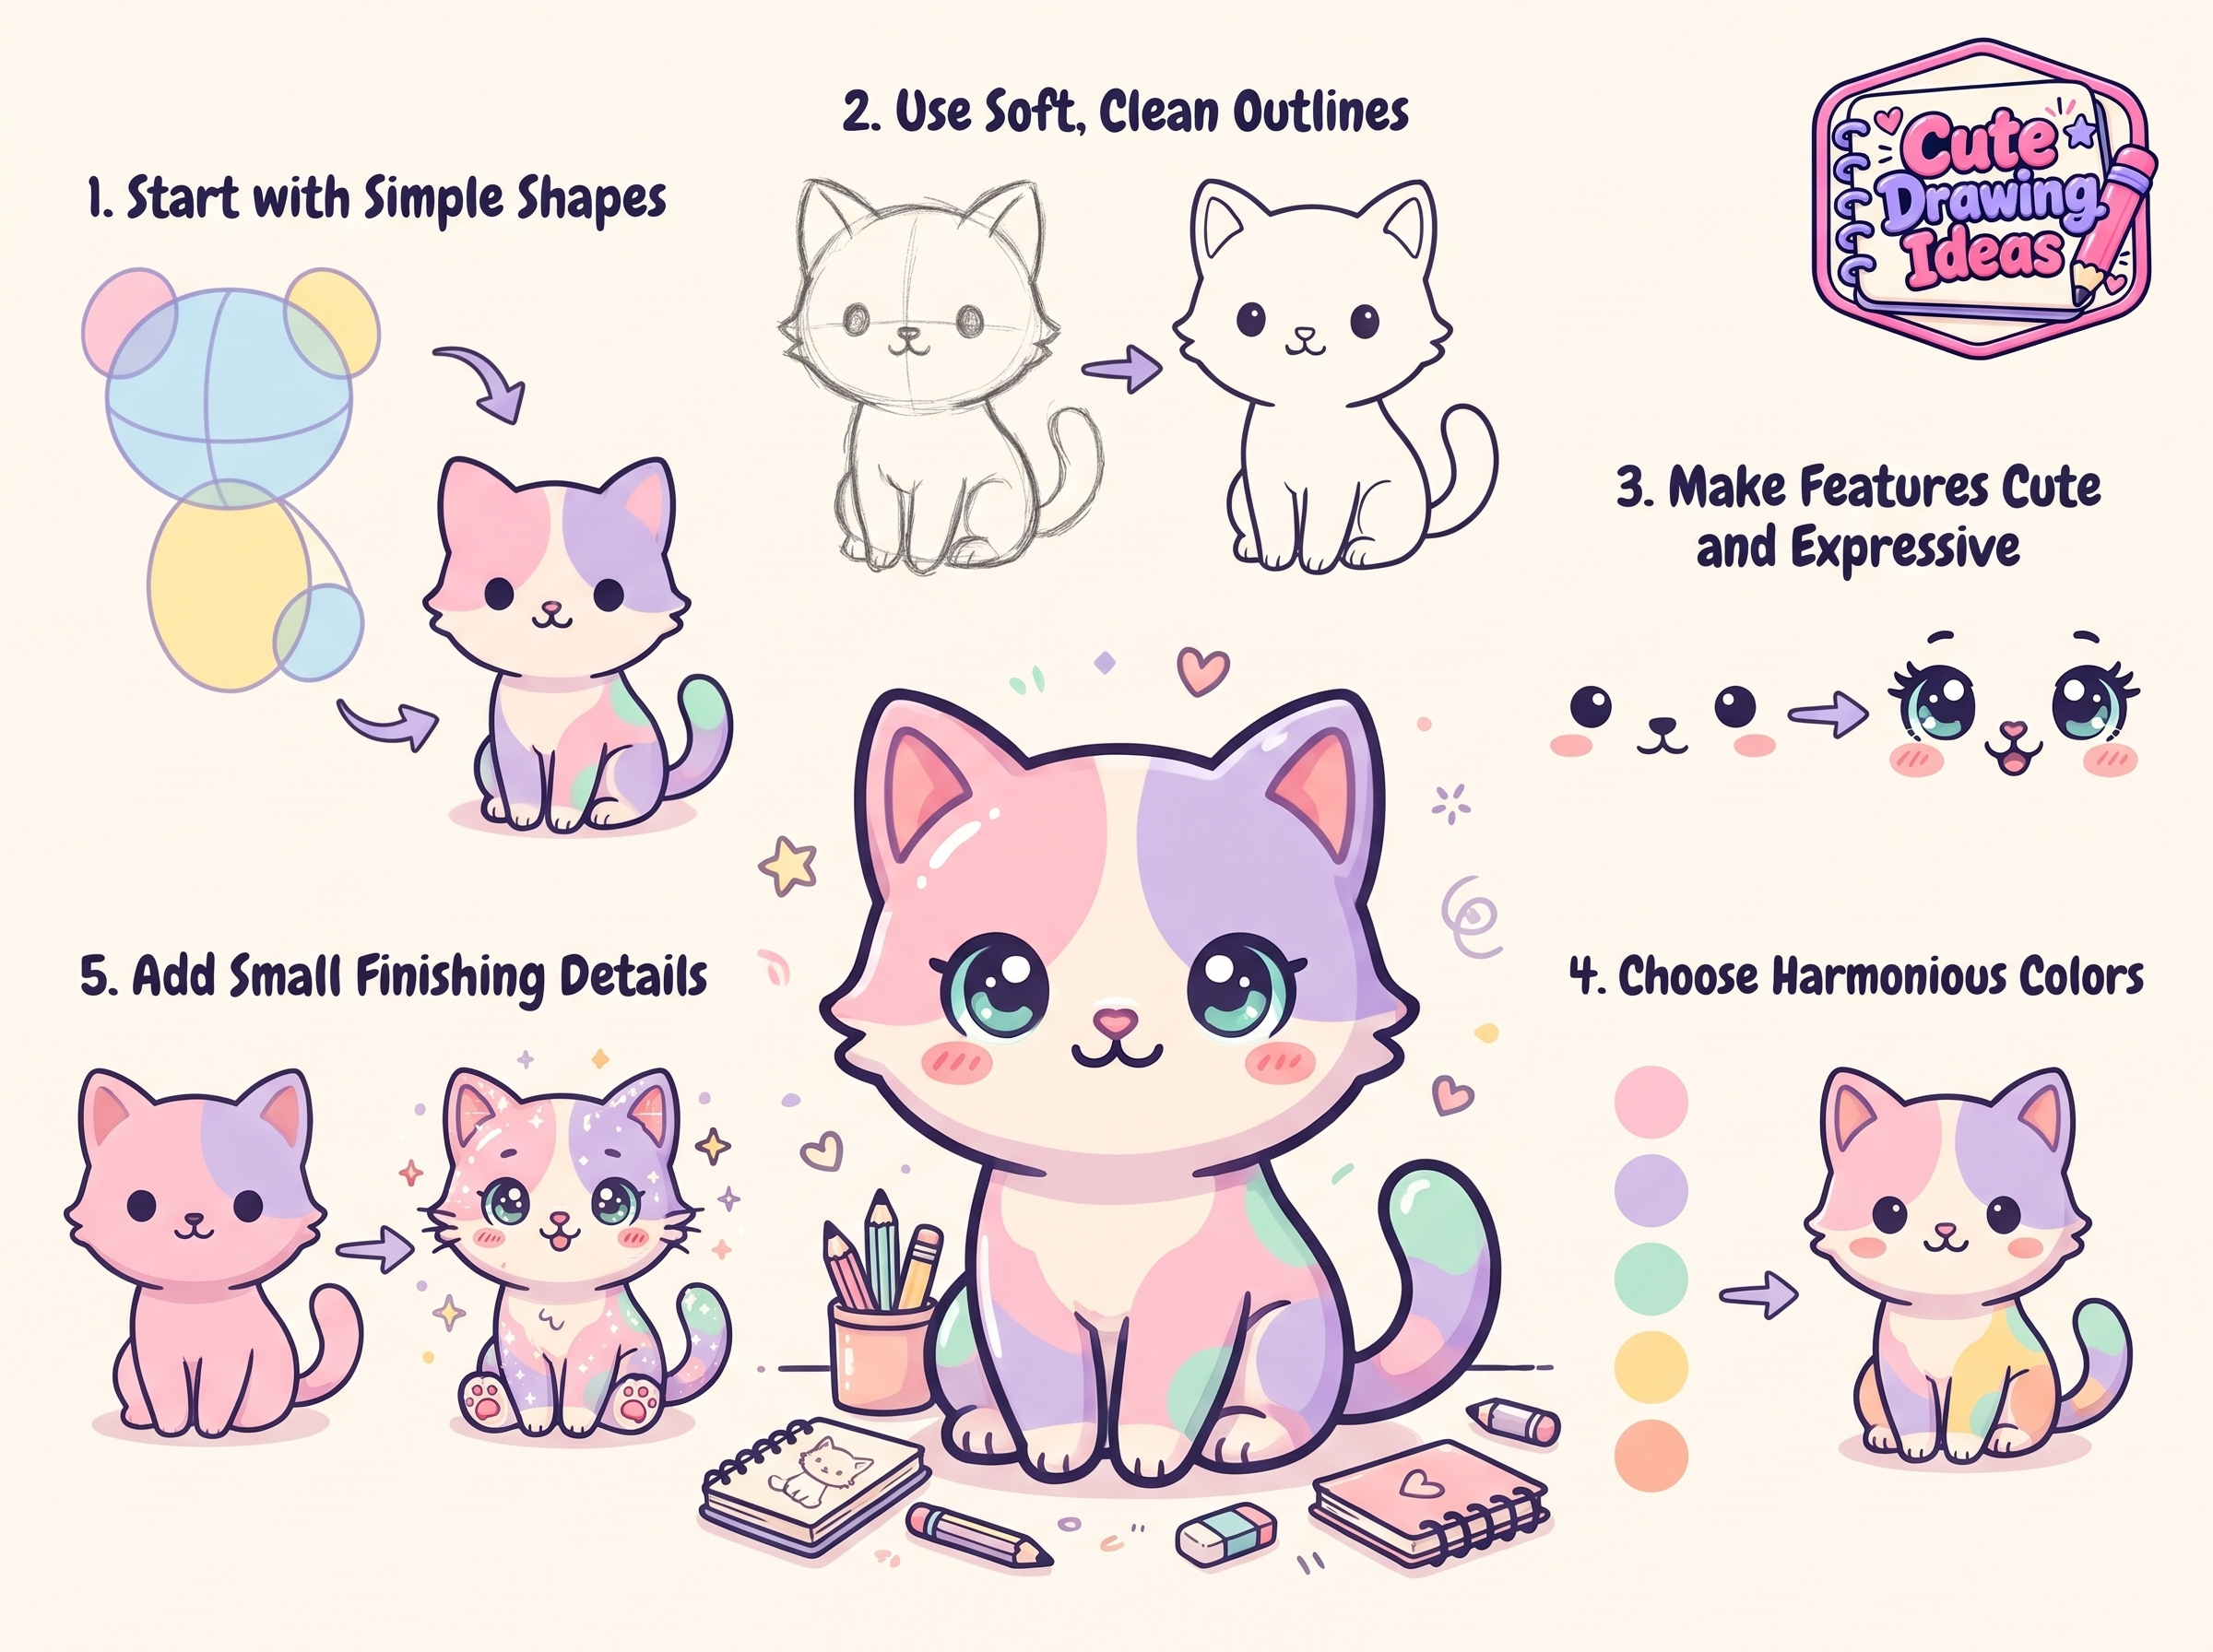
Draw lightly at first.
Light lines are easy to erase and adjust, so keep your pencil pressure gentle until your outline is final.
Keep proportions simple.
For a cute look, make the head large compared with the body, and keep legs and arms short. A big head and a small body are one of the quickest ways to make any character look adorable.
Choose simple outlines.
Smooth, rounded lines tend to look friendlier than sharp, jagged ones. Round off corners and keep shapes soft.
Keep faces small and simple.
Two dots or small ovals for eyes and a tiny smile are often enough. Placing features a little low on the face adds to the cute effect. A small blush mark on each cheek adds charm.
Pick colors that go together
Soft pastel colors suit cute drawings, and two or three main colors usually look neater than many. Try pairing a main color with a lighter shade of the same color for simple shading.
Practice a little often.
Ten minutes a few times a week helps more than one long session now and then. A small sketchbook you keep nearby makes the habit easier.
Learn from mistakes
A crooked line is information, not failure. Erase it, try again, or turn it into a feature.
Common Beginner Mistakes and Easy Fixes
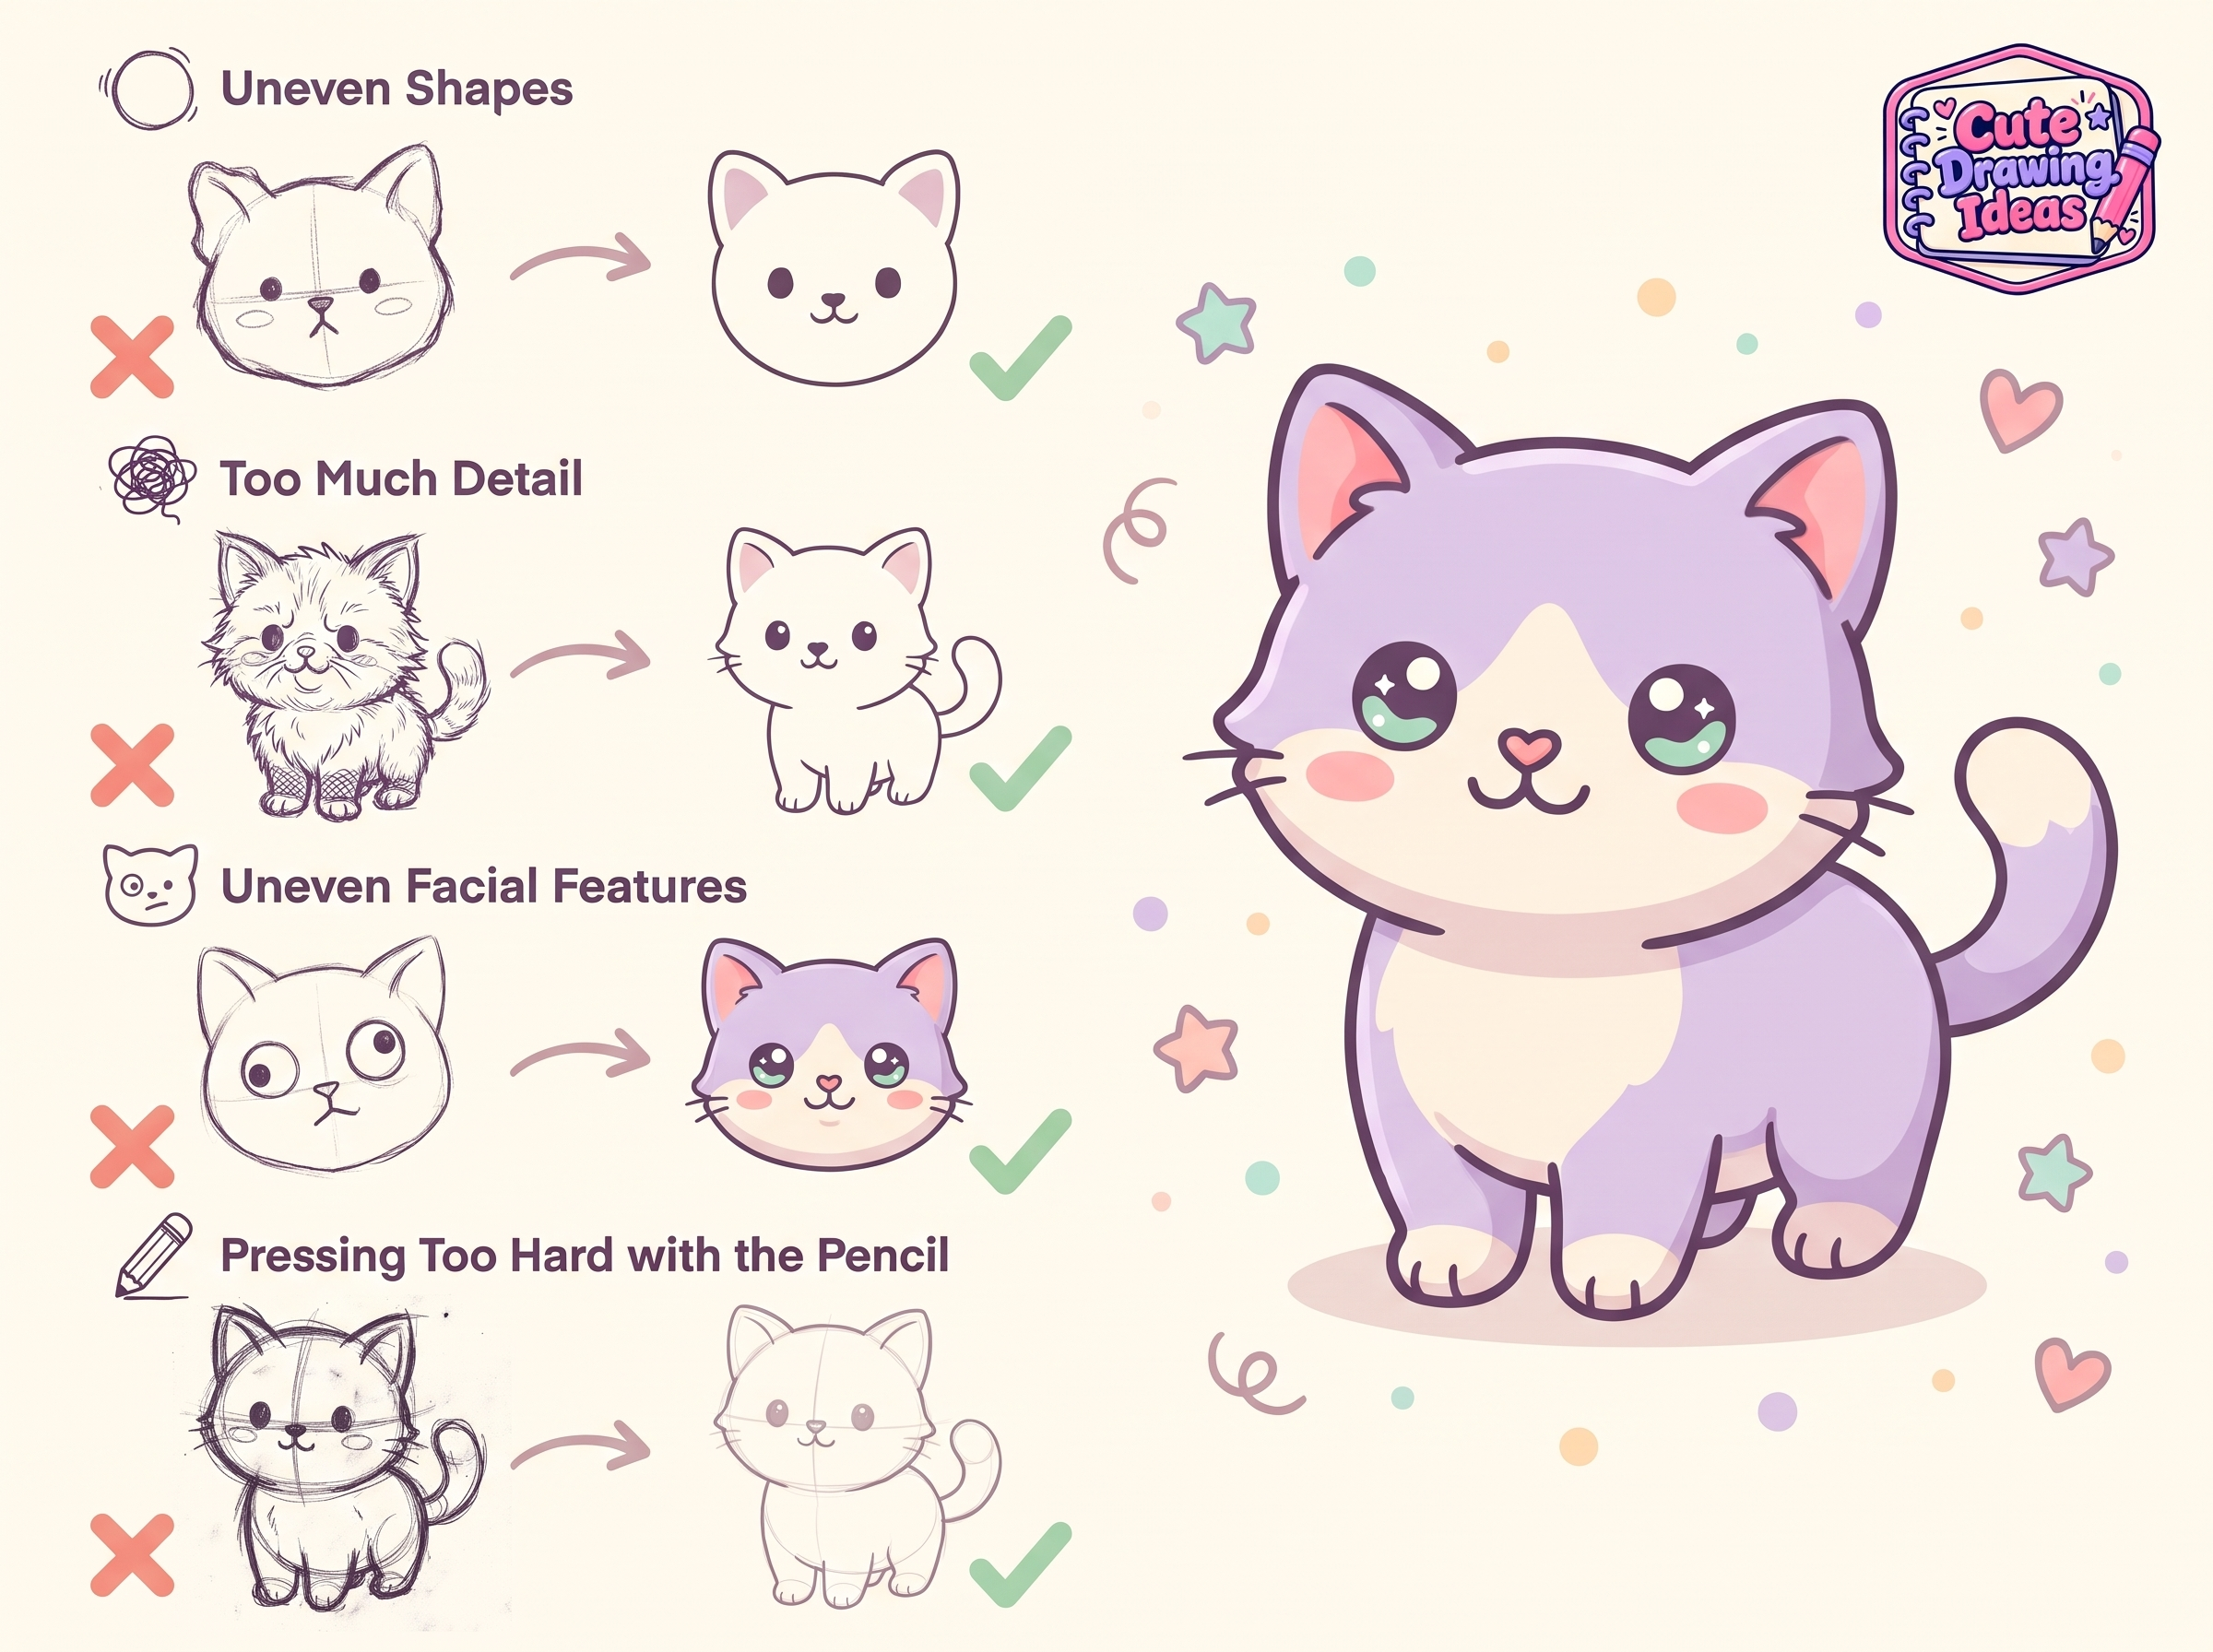
Pressing too hard
Dark lines are hard to erase. Draw the first shapes so lightly that you can barely see them, then darken only the final outline.
Drawing too small
Tiny drawings leave little room for details. Use most of the page for the main shape, so you have space to add faces and patterns.
Putting facial features too high
Eyes placed in the middle or lower part of the face look cuter than eyes near the top. Move them down a little and bring them closer together.
Adding too many details
Cute drawings are simple. If a drawing starts to look busy, stop and leave some areas plain.
Giving up after one try
The first version is a draft. Try the same subject two or three times, and notice what improves each time.
Drawing Activities for Home, School, and Free Time
At home
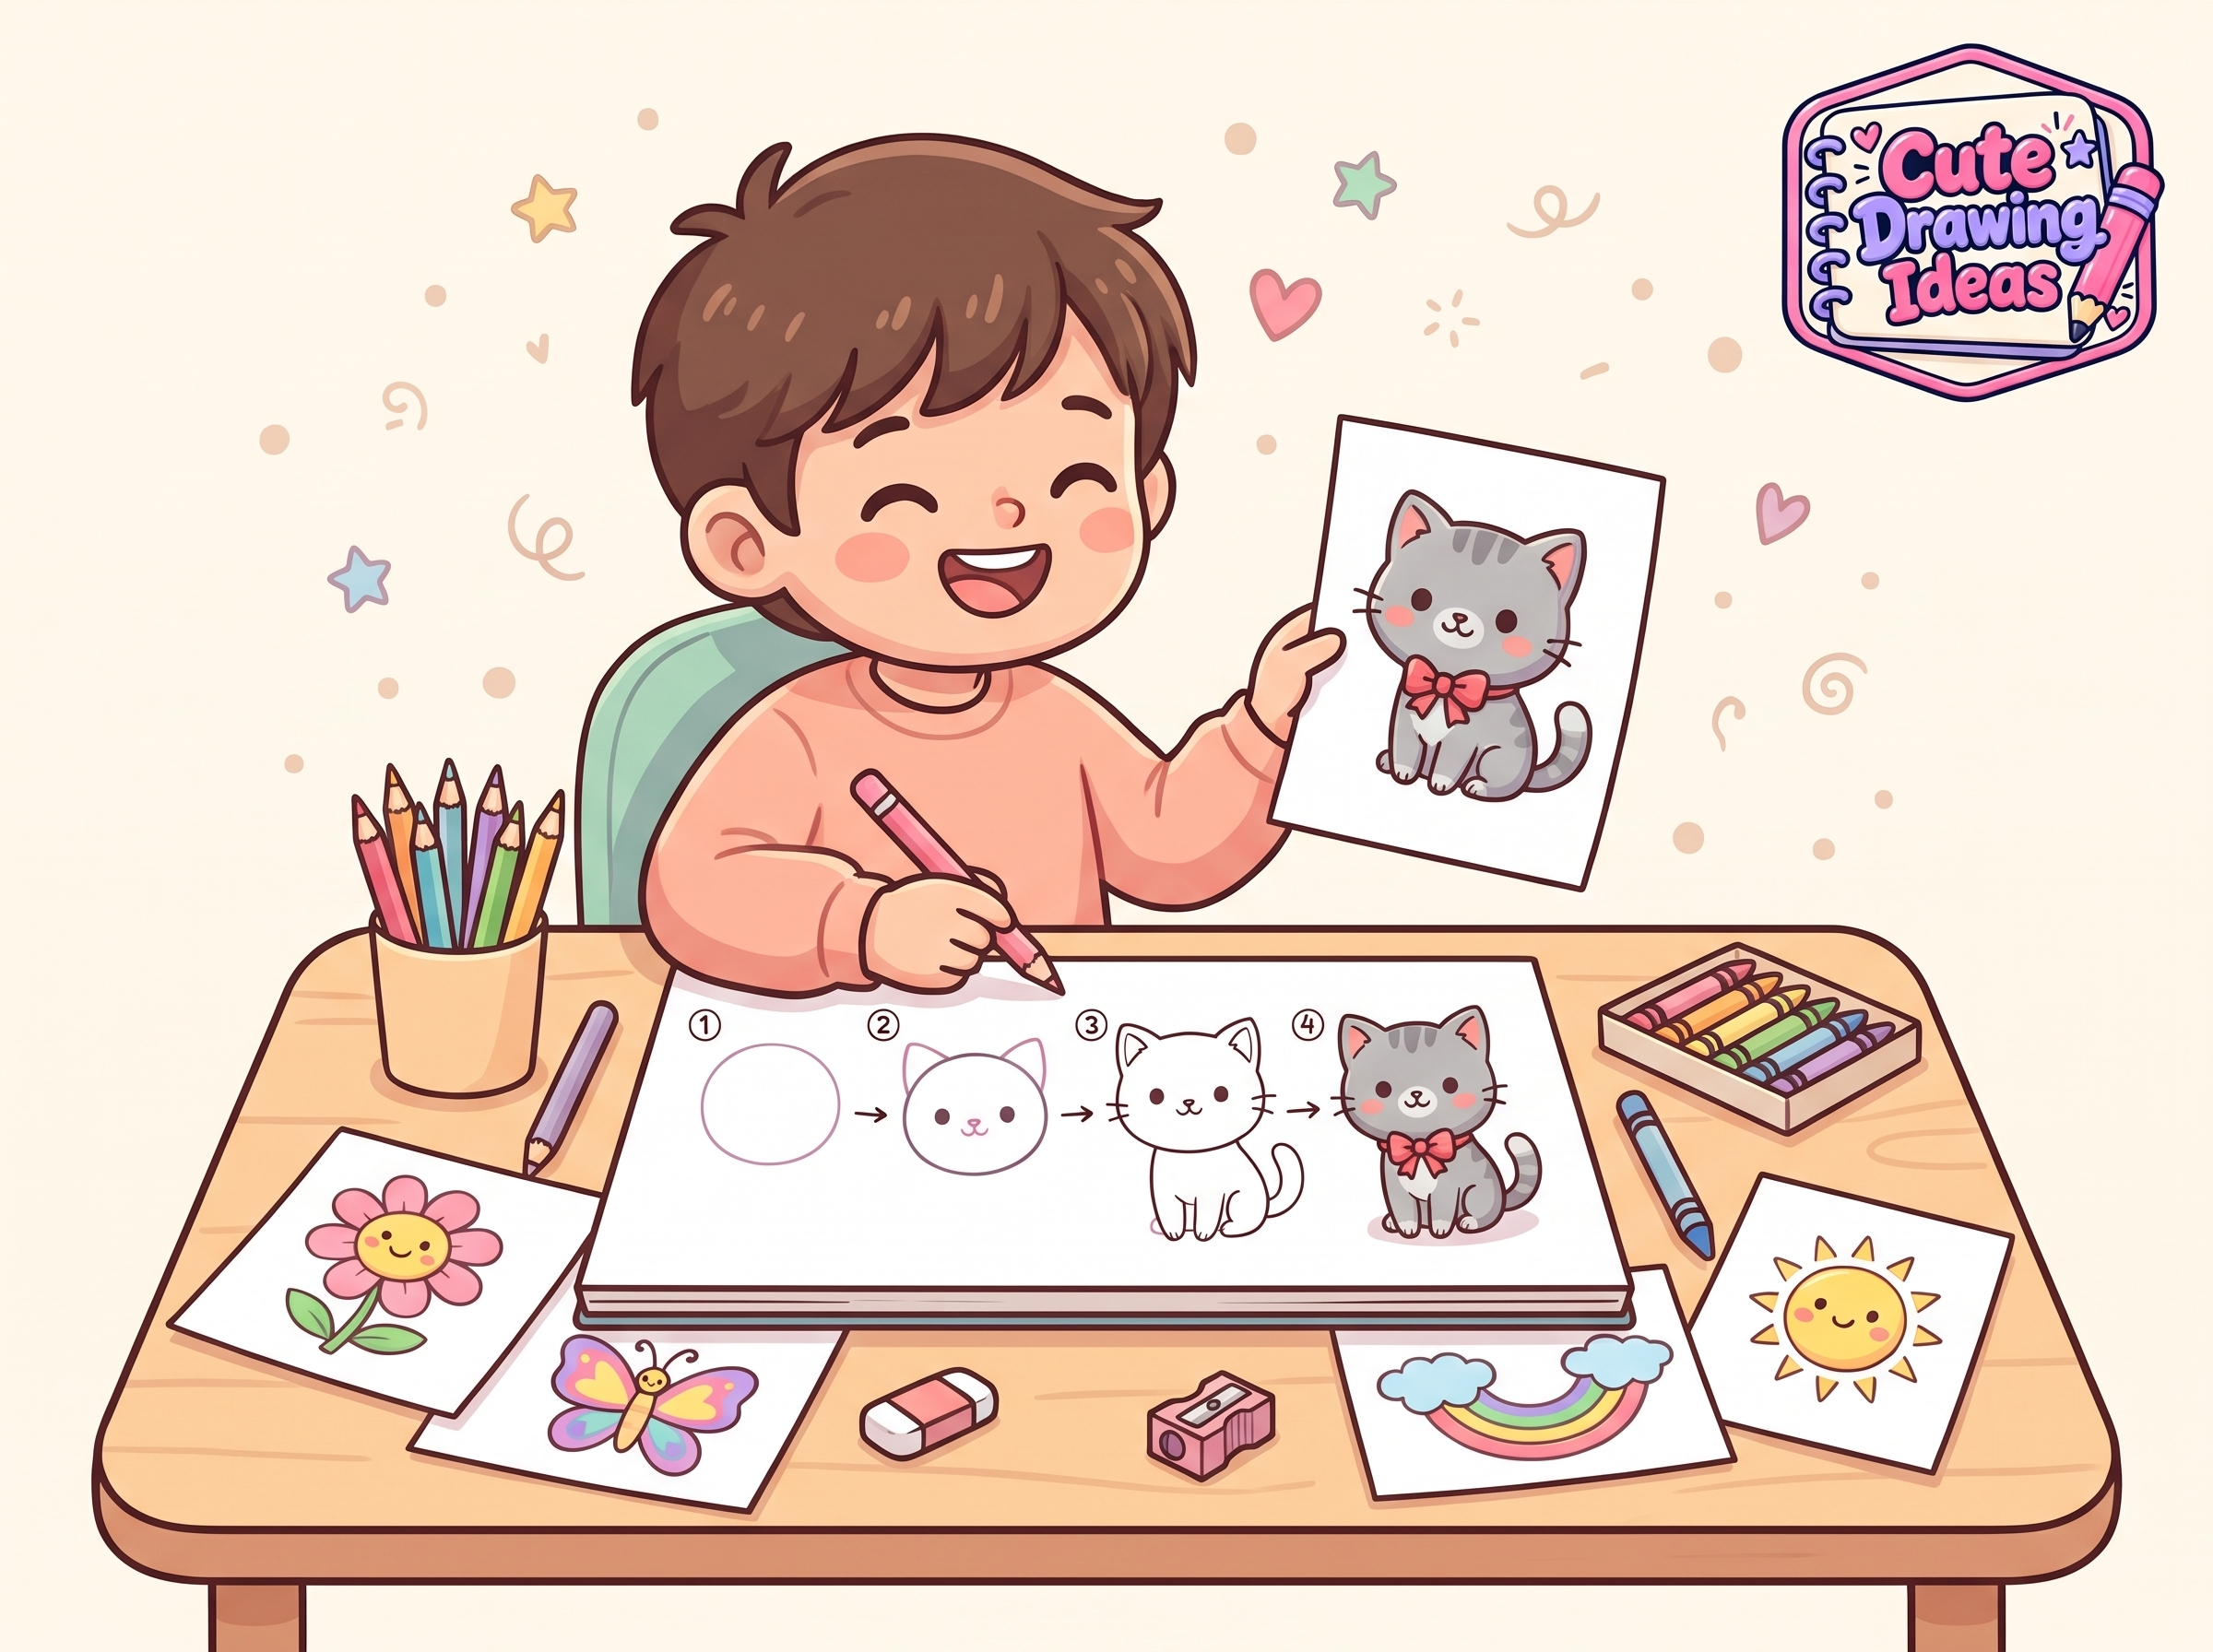
Parents can draw alongside children. Choose one idea, follow the steps together, and compare results. It’s a screen-free activity that needs only paper and a pencil. Hang finished drawings on the fridge or turn them into cards for family and friends.
At school and in the classroom
Teachers can pick a guide as a short art activity or use drawings to support a theme. For example, a class studying plants might draw flowers and leaves, or a class talking about pets could draw cats and dogs. A single guide fits easily into a ten- to fifteen-minute slot.
For students and hobbyists
If you draw for fun, guides are an easy way to build a habit. Use them to practice shapes, try a new subject, or fill a sketchbook one page at a time. You can also use finished drawings for cards, bookmarks, or journal pages.
On a tablet or drawing app
The method works the same on a screen. Draw your guide shapes on one layer in a light color, build your outline on a new layer, then hide or delete the guide layer when you reach the erasing stage.
Why Choose Cute Drawing Ideas?
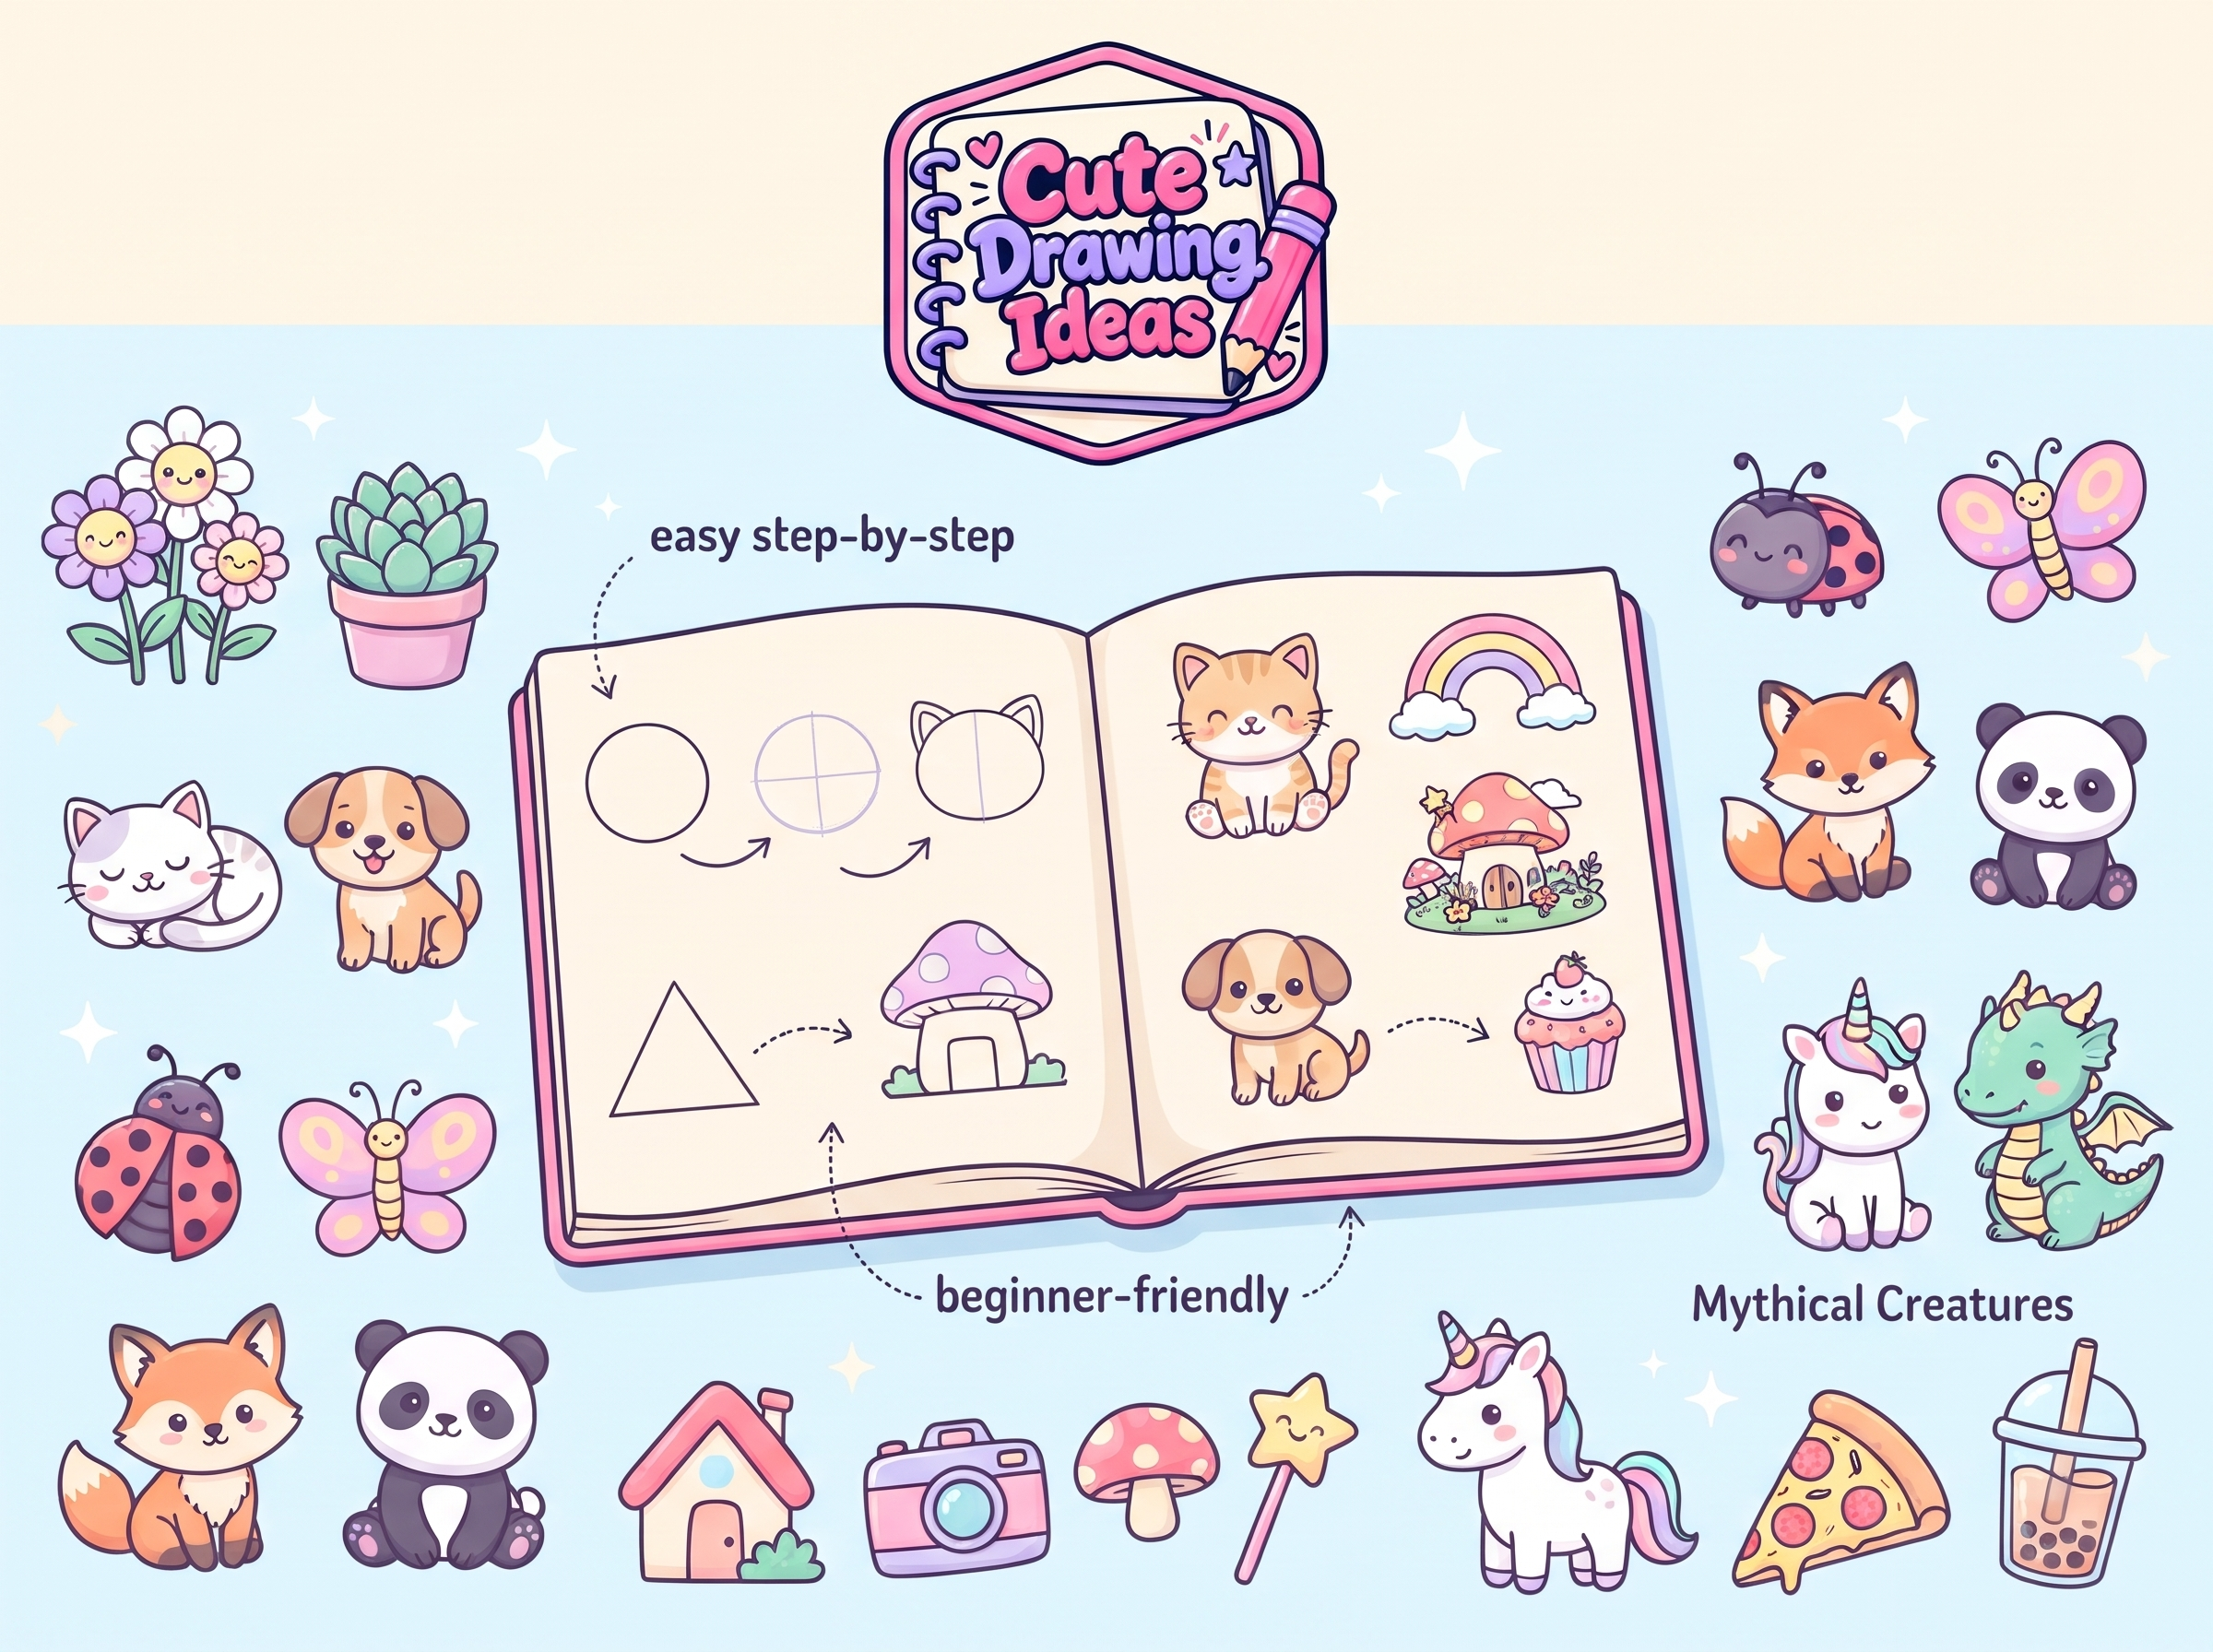
Cute Drawing Ideas is built around one goal: to make drawing feel approachable.
- Clear, simple instructions that go one stage at a time.
- Friendly drawing ideas, chosen to be fun and not intimidating.
- A range of subjects, from food and pets to objects, nature, and more.
- Beginner-friendly guidance, with levels organized from Beginner to Advanced.
- A relaxed pace. There’s no timer and nothing to prove, so you can draw however quickly or slowly you like.
Frequently Asked Questions
Do I need drawing experience to follow the guides?
No. The guides are meant for beginners and start with basic shapes such as circles, ovals, and triangles. If you can draw those, you can begin.
What supplies do I need?
A pencil, an eraser, and paper are enough to finish the outline. Colored pencils, crayons, or markers are optional and only needed for the coloring stage.
Which drawing should I try first?
Choose a subject with few parts, such as a fruit, a scoop of ice cream, or a round-faced pet. The Beginner category is the best place to look. Once those feel comfortable, move on to drawings with more details.
How long does one drawing take?
It depends on the subject and on how much detail you add. Because each guide is split into stages, you can stop after any stage and pick the drawing up again later.
Why do the guides start with shapes and light guide lines?
Shapes show you the size and position of each part before you commit to an outline. Light lines are easy to erase, so a wrong curve costs you nothing. Once the outline looks right, you erase the guidelines, and the drawing looks clean.
What if my drawing doesn’t look like the example?
That is normal, and it doesn’t mean you did it wrong. Hand-drawn pictures differ from person to person, and many people like their own version better. Try the same drawing again, change one detail, and compare. Repeating a subject is one of the quickest ways to improve.
Can I use the guides at home or in a classroom?
Yes. They work well as a quiet activity for a parent and child, a short art lesson, or free-time practice. Choose one subject, follow the steps at your own pace, and let each person add their own colors and details.
Can I follow the steps on a tablet instead of paper?
Yes. The method is about shapes and the order you draw them in, so it works on paper or on a drawing app. Use a light color for guide lines and delete them at the erasing stage.
What age are the guides suitable for?
Younger children can follow along with a parent or teacher helping, and older children and adults can usually follow the steps on their own. Choose beginner drawings for the youngest artists.
How can I make my drawings look cuter?
Use a big head, a small body, soft rounded lines, and a small face with features placed low. Add a blush on the cheeks and pick soft pastel colors.