
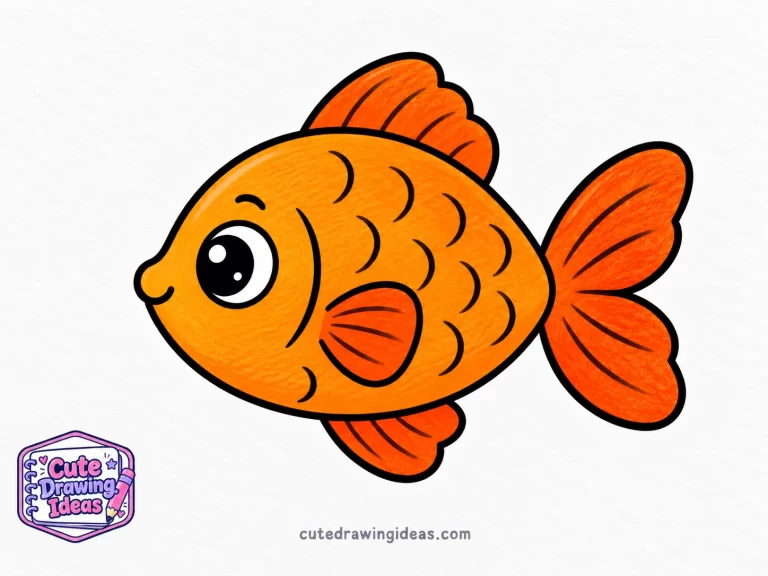
Difficulty: Easy | Time: 20 minutes | Steps: 9 | Good for: All ages
I love drawing fish. They have round bodies, little fins, and colorful tails that make them fun to draw. Some fish have bright stripes, while others have tiny spots. And the best part? You can draw a cute fish using just a few simple shapes.
If you have never drawn a fish before, don’t worry. You don’t need to be good at drawing to try this. We will start with an oval and add one small detail at a time.
In this tutorial, I will show you how to draw a fish in 9 easy steps. We will draw the body, tail, fins, and face before adding a few scales and some color.
This simple fish drawing is great for kids, beginners, and anyone who wants to try an easy animal drawing.
What You Will Need
- A pencil
- An eraser
- A sheet of paper
- A black pen or marker for tracing your final lines
- Crayons, colored pencils, or markers, if you want to color your fish
Before You Start
Draw light lines first. Keep your pencil strokes soft so you can erase and change any shapes that don’t look right.
Think in simple shapes. A fish has an oval body, a curved tail, and small fins. Once you draw these shapes, the rest becomes much easier.
Step by Step: How to Draw a Fish
Step 1: Draw the Body

Start with one big oval in the middle of your paper. Make it wider than it is tall, like an egg lying on its side.
This will be the body of your fish. Leave some space on the right side for the tail and a little room above and below for the fins.
Keep the oval wide and round. It doesn’t need to be perfect.
Step 2: Add the Tail
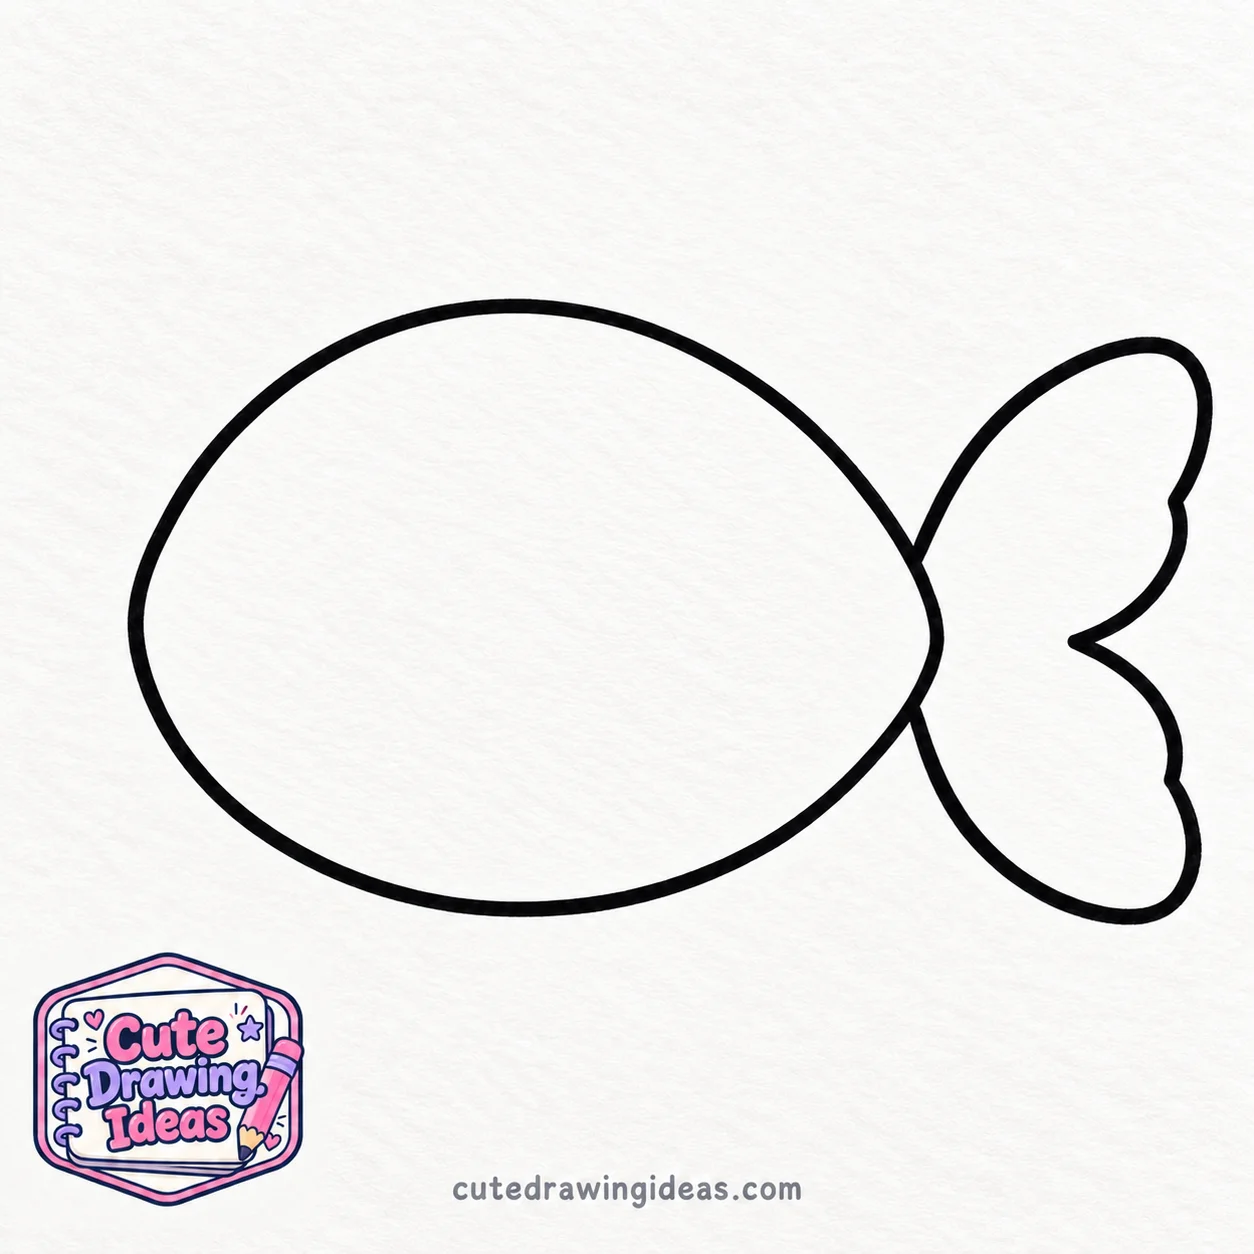
On the right side of the body, draw two short lines spreading outward. Connect their ends with two curved lines that meet in the middle.
This makes a simple tail with two pointed tips. You can erase the part of the oval that passes through the tail.
Don’t make the tail too big. A small, rounded tail looks cute with a wide body.
Step 3: Draw the Top Fin
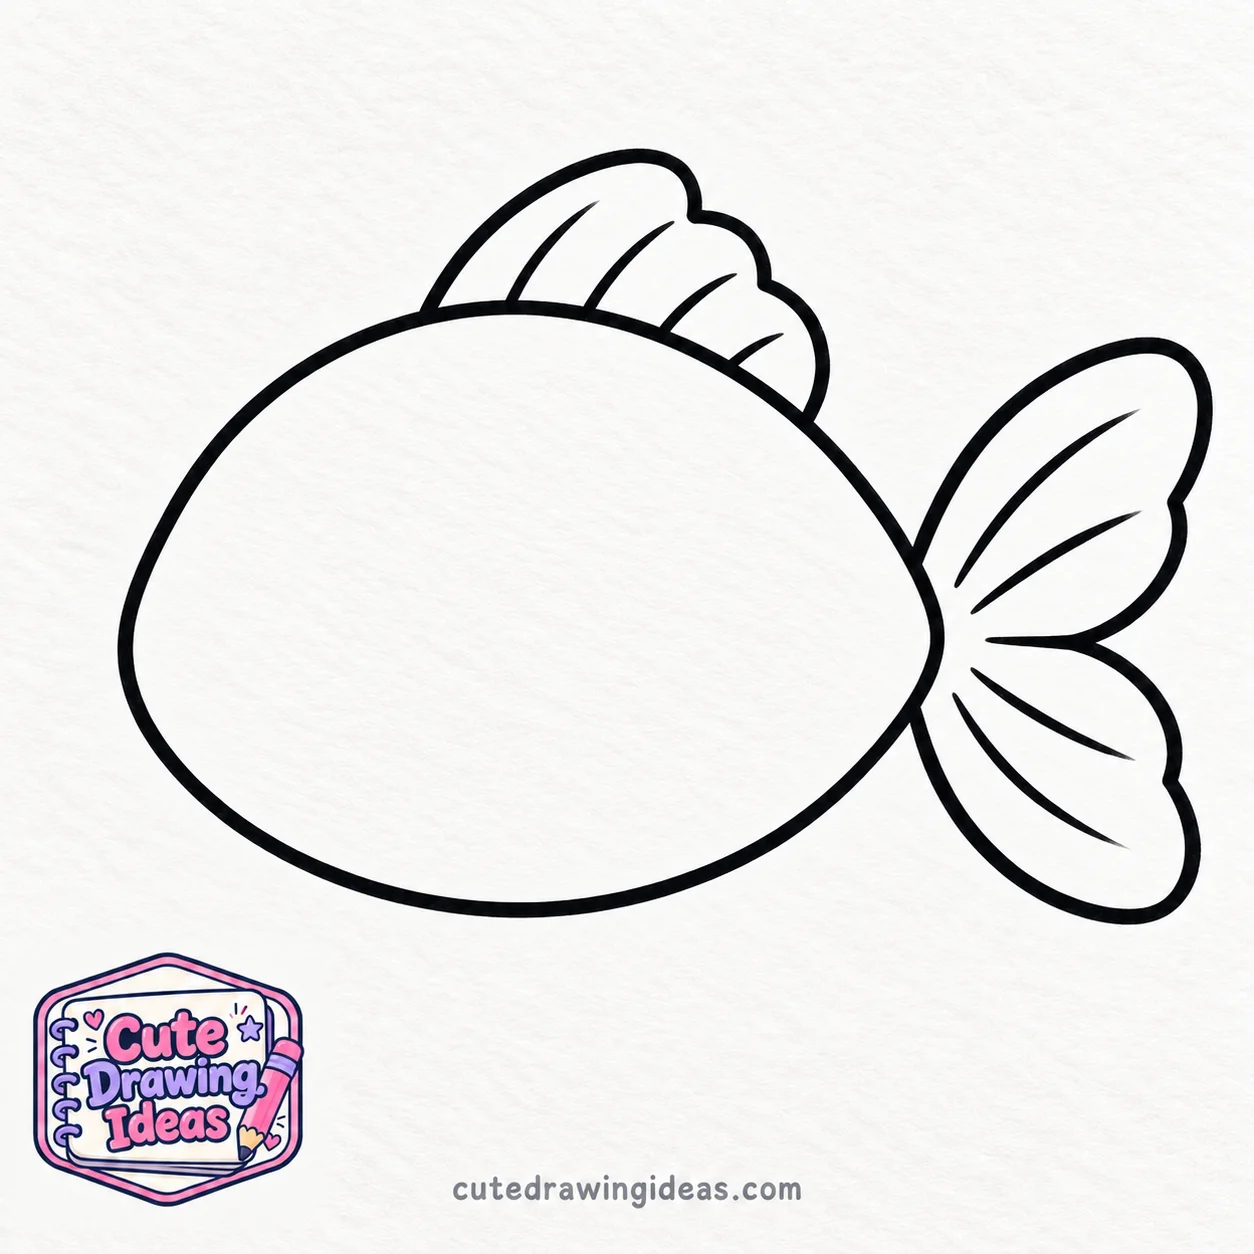
Now let’s add a fin on top of the body.
Start near the middle of the oval and draw a curved line going upward. Bring another curved line back down to the body to make a soft point.
This is called the dorsal fin. It helps real fish stay balanced in the water.
Keep the top fin small and slightly curved. You don’t need any sharp corners.
Step 4: Add the Bottom Fin.
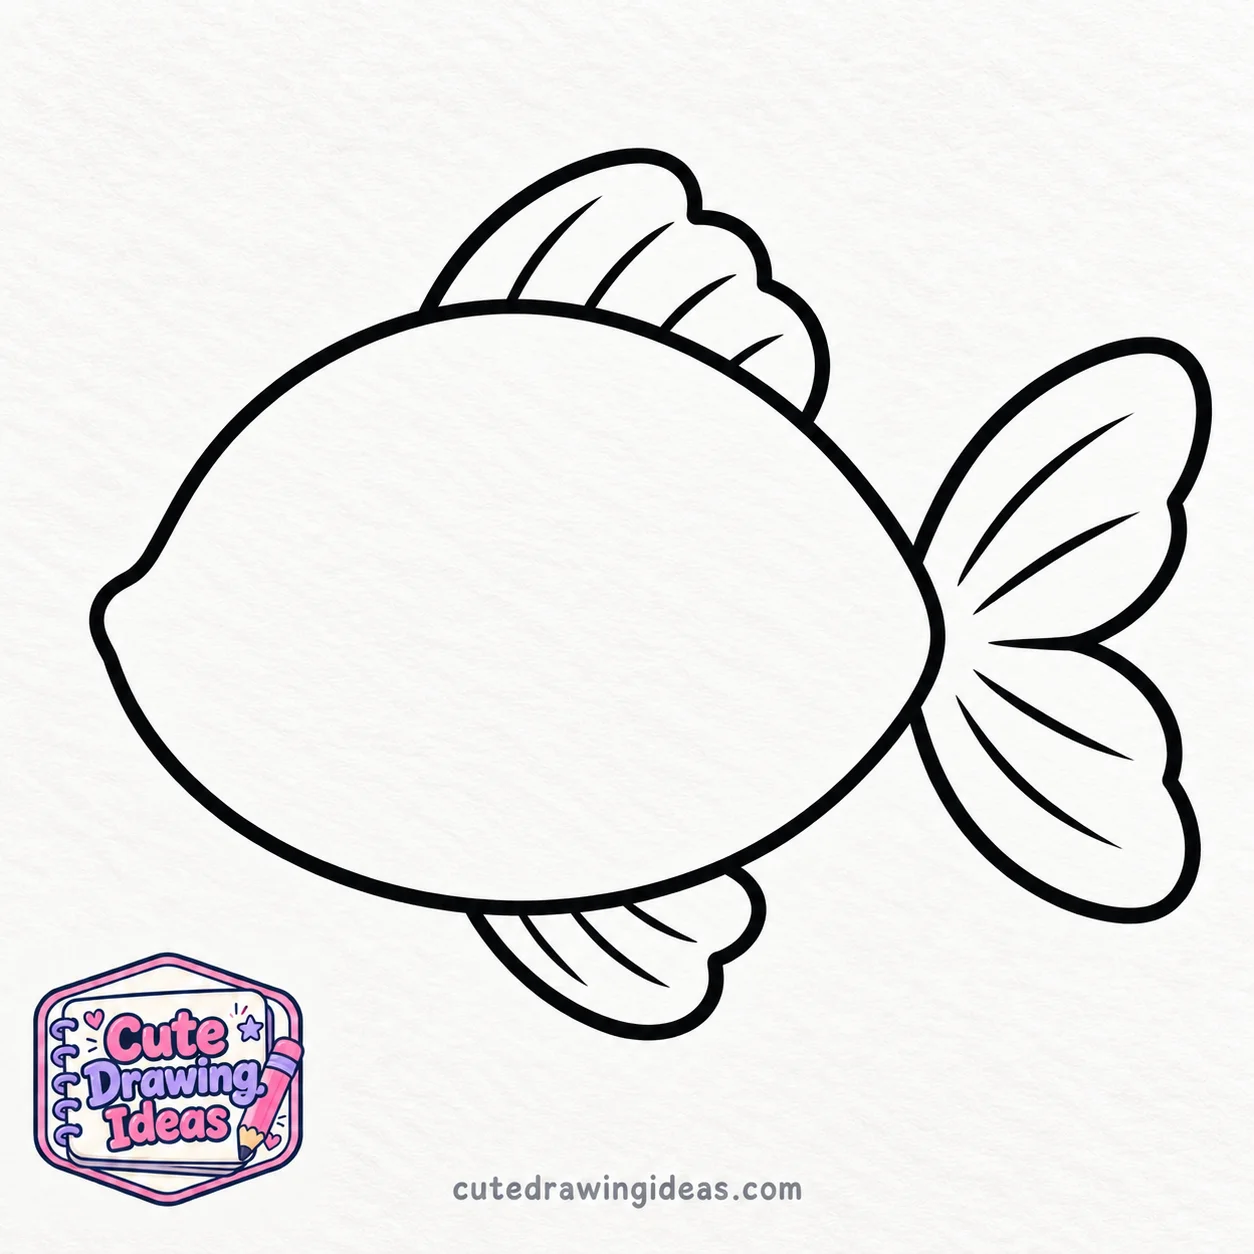
Draw another little fin underneath the body. Start with a short line curving downward, then bring it back up to meet the oval.
Make this fin a little smaller than the one on top.
Try to keep both fins soft and rounded. Simple curves are easier to draw than sharp points.
Step 5: Draw the Eye
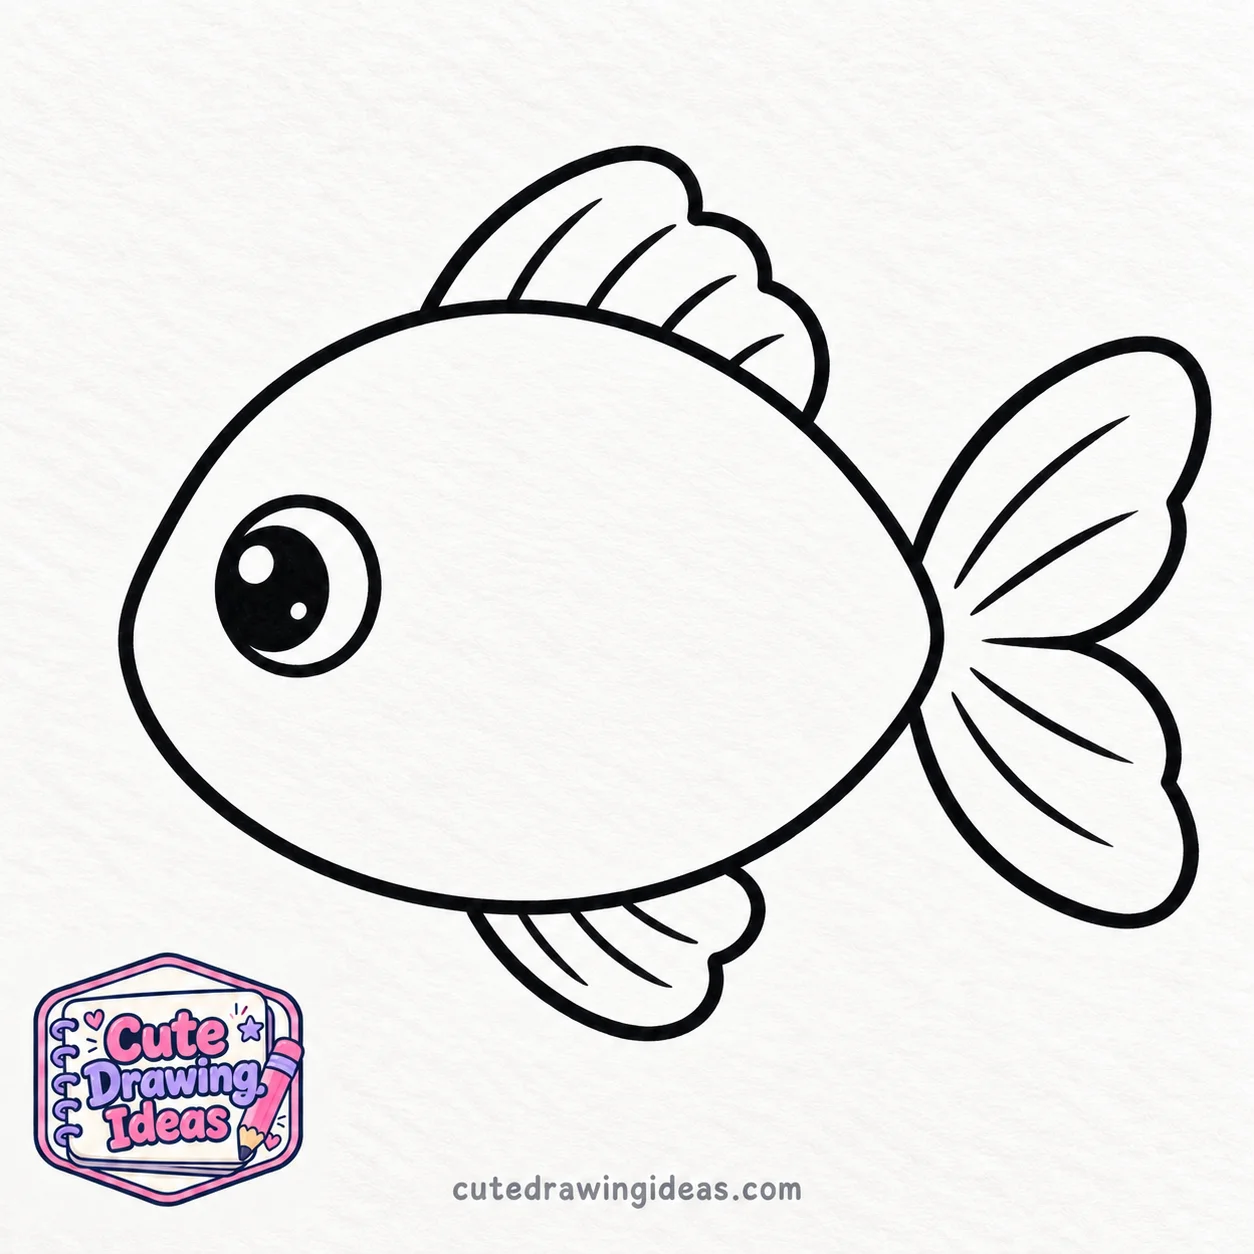
Now we can give our fish a face!
On the left side of the body, draw one big circle for the eye. Inside it, draw a smaller circle and color it black. Leave one tiny white dot to make the eye look shiny.
I like giving my fish big eyes because they make the whole drawing look friendly.
Don’t place the eye too close to the edge. Leave a little space for the mouth.
Step 6: Add the Mouth and Gill
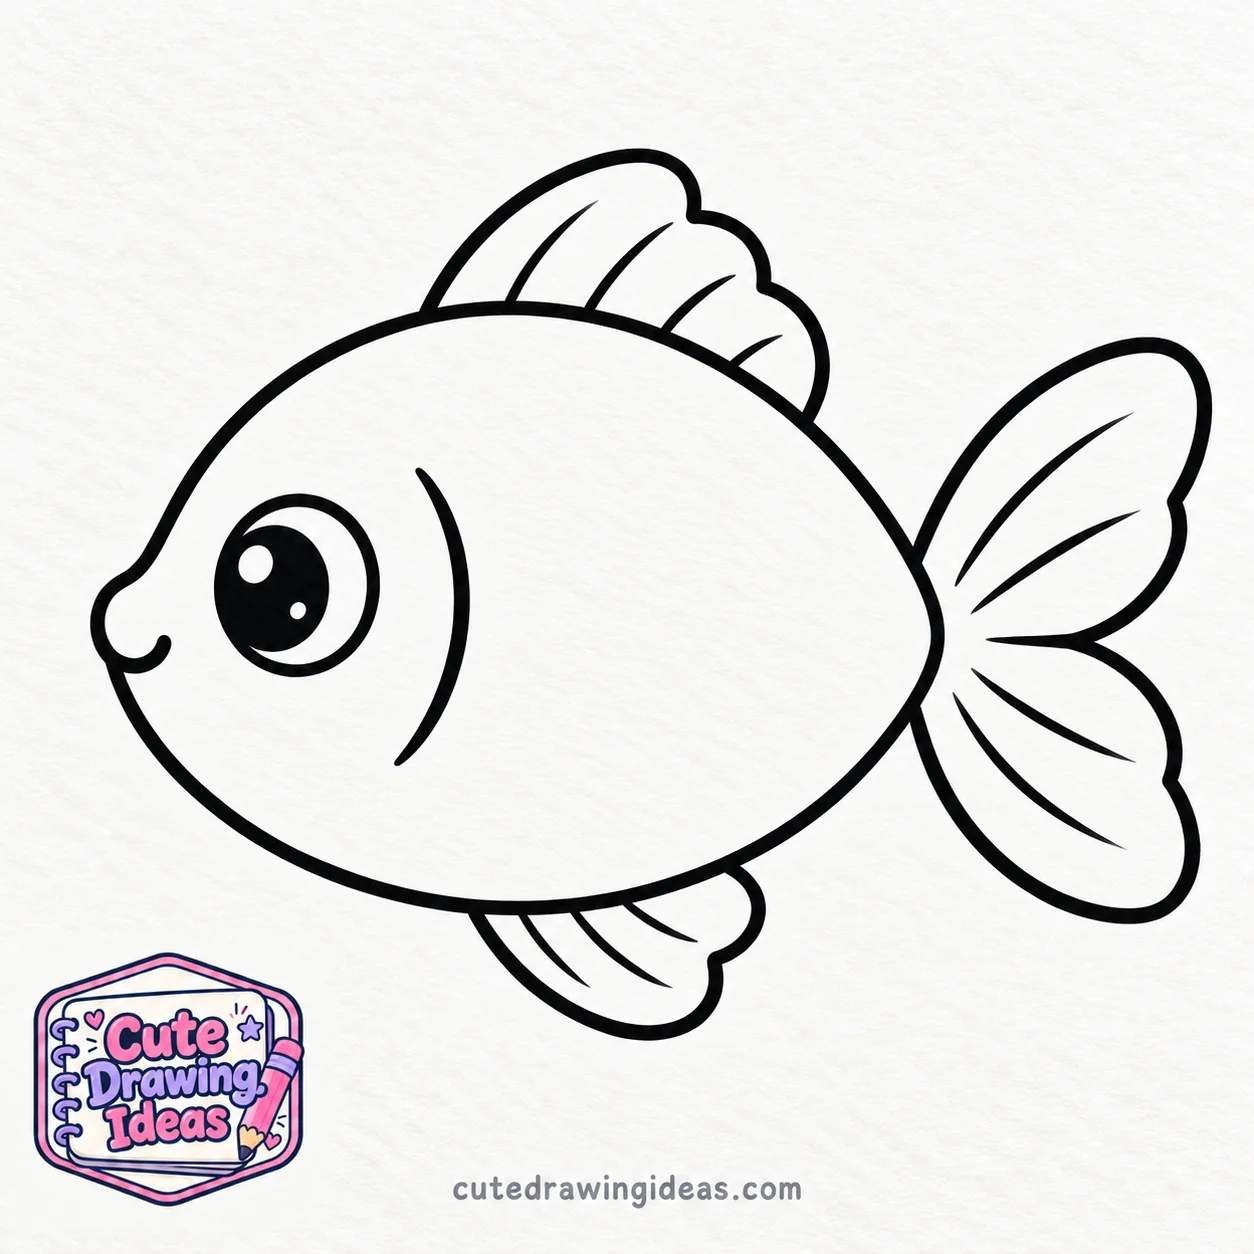
Draw a tiny curved line near the front of the body for the mouth. Make it look like a little smile.
Next, draw one curved line just behind the eye. This will show where the fish’s gill cover is.
Real fish use their gills to breathe underwater, but we only need one simple line to show this detail.
Keep the mouth small. A tiny smile gives your fish a happy look.
Step 7: Draw the Side Fin
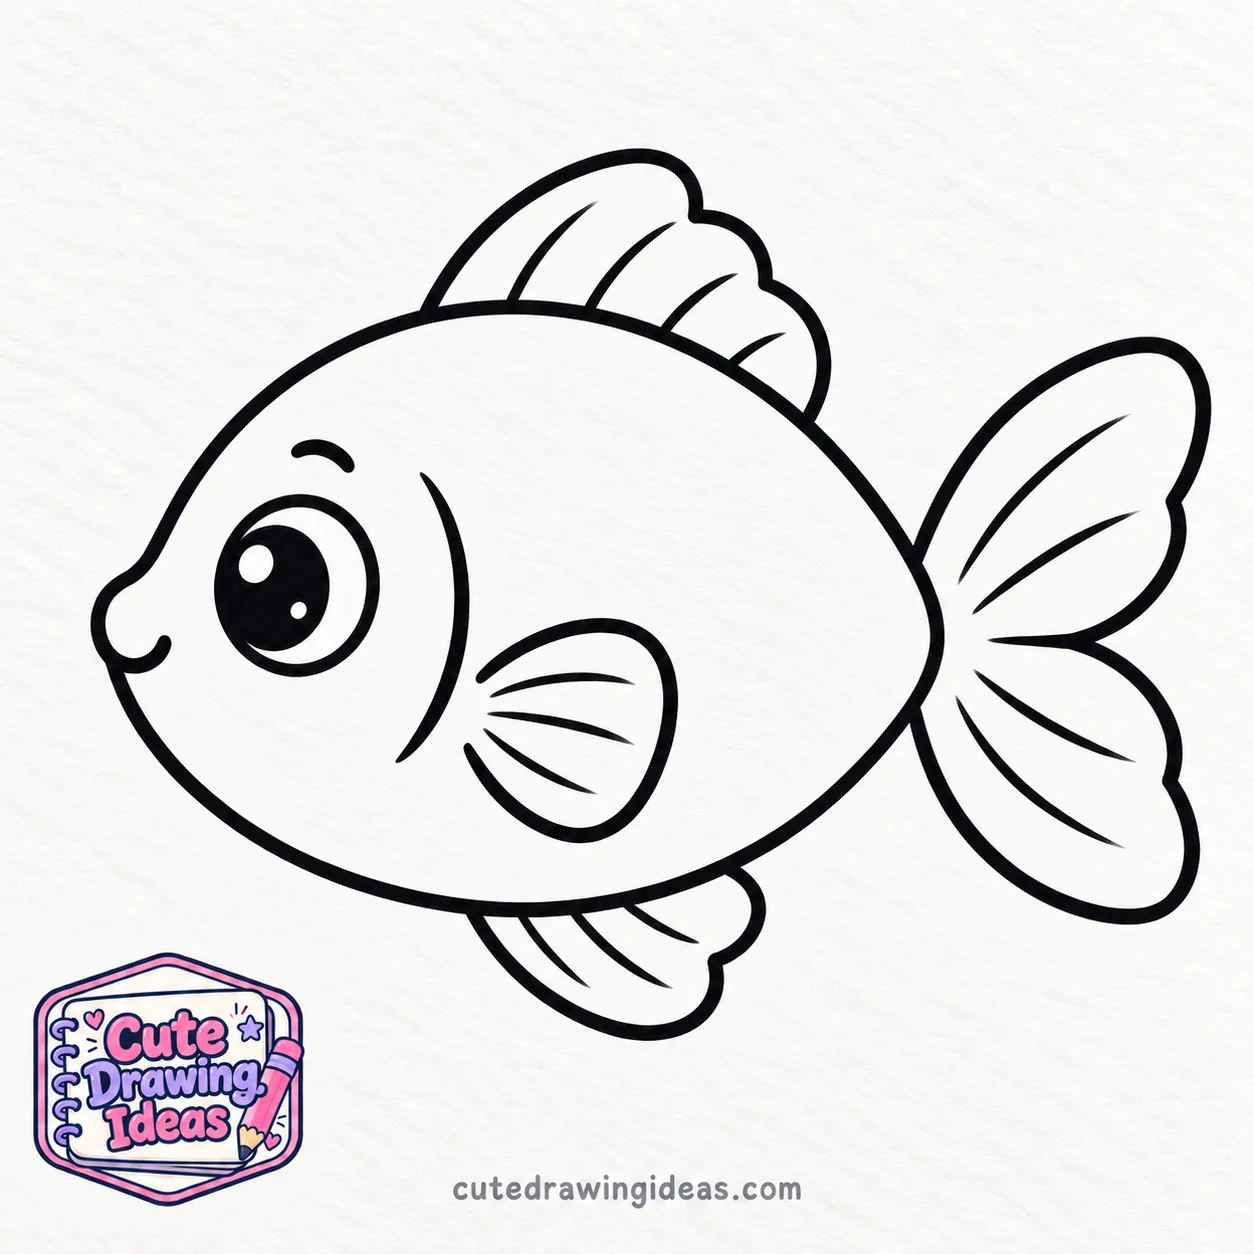
Let’s add one more fin to our fish.
Just behind the gill line, draw a small leaf-like shape. Use two short curved lines that meet at a rounded point.
This is the side fin, also called a pectoral fin.
Keep this fin smaller than the tail. It should look like a little leaf sitting on the body.
Step 8: Add the Scales and Details

Our fish is almost finished!
Draw a few small C-shaped curves inside the body for the scales. Leave some space between them so your drawing doesn’t look crowded.
You can also add one or two short lines inside the tail and fins.
Once you like your fish drawing, trace the final lines with a black pen or marker. Let the ink dry before erasing any extra pencil marks.
You don’t need to draw every scale. A few small curves are enough to make your fish look complete.
Step 9: Color Your Fish
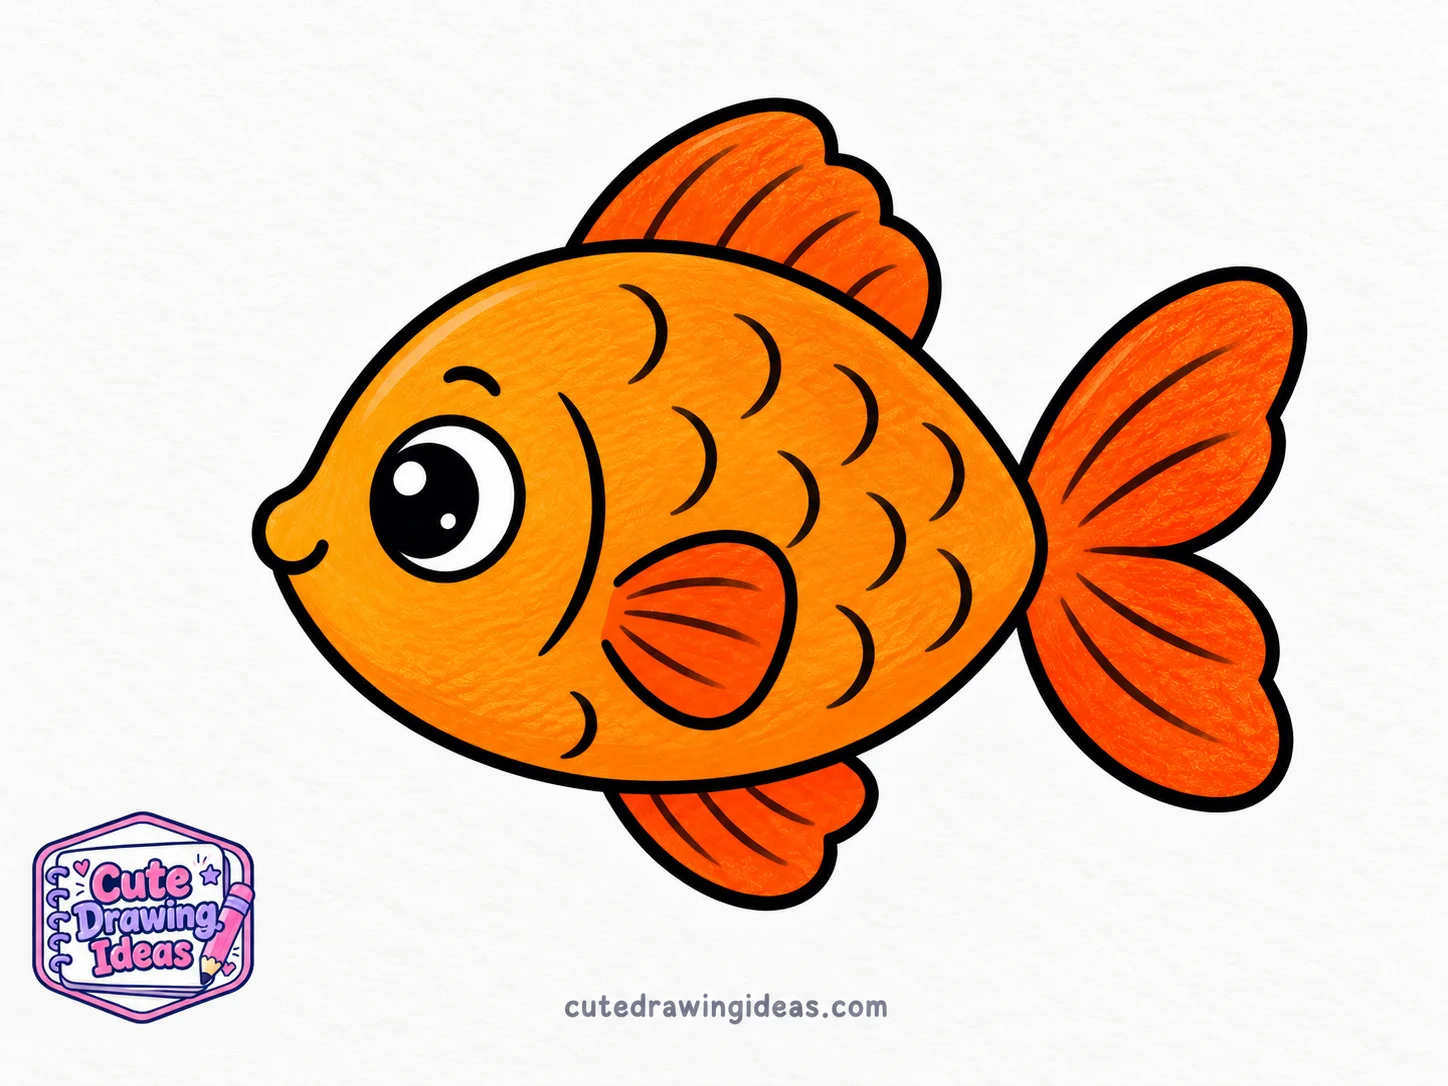
Now comes the fun part!
Color the body of your fish with orange, yellow, blue, or any color you like. You can use a different color for the tail and fins to make them stand out.
I like using bright orange for the body and a slightly darker orange for the fins. You can also add little colorful spots if you want.
Keep the tiny white dot in the eye uncolored, so it stays shiny.
Fish come in so many beautiful colors. Pick your favorites and have fun.
Your Finished Cute Fish Drawing
Nice work! You just drew a cute fish with a round body, little fins, a curved tail, and a big shiny eye.
I love how something that starts as a simple oval can turn into a colorful fish. Yours might have a bigger tail, smaller fins, or different colors than mine. That’s what makes drawing fun.
You can show your fish to your family, hang it on your wall, or keep it in your drawing book.
Why I Love Drawing Fish
Fish are one of my favorite animals to draw because their shapes are so simple. You don’t need lots of tiny details to make a fish look cute. A round body, a little tail, and one big eye can already make a lovely drawing.
I also like trying different colors. Sometimes I draw an orange fish with yellow fins, and other times I use blue and purple. Even when I start with the same shape, each fish can look different.
Drawing fish is also a nice way to practice smooth, curved lines. The more you draw them, the easier those shapes become.
Tips to Make Your Fish Even Cuter
Make the Eye Big
A large eye makes a simple fish drawing look friendly and playful. Add a tiny white dot inside the pupil to give it a little shine.
Keep the Fins Small
Little, rounded fins look nice with a wide body. If the fins are too big, they can take attention away from the fish’s face.
Use Smooth Curves
Try drawing the body and tail with soft, curved lines instead of sharp corners. This gives your fish a rounder, cuter shape.
Try Bright Colors
Orange, yellow, blue, and pink all look lovely on a cartoon fish. You can even give the tail and fins different colors.
Common Mistakes When Drawing a Fish
The Body Is Too Narrow
A very thin body can make it difficult to fit the eye, gill, and scales.
Fix: Start with a wide oval. Leave enough room inside for the little details.
The Tail Is Too Big
A tail that is much larger than the body can make your fish look unbalanced.
Fix: Draw the tail smaller than the body. Keep its two sides about the same size.
Adding Too Many Scales
It’s easy to fill the whole body with tiny curves, but too many scales can make a simple drawing look messy.
Fix: Draw just a few C-shaped lines in the middle of the body. You can always add more later.
Pressing Too Hard With the Pencil
Dark pencil marks can be difficult to erase when you want to fix a line.
Fix: Use light strokes at first. Trace your best lines with a black pen once you’re happy with the drawing.
Fun Variations to Try
Colorful Fish
Draw the same fish again, but use three or four bright colors. Try a yellow body, orange tail, and blue fins. You can also add a few colorful spots.
Fish With Bubbles
Draw three or four small circles near your fish’s mouth. Make some big and others tiny. This will make your fish look like it’s swimming and blowing bubbles underwater.
Fish With a Fancy Tail
Make the tail a little longer and give it soft, wavy edges. You can add a few curved lines inside it to show the shape. It’s a fun way to make another fish using the same easy steps.
Fun Facts About Fish
- Fish use gills to take oxygen from water.
- Fish come in many colors, including bright yellow, orange, blue, and red.
- Most fish have scales that help protect their bodies.
- Some fish, like pufferfish, can puff up their bodies to look bigger when they feel threatened.
- Most fish don’t have eyelids, so they cannot blink as we do.
- Sharks are fish too! Their skeletons are made of cartilage instead of bone.
Frequently Asked Questions
How Do You Draw a Fish Easily?
Start with a wide oval for the body. Add a small tail and fins, then draw one big eye, a little mouth, and a curved gill line. Finish with a few scales and some color. You can follow the 9 steps above to make your own easy fish drawing.
How Do You Draw a Fish Step by Step for Kids?
Kids can start with an oval, then add one small part at a time. Draw the tail first, followed by the fins, eye, mouth, and scales. Keep the shapes simple and use light pencil lines so it’s easy to make changes.
What Is the Easiest Way to Draw a Simple Fish?
I think the easiest way is to start with an oval body. You only need to add a tail, a few fins, and a face to make it look like a fish. You can leave out the scales if you want an even simpler drawing.
How Do You Draw a Fish Tail?
Draw two lines spreading outward from the back of the body. Join their ends with curved lines that bend inward and meet in the middle. This gives your fish a simple, two-pointed tail.
How Do You Draw Fish Fins?
Use small curved lines to make soft, leaf-like shapes. Add one fin on top of the body, another underneath, and a little side fin behind the gill. Keep them small if you’re drawing a cute cartoon fish.
How Do You Draw Fish Scales Easily?
Draw a few small curves shaped like the letter C inside the fish’s body. Space them apart and keep the lines short. You don’t need to cover the whole fish with scales.
How Long Does It Take to Draw a Fish?
About 20 minutes if you’re a beginner. The basic outline only takes a few minutes, but you may want more time to draw the details and color your fish.
Can Young Kids Draw This Fish?
Yes. This tutorial uses simple shapes like ovals and curves, so it’s easy for kids to follow. Younger children may need a little help with the smaller fins and scales.
Keep Drawing
Every little drawing helps you get better. Now that you know how to draw a fish, try making another one with a different tail, a bigger eye, or a new color.